Heatsink
•“Removingtheheatsink”onpage52
•“Installingtheheatsink”onpage53
CAUTION:
Theheatsinkmightbeveryhot.Turnofftheserverandwaitthreetofiveminutestolettheserver
coolbeforeremovingtheservercover.
Removingtheheatsink
Toremovetheheatsink,dothefollowing:
1.Prepareyourserver.See“Preparingyourserverinadvance”onpage47.
2.Removetheairbaffle.See“Removingtheairbaffle”onpage50.
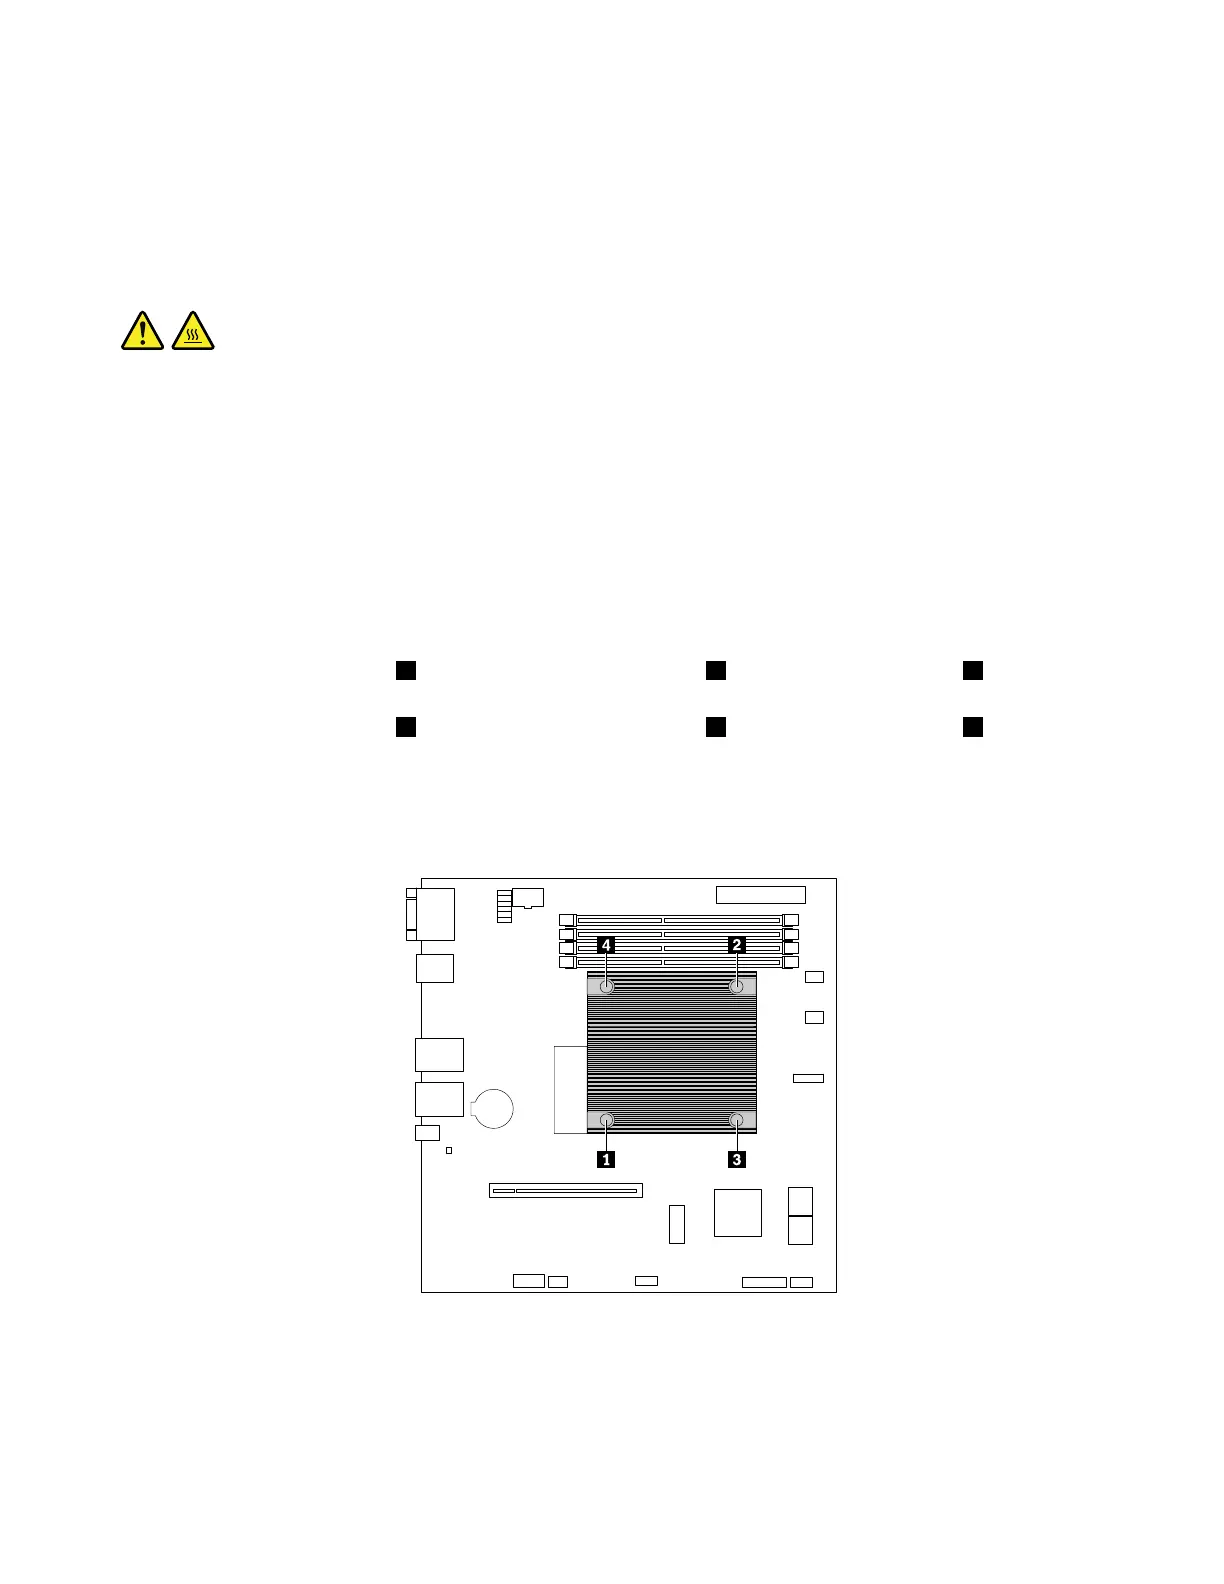
3.Locatetheheatsinkandremovethefourscrewsthatsecuretheheatsink.Itisrecommendedthat
youcarefullyremovethefourscrewsfromthesystemboardusingthefollowingmethodtoavoidany
possibledamagetothesystemboard.
a.Partiallyremovescrew1,thencompletelyremovescrew2,andthenreturntoscrew1and
completelyremoveit.
b.Partiallyremovescrew3,thencompletelyremovescrew4,andthenreturntoscrew3and
completelyremoveit.
Note:Thefourscrewsareintegratedpartsoftheheatsink.Donottrytoremovethefourscrews
fromtheheatsink.
Figure24.Removingthescrewsthatsecuretheheatsink
4.Gentlytwisttheheatsinktofreeitfromthemicroprocessor,lifttheheatsinkoffthesystemboard,and
thenlayitdownbyitsside.Donottouchthethermalgreaseonthebottomoftheheatsink.
52ThinkServerRS160UserGuideandHardwareMaintenanceManual
 Loading...


