5.Ifyouareinstructedtoreturntheoldheatsink,followallpackaginginstructionsanduseanypackaging
materialsthataresuppliedtoyouforshipping.
Installingtheheatsink
Toinstalltheheatsink,dothefollowing:
1.Touchthestatic-protectivepackagethatcontainsthenewheatsinktoanyunpaintedsurfaceonthe
outsideoftheserver.Then,removetheheatsinkfromthepackage.
Note:Beforeinstallingthenewheatsink,usethecleaningpadthatcomeswiththeheatsinktowipe
thethermalgreasefromthetopofthemicroprocessor.Disposeofthecleaningpadafterallthermal
greaseisremovedfromthemicroprocessor.
2.Removeanyprotectivecoverthatprotectsthethermalgreaseonthebottomoftheheatsink.Do
nottouchthethermalgrease.
3.Placetheheatsinkonthesystemboardsothatthefourscrewsontheheatsinkareinsertedinto
thecorrespondingholesinthesystemboard.
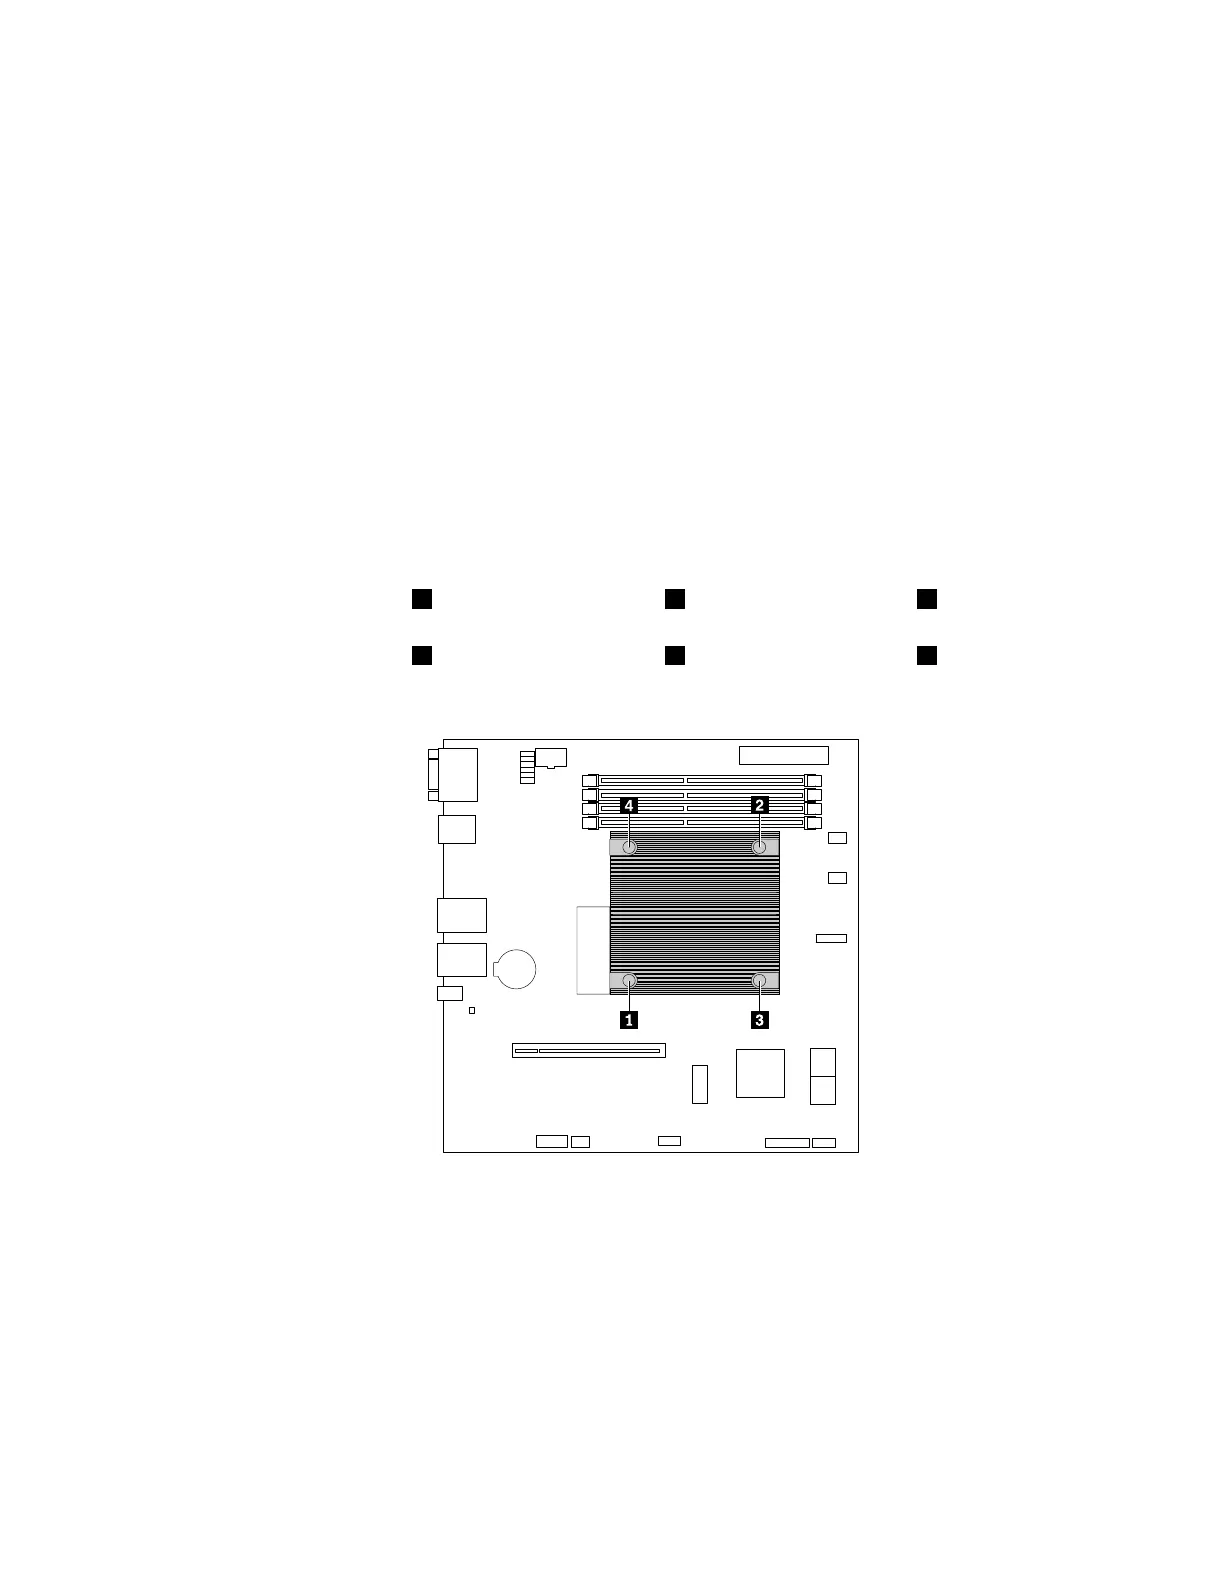
4.Installthefourscrewstosecuretheheatsinkonthesystemboard.Itisrecommendedthatyoucarefully
installthefourscrewsusingthefollowingmethodtoavoidanypossibledamagetothesystemboard.
a.Partiallytightenscrew1,thenfirmlytightenscrew2,andthenreturntoscrew1andfirmlytighten
it.Donotover-tightenthescrews.
b.Partiallytightenscrew3,thenfirmlytightenscrew4,andthenreturntoscrew3andfirmlytighten
it.Donotover-tightenthescrews.
Figure25.Installingthescrewstosecuretheheatsink
5.Reinstalltheairbaffle.See“Installingtheairbaffle”onpage51.
Tocompletethepartsreplacement,goto“Completingthepartsreplacement”onpage95.
Memorymodule
•“Removingthememorymodule”onpage54
•“Installingthememorymodule”onpage55
Chapter5.Replacinghardware53
 Loading...


