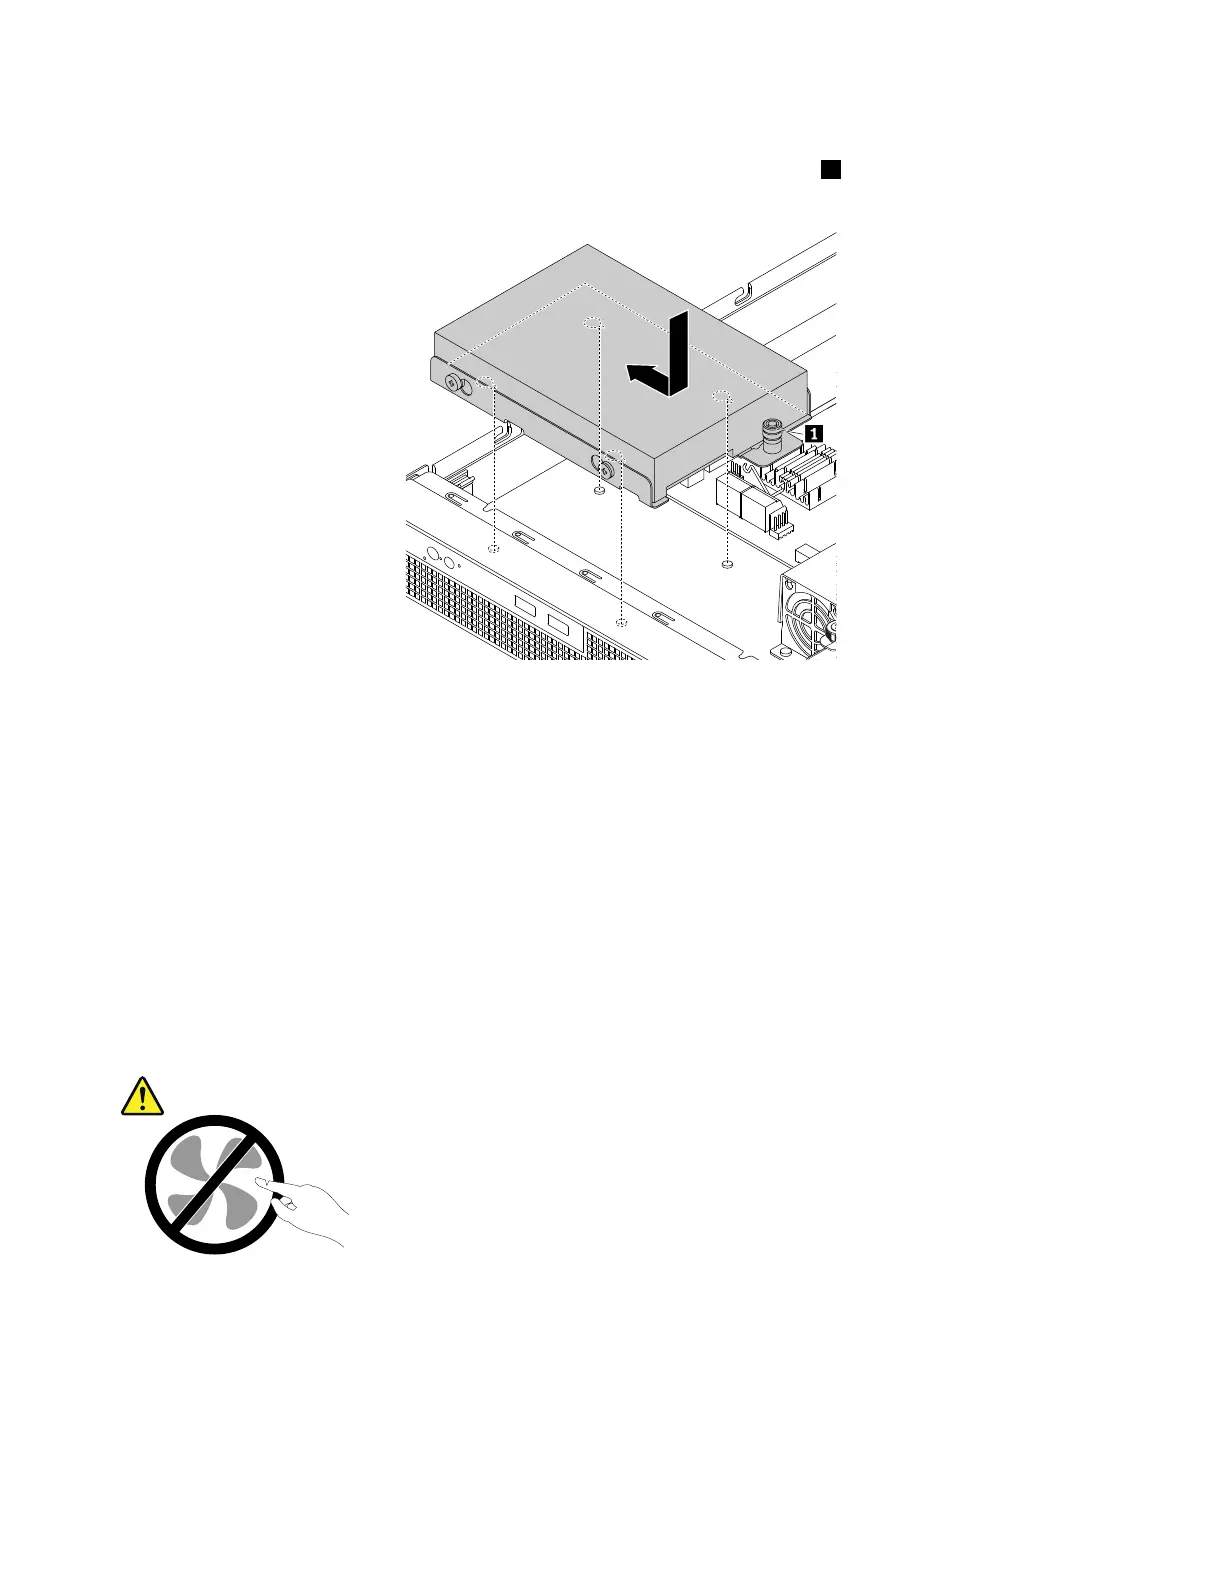
6.Alignthefourslotsinthebracketwiththemountingstudsonthechassis.Positionthe3.5-inchHDD
anditsbracketintotheserver.Then,slidethedriveasshownuntilthepin
1snapsintoplace.
Figure58.Installingthe3.5-inchHDDanditsbracket
7.Connectthecablesforthe3.5-inchHDD.See“Connectingthecables”onpage19.
8.Reinstalltheslim-optical-drivebracketifyouhaveremovedit.See“Installingtheslim-optical-drive
bracket”onpage71.
Tocompletethepartsreplacement,goto“Completingthepartsreplacement”onpage95.
Systemfan
•“Removingasystemfan”onpage78
•“Installingasystemfan”onpage79
CAUTION:
Hazardousmovingparts.Keepfingersandotherbodypartsaway.
Removingasystemfan
Toremoveasystemfan,dothefollowing:
1.Prepareyourserver.See“Preparingyourserverinadvance”onpage47.
2.Locatethesystemfanthatyouwanttoremove.
3.Removetheairbaffleifnecessary.See“Removingtheairbaffle”onpage50.
78ThinkServerRS160UserGuideandHardwareMaintenanceManual
 Loading...


