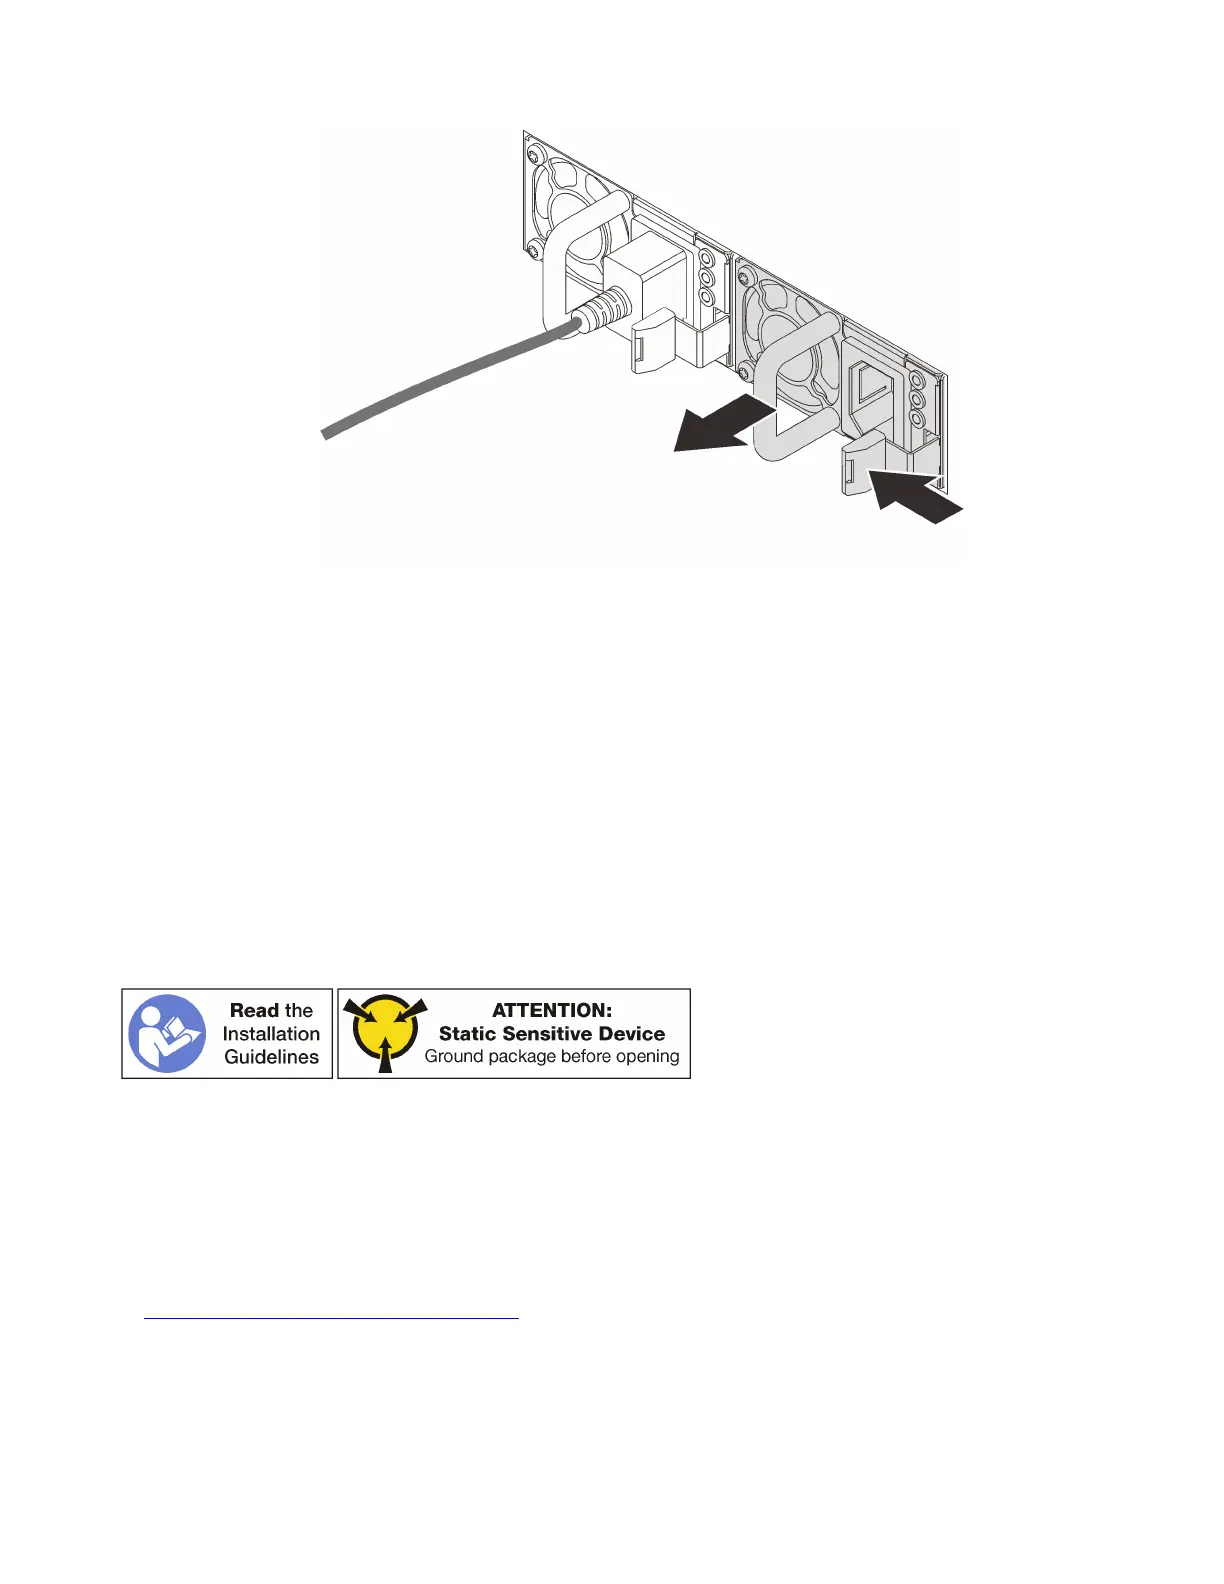
Figure 138. Hot-swap power supply removal
After removing the hot-swap power supply:
1. Install a new power supply or install the power-supply filler to cover the power supply bay. See “Install a
hot-swap power supply” on page 176.
Important: To ensure proper cooling during normal server operation, both of the power supply bays
must be occupied. This means that each bay must have a power supply installed; or one has a power
supply installed and the other has a power supply filler installed.
2. If you are instructed to return the old hot-swap power supply, follow all packaging instructions and use
any packaging materials that are provided.
Install a hot-swap power supply
Use this information to install a hot-swap power supply.
The following tips describe the type of power supply that the server supports and other information that you
must consider when you install a power supply:
• The standard shipping has only one power supply installed in the server. For redundancy and hot-swap
support, you must install an additional hot-swap power supply. Certain customized models might be
shipped with two power supplies installed.
• Ensure that the devices that you are installing are supported. For a list of supported optional devices for
the server, go to:
http://www.lenovo.com/us/en/serverproven/
Notes:
• Ensure that the two power supplies installed on the server have the same wattage.
176
ThinkSystem SR650 Maintenance Manual

 Loading...


