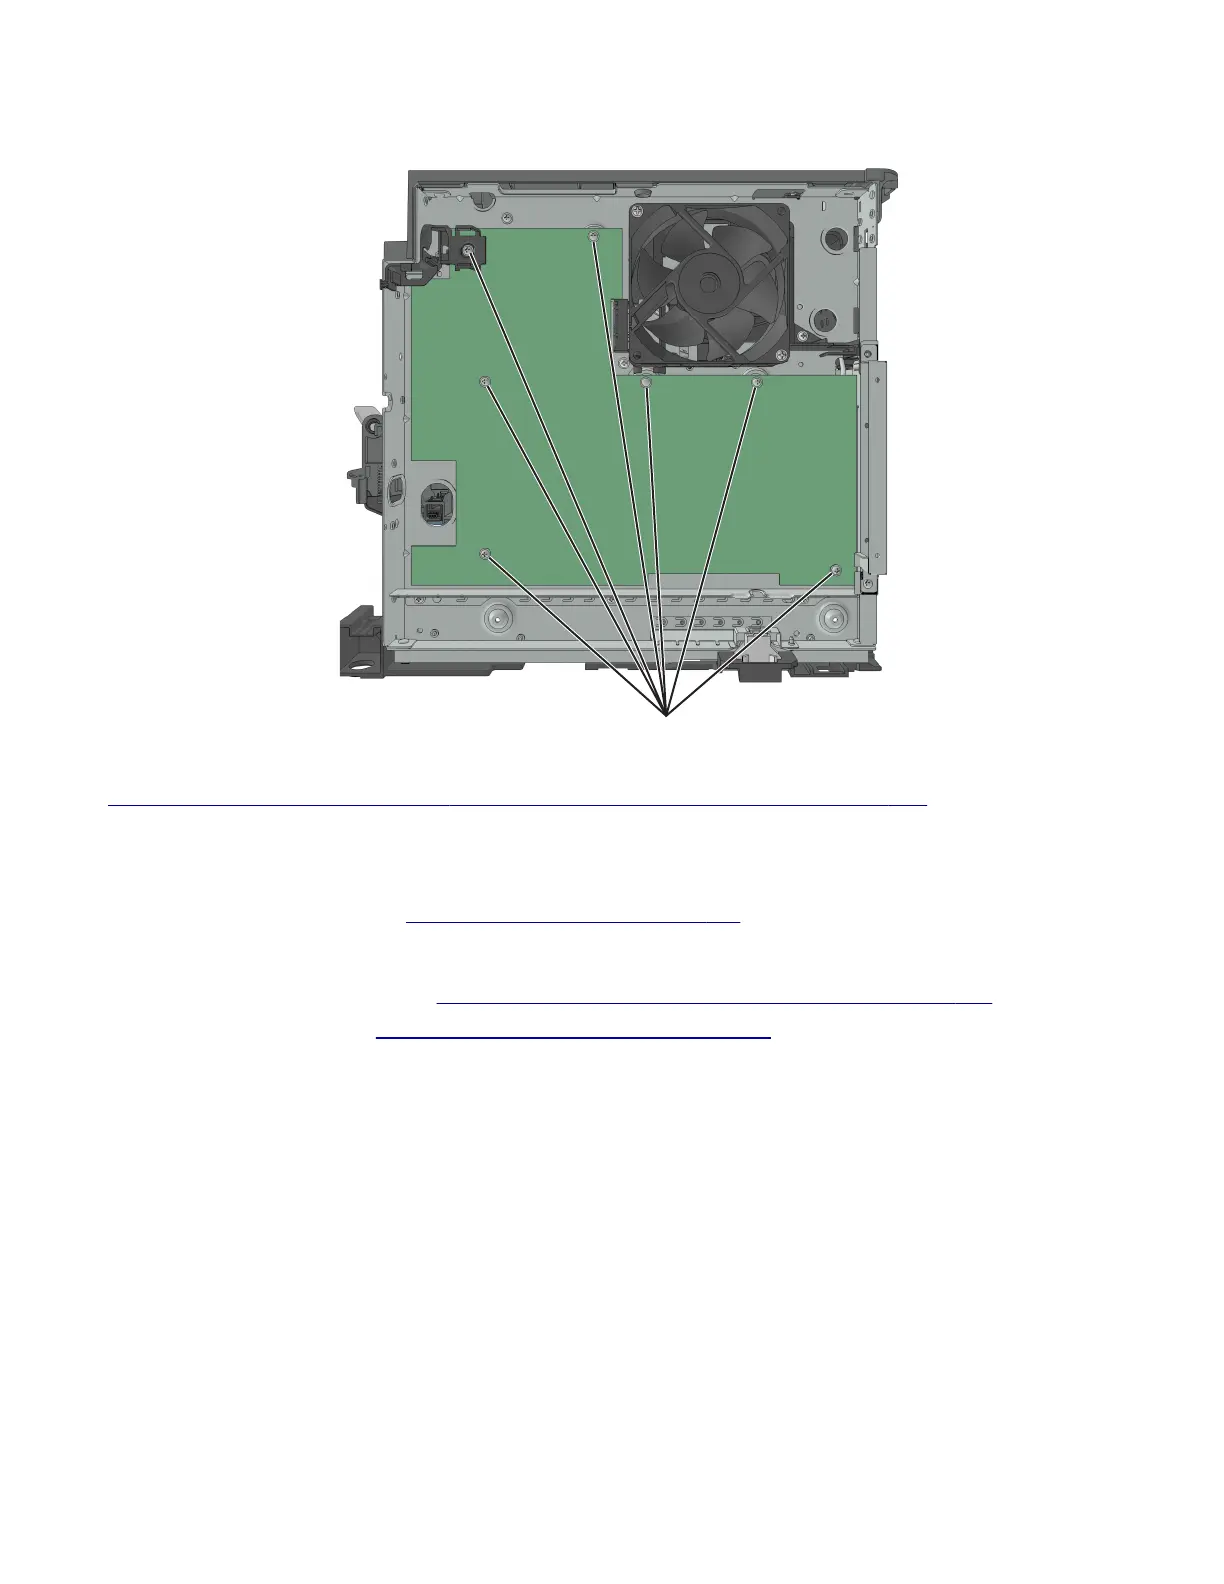
6 Remove the seven screws (B) securing the controller board.
B
Installation note: After installing a new controller board, perform the printer configuration restoration. See
“Restoring the printer configuration after replacing the controller board” on page 205.
Toner cartridge smart chip contact removal
1 Remove the right cover. See “Right cover removal” on page 241.
Note: For MS610de, also remove the following:
a Controller board shield. See “Controller board shield removal (MS610de)” on page 247.
b Controller board. See “Controller board removals” on page 247.
2 Disconnect the cable JARW1 from the system board.
4514-6xx
Parts removal
251