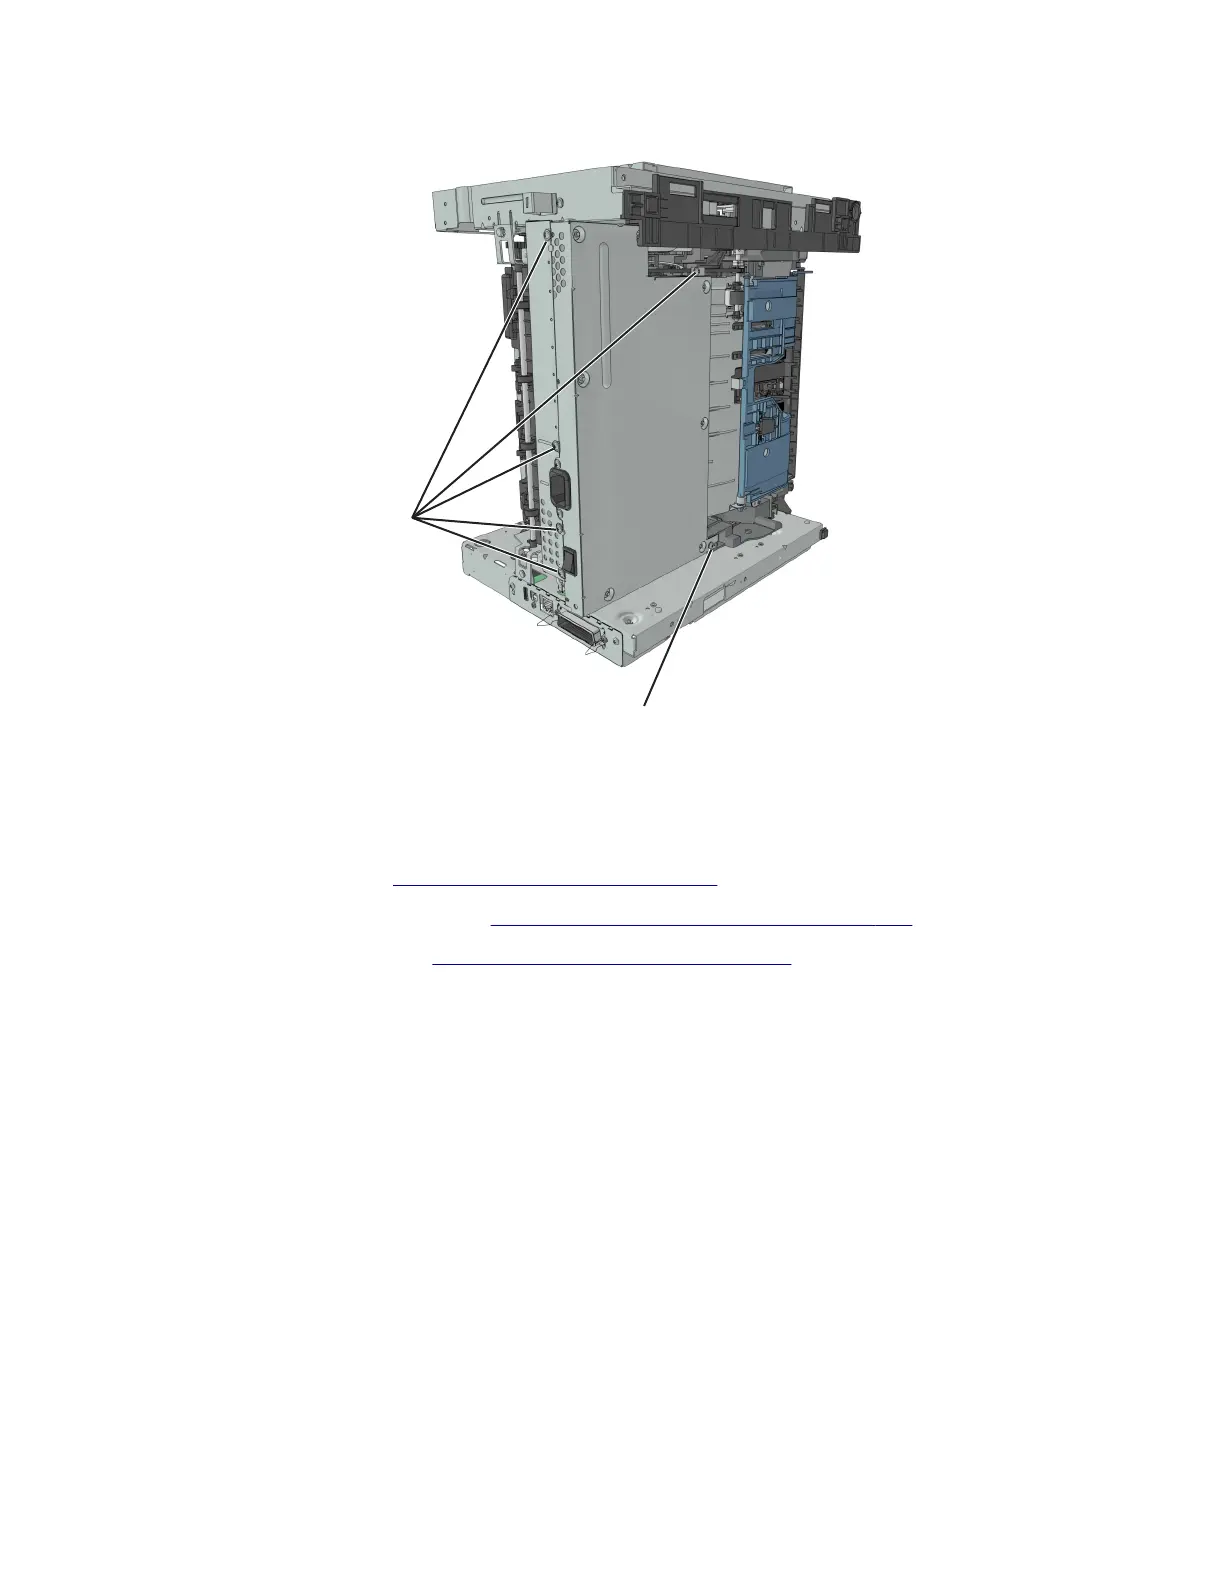
6 Remove the five metal screws (D) and the plastic screw (E) securing the power supply.
D
E
7 Remove the power supply, and then disconnect all cables from the power supply.
Power supply shield removal
1 Remove the left cover. See “Left cover removal” on page 228.
2 Remove the rear door and cover. See “Rear door and cover removal” on page 307.
3 Remove the power supply. See “Power supply removal” on page 289.
4 Position the printer so that it sits on its right side.
4514-6xx
Parts removal
290
 Loading...