EVOS
®
FL and EVOS
®
FL Color User Guide
33
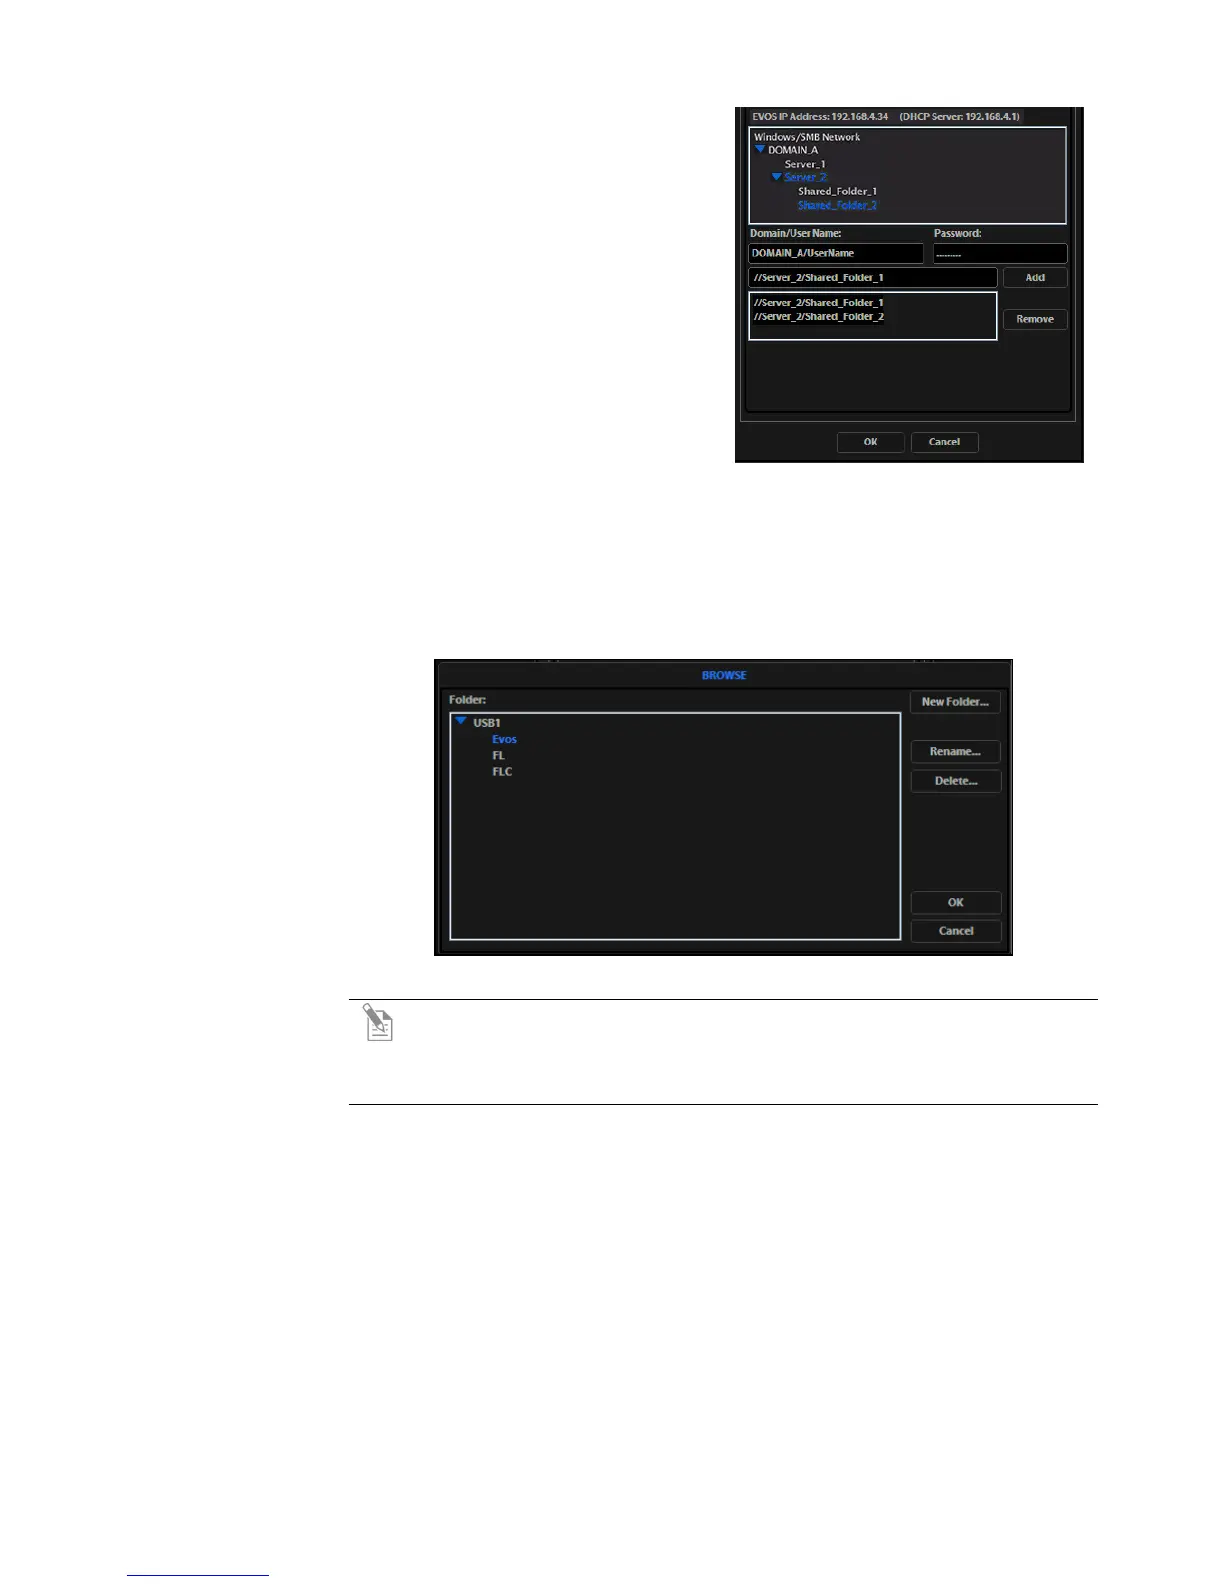
6.
After the server accepts your login,
the EVOS
®
FL Imaging System will
display the list of available shared
folders on the selected server.
Select a shared folder and click the
Add button to include it in the list
of possible file destinations. You
may also type in the file path and
click Add.
The folder should appear on the list
box below the Add button. If it does
not, contact your network
administrator for help. (Figure 28)
Figure 28 Adding shared folders
7.
If you need to remove a shared folder from the destinations list, select the folder
name and click the Remove button.
8. Click OK to close the Settings dialog box.
9. To verify your list of network destination folders, go to the QuickSave tab and
click the Browse button to display the QuickSave Browse popup. (Figure 29)
Figure 29 QuickSave: Browse Popup
Note: All selected network destinations, as well as any USB flash drives
currently plugged in, will appear in the Browse popup. These locations will
also be available in the Save dialog box and through the Browse button in
the Time Lapse and Image Review tools.
Helpful Tips
• EVOS
®
will try to connect for about 30 seconds. If there is a problem with the
connection, the Network page will display “No Items.”
• Double-check the physical connections and click the Refresh Network button.
During the refresh, a progress icon will appear.
• Unless there is an issue with the network, or you are using an incompatible
adapter, refreshing the connection should resolve the problem within a few
moments. Contact your network administrator for help if the problem
persists.
• If your configuration requires using a static IP address, select the Use Static IP
Address option, enter your IP Address, Subnet Mask, Gateway Address, and
DNS Server Address, then click Set Static IP.