EVOS
®
FL and EVOS
®
FL Color User Guide
19
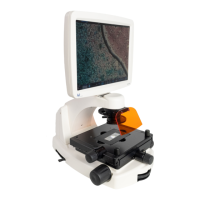
Fluorescence Operations
1.
Set the magnification using the objective selection wheel on the front of the
instrument.
2. Move light cube selection lever until the active fluorescent channel on screen
reflects the desired light cube (i.e., “GFP”).
3. Place the light shield box on the stage, over the sample. This is important for
optimal image quality.
Note: If your application requires access to the sample, work in a dark
room and use the Block slider to block light reflected from the condenser.
4.
Follow steps 4 to 7 under “Brightfield/Phase Operations” (page 17).
Overlays (optional)
1.
Follow the steps above to capture an image in each desired channel (i.e.,
“GFP”, “RFP”, “DAPI”)
2. Click “The overlay tab” to display the multi-channel image in color.
Note: See “Working with Images” (page Error! Bookmark not defined.)
for more information.
Helpful Tips
• To display the image with pseudo colors, turn on the color option.
• To display the image in grayscale, turn off the color option - this often shows
more detail than a color image.
• Find & Focus uses a shorter exposure time (100 ms) and lower illumination
(approximately 60%) compared to image capture settings. This minimizes
photobleaching and phototoxicity effects. When you capture an image,
illumination and exposure time automatically adjust for best image quality
and then reset to lower levels after the capture.
• The Actual tab provides full-powered illumination and actual exposure times
for live viewing of the sample(s).