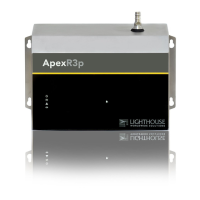
ApexRp Operators Manual
248083480-1 Rev 3 50
5. For ApexRp installation without Wall Bracket, install the
ApexRp using the installed anchors and appropriate screws.
Proceed to step 8.
6. For Wall Bracket installation, attach the Wall Bracket using the
installed anchors. Make sure to use flat head screws to maintain
clearance from the rear of the ApexRp.
7. Attach the ApexRp to the Wall Bracket by slipping it over
the mounting screws provided and sliding it downward on the
Bracket. Tighten the two screws.
8. The ApexRp is now ready for connection to the network.
Installing ApexRp without Wall Bracket
1. Using a bubble level to ensure ApexRp is level, place the ApexRp
against the vertical surface upon which it will be mounted.
2. Mark the center of each mounting tab’s larger hole then remove
the ApexRp from the surface and drill pilot holes for the mounting
hardware.
3. Install the mounting hardware then the ApexRp, snugging
the instrument to prevent wobble or movement while it is in use.
4. Connect the communication cable and the power cable.
5. The instrument is ready for connecting and integrating into the
instrumentation network.

 Loading...