THE BLUE BOX LT MAKING UP CAT. 5 CABLE WITH RJ45 CONNECTORS 33
LCDBBMUCAT03Sept08
There are two components needed to crimp a Cat. 5 cable:
a “crimper” and a “RJ45 modular connector.” A crimper is
the tool used to make a crimp and seal the cable to the
connector. RJ45 connectors create the interface for a con-
nection and come in four sizes : 4-, 6-, 8-, and 10-position
(position is the placement in the connector that holds a
contact [pin]).
It is important to note, all crimpers and connectors are
not created equal. We have performed many trials to de-
termine a recommended crimper tool and connectors for
our systems; these products will be discussed in a later
section.
Note that no matter what brand of connector or crimp
tool used, just the action of crimping a connector to a
cable can cause it to deform and splay the connections.
Figure 1.7a illustrates how the crimper head pushes the
contacts down by the same distance but deforms the
plastic case under the pressure; as you see in Figure 1.7b
the contact causes the center crimp to not be adequately
supported or seated. Figure 1.8 shows a crimp after
release; notice how it has a “bowed” appearance.
A bowed crimp is a recipe for
disaster. The two center pins
do not have adequate contact
with the wire. And for the
purpose of LC&D lighting
systems, the two center pins
carry the data! The ONLY
way to completely flush the
REASONS WHY IT’S HARD TO MAkE
GOOD CRIMPS ON Rj45s
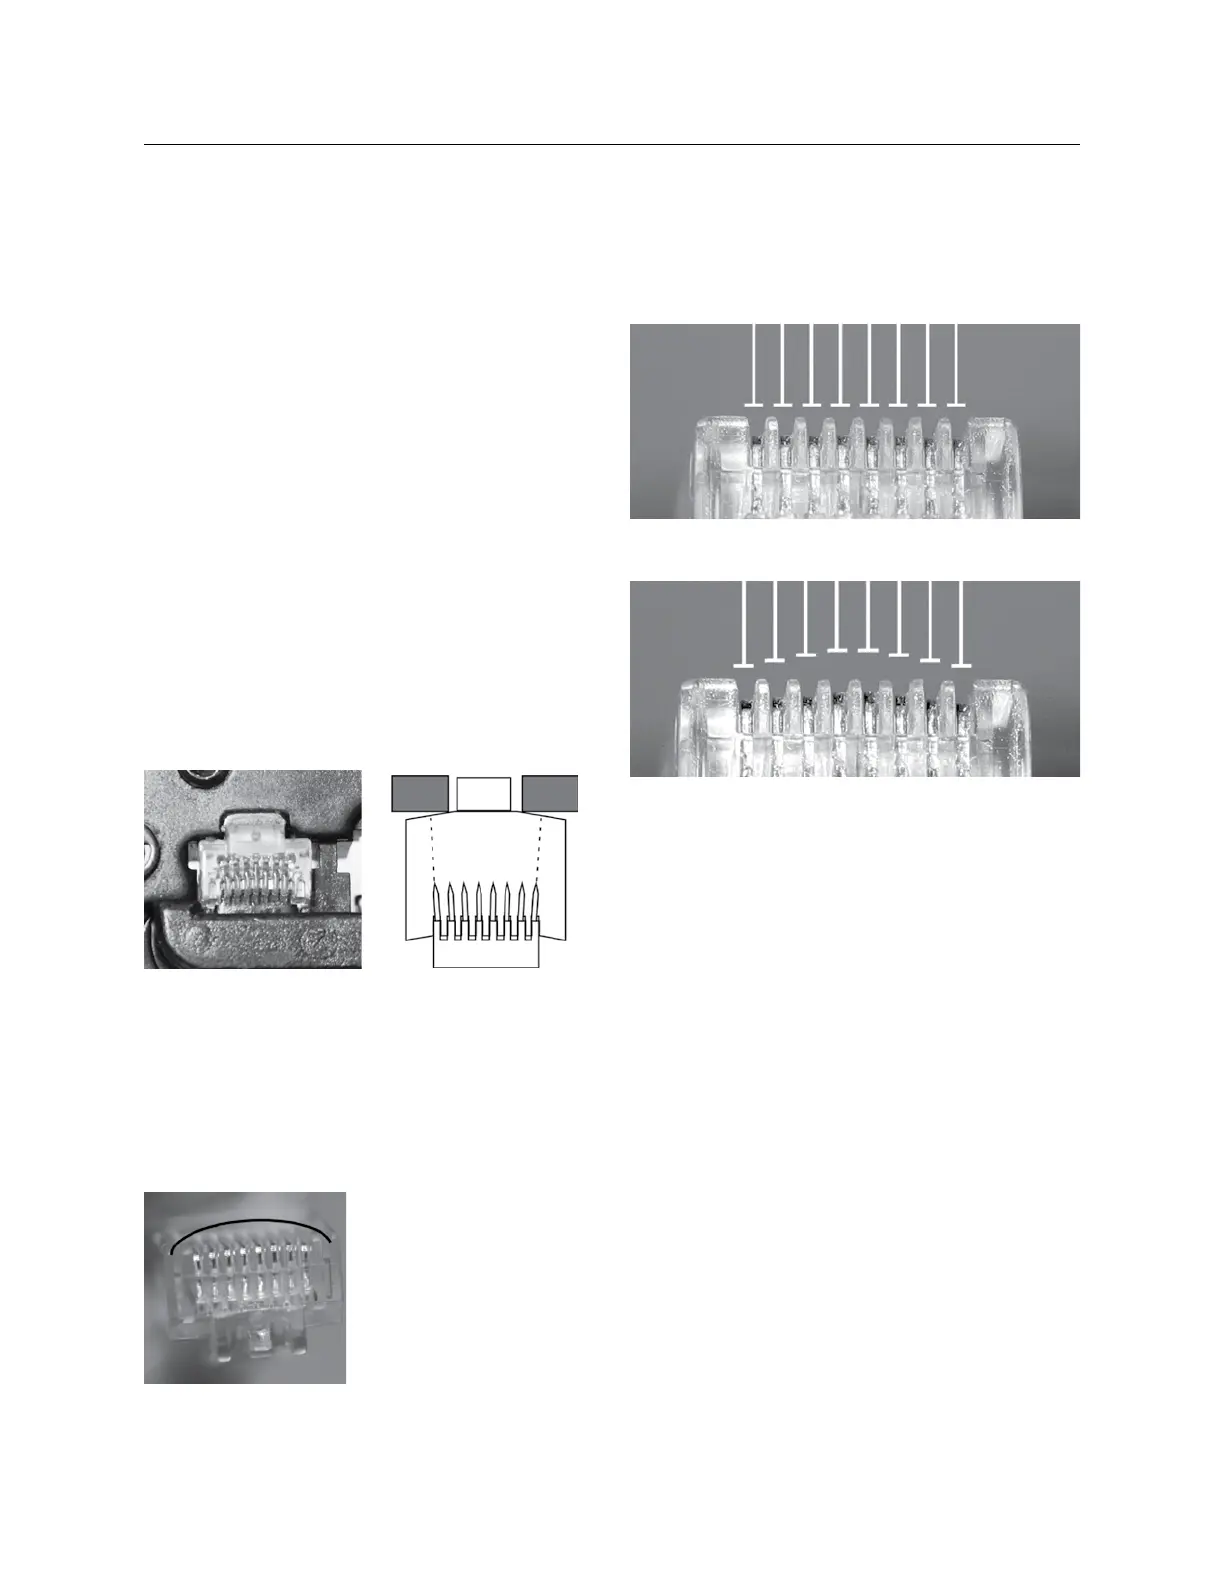
center pins is to crimp multiple times (Note: we suggest
5-10 crimps for a successful Cat. 5 cable crimp) (Figure 1.9a
and 1.9b are examples of properly seated and non-properly
seated contacts).
SOLID WIRE IS DUCTILE
The action of pulling a cable side to side does two things: a) pulls
the side wires out of the crimp and/or b) squashes the copper
wire, first one way and then another. The copper “flows” into
a new shape and stays there as if it has been hammered
flat. An example of this pulling occurs unintentionally when a
switch is pushed/forced into a tight space or wall enclosure.
This can result in an “open” connection. This is why we do not
recommend solid wire cable.
THE RIGHT CRIMPING TOOL
Choosing the right crimping tool is the most critical part
of a cable crimping job. All crimping tools do pretty
much the same thing, they force the contacts within the
connectors onto the cable. But as we mentioned earlier,
there is a big difference in the quality of crimps on different
types of crimping tools. In trial testing, we found even the
Figure 1.9a: Contacts are seated properly.
Figure 1.9b: Contacts are not seated properly.
Figure 1.7a
Figure 1.7b
Figure 1.8

 Loading...