15
lci1.com 574-537-8900 Rev: 03.02.21
Ground Control
®
TT
Leveling OneControl
®
Touch Panel (3K-5K)
Installation and Owner’s Manual
(For Aftermarket Applications)
CCD-0002700
NOTE: It is recommended to wire the canbus power
connector to the controller. The canbus power connector
MUST be powered from a fused power source. Failure
to provide circuit protection could cause damage to
the system.
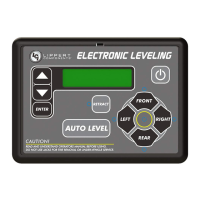
6. Insert touch panel into mounting bracket. Align the four
slots on the back of the OneControl Touch Panel with the
four tabs (Fig.26A) on the mounting bracket. Gently push the
OneControl in and then slide down. The mounting bracket
has two screw mounting tabs on the bottom (Fig.26B).
Secure the touch panel into the screw mounting tabs using
the two provided Phillips pan head sheet metal screws.
Auto Leveling Control Touch Pad
1. Determine where to mount the Auto Leveling Control
Touch Pad. The touchpad should be mounted on the
exterior of the trailer so the operator will have a view of the
coupler during operation.
2. Cut a hole in the desired location 1 ¾” wide by 1 ¼”
high and have a depth of 5/8” (Fig.27) so the top and bottom
horizontal cuts are parallel to oor of the compartment or
oor of the unit.
Fig.26
Fig.27
3. Plug the touchpad harness into the connector on
the back of the touchpad to ensure that the product is
functional before mounting.
4. Feed the touchpad harness through this hole and run it
to the compartment where the controller is mounted
(Fig.25). Plug the harness into the appropriate connector on
the controller.
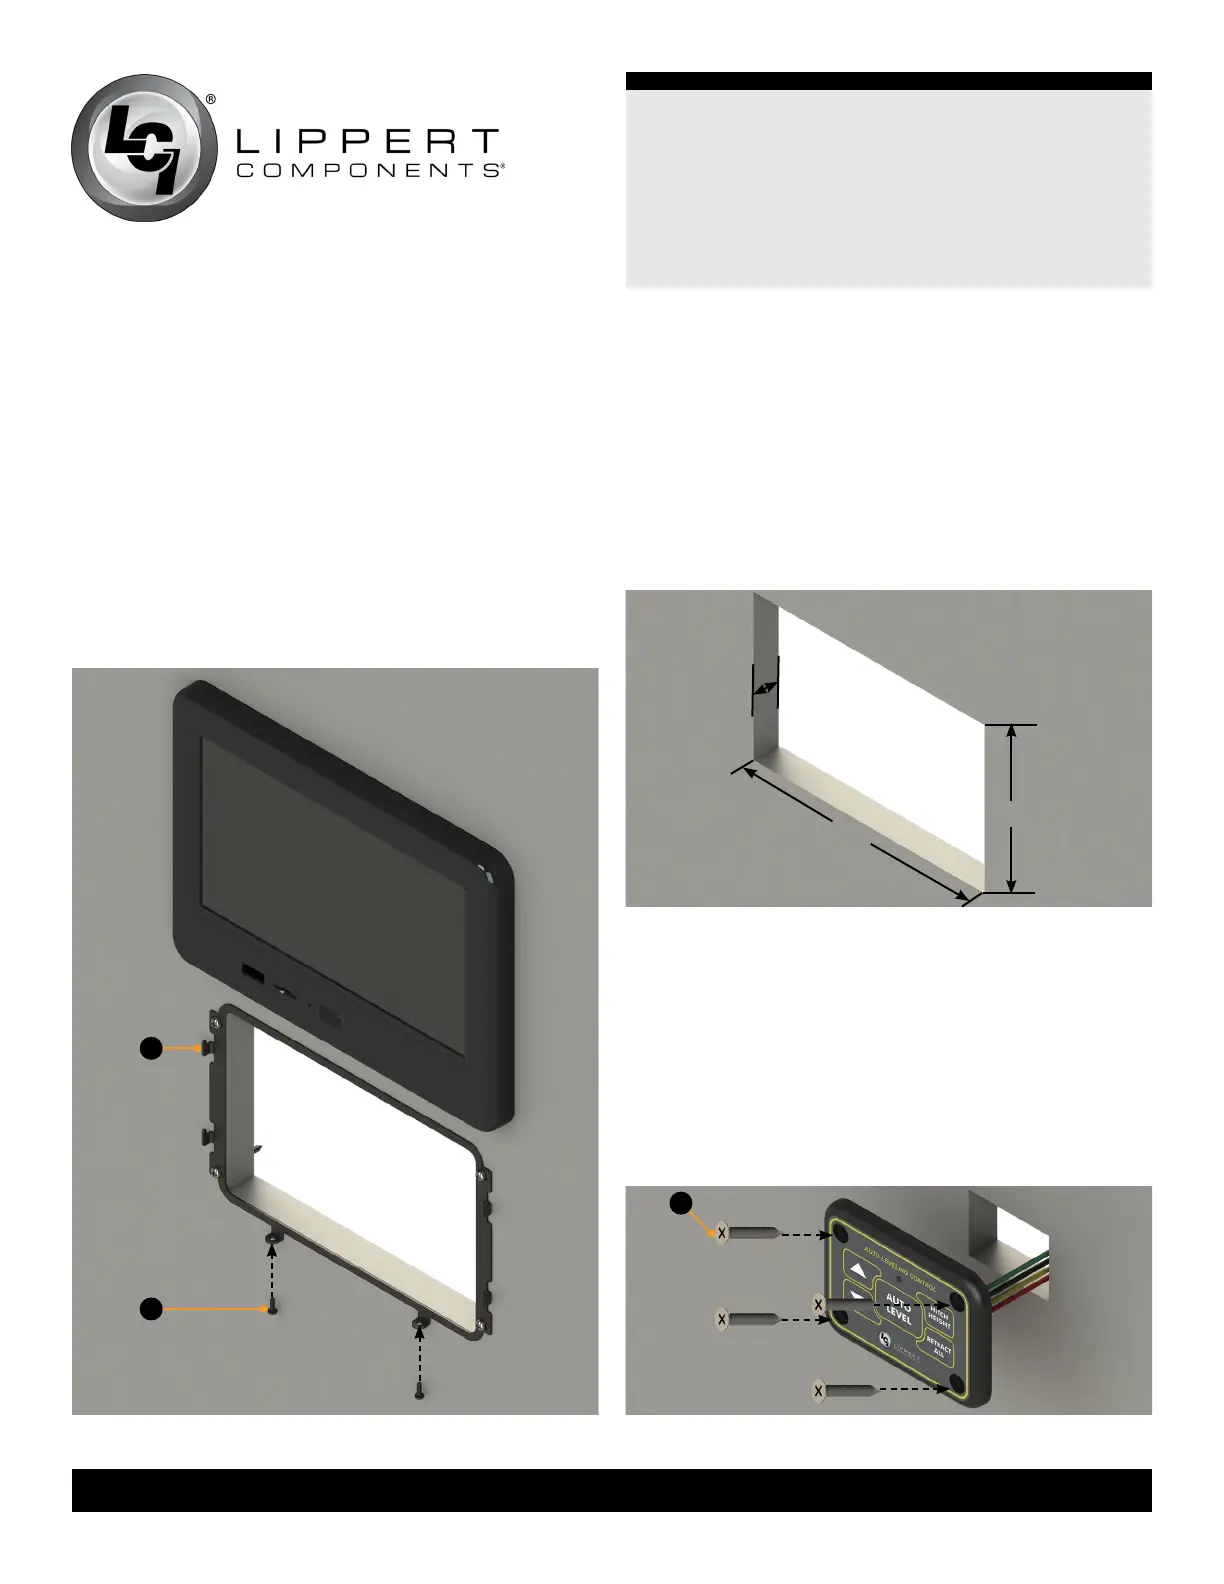
5. Attach the touchpad with four #8 x 1” wood screws
(Fig.28A).
Fig.28
A
B
5/8”
1 ¼”
1 ¾”
A