03-09-05 29
Mechanical installation.
The SLS sensor must be mounted rigidly in such a way that neither thermal
expansion of the fixture nor external forces may influence its position. Otherwise
the accuracy of the system will be affected and frequent re calibrations of the
system may be necessary. Calibrate the system as often as possible to avoid
influence of mechanical fixture drift due to time and temperature.
Make sure that the optical path is not obstructed.
•1 It is possible during installation that unintentional
exposure to laser light may occur take extra care not
to look into the laser aperture of the SLS sensor
unless you are certain that the laser beam is turned
off. Tools that are used during installation may give
mirror like reflections.
•2 If possible wear protective goggles.
•3 The laser beam of the SLS sensor cannot burn skin.
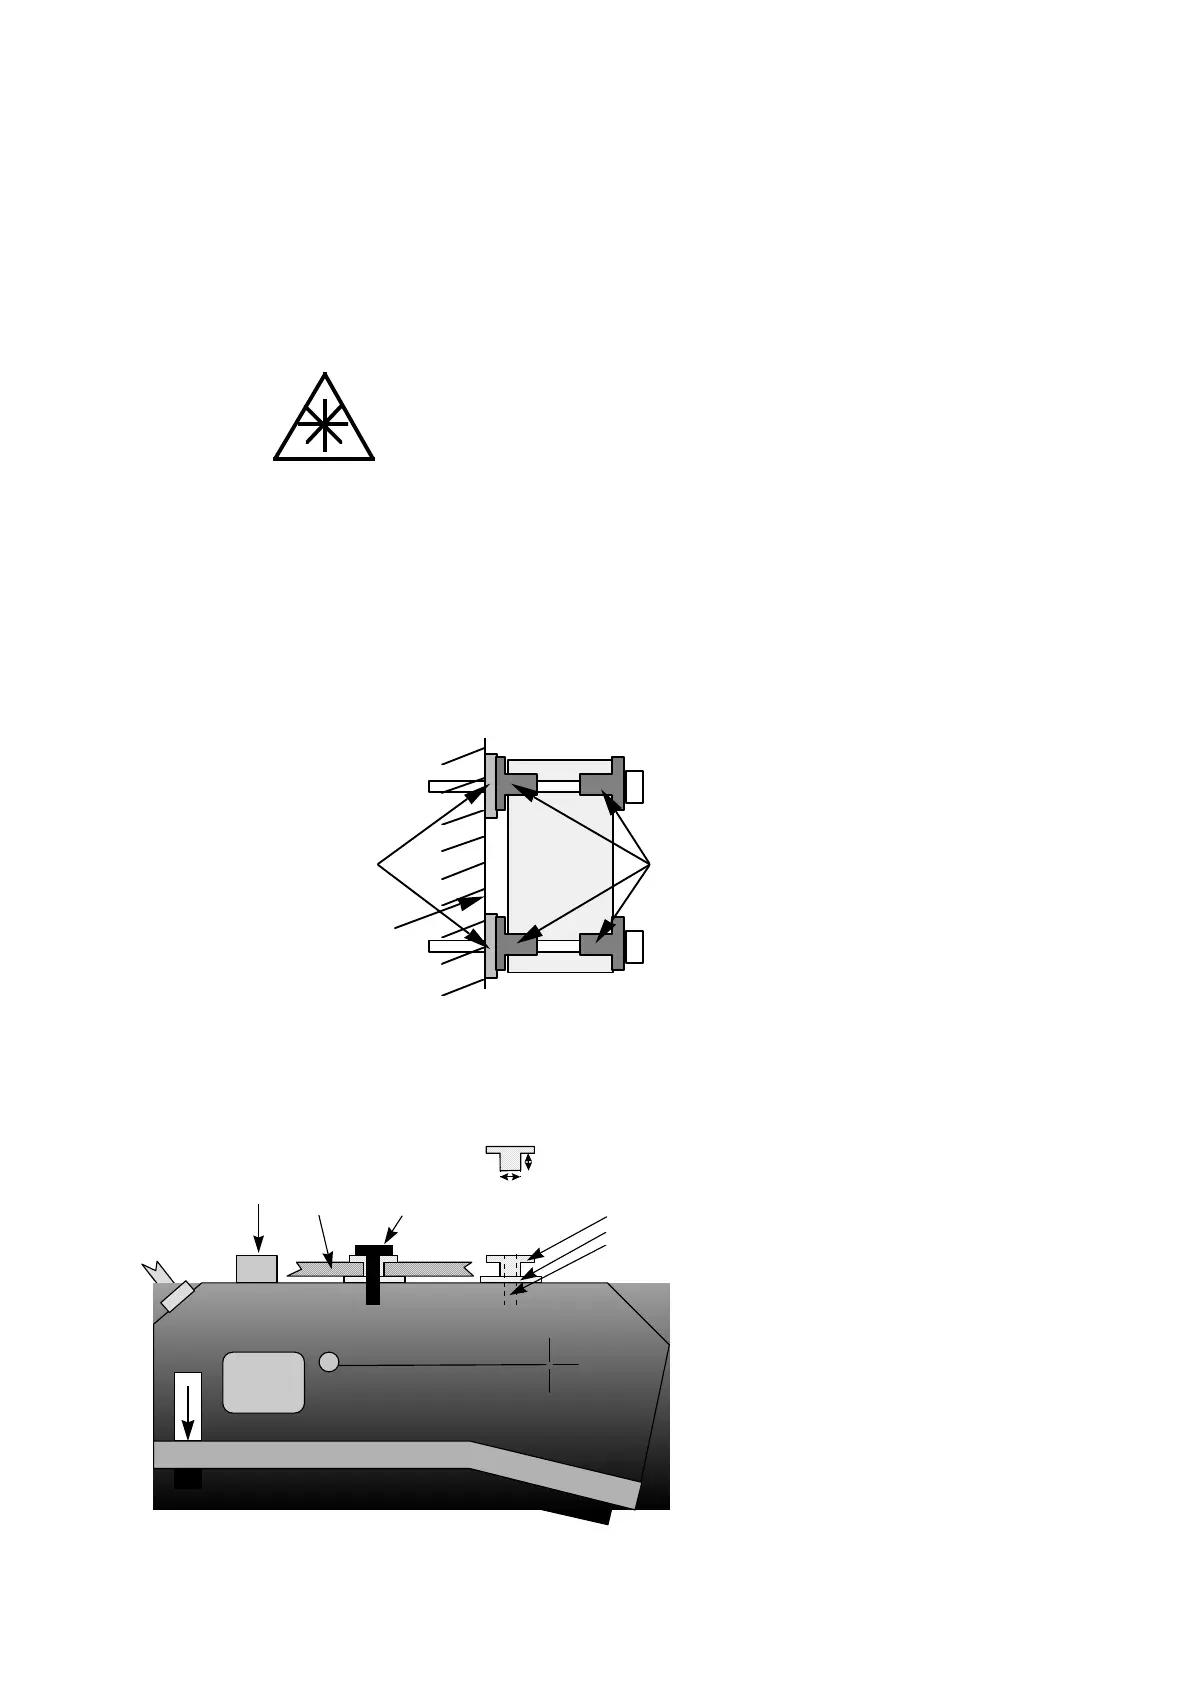
Eight plastic mounting washers are enclosed in the delivery. These washers may
be used to electrically isolate the sensor from its mounting surface, see figure
below.
M6 mounting
bolts
Isolation
washers
Washers
Mounting surface
Drill diam.
10.5 - 11.0 mm
Mounting Surface
Selcom
LASER MEASUREMENTS
SLS 6000
DANGER
Laser
Class 3B
Air purge inlet
Isolation washer (4x)
Washer (4x)
Mounting Holes M8(4x)
Mounting plate
Bolt (M8)
7,0 mm