4D-Nucleofector™ Manual – Bioscience Solutions 19
2.10.2 Loading Samples
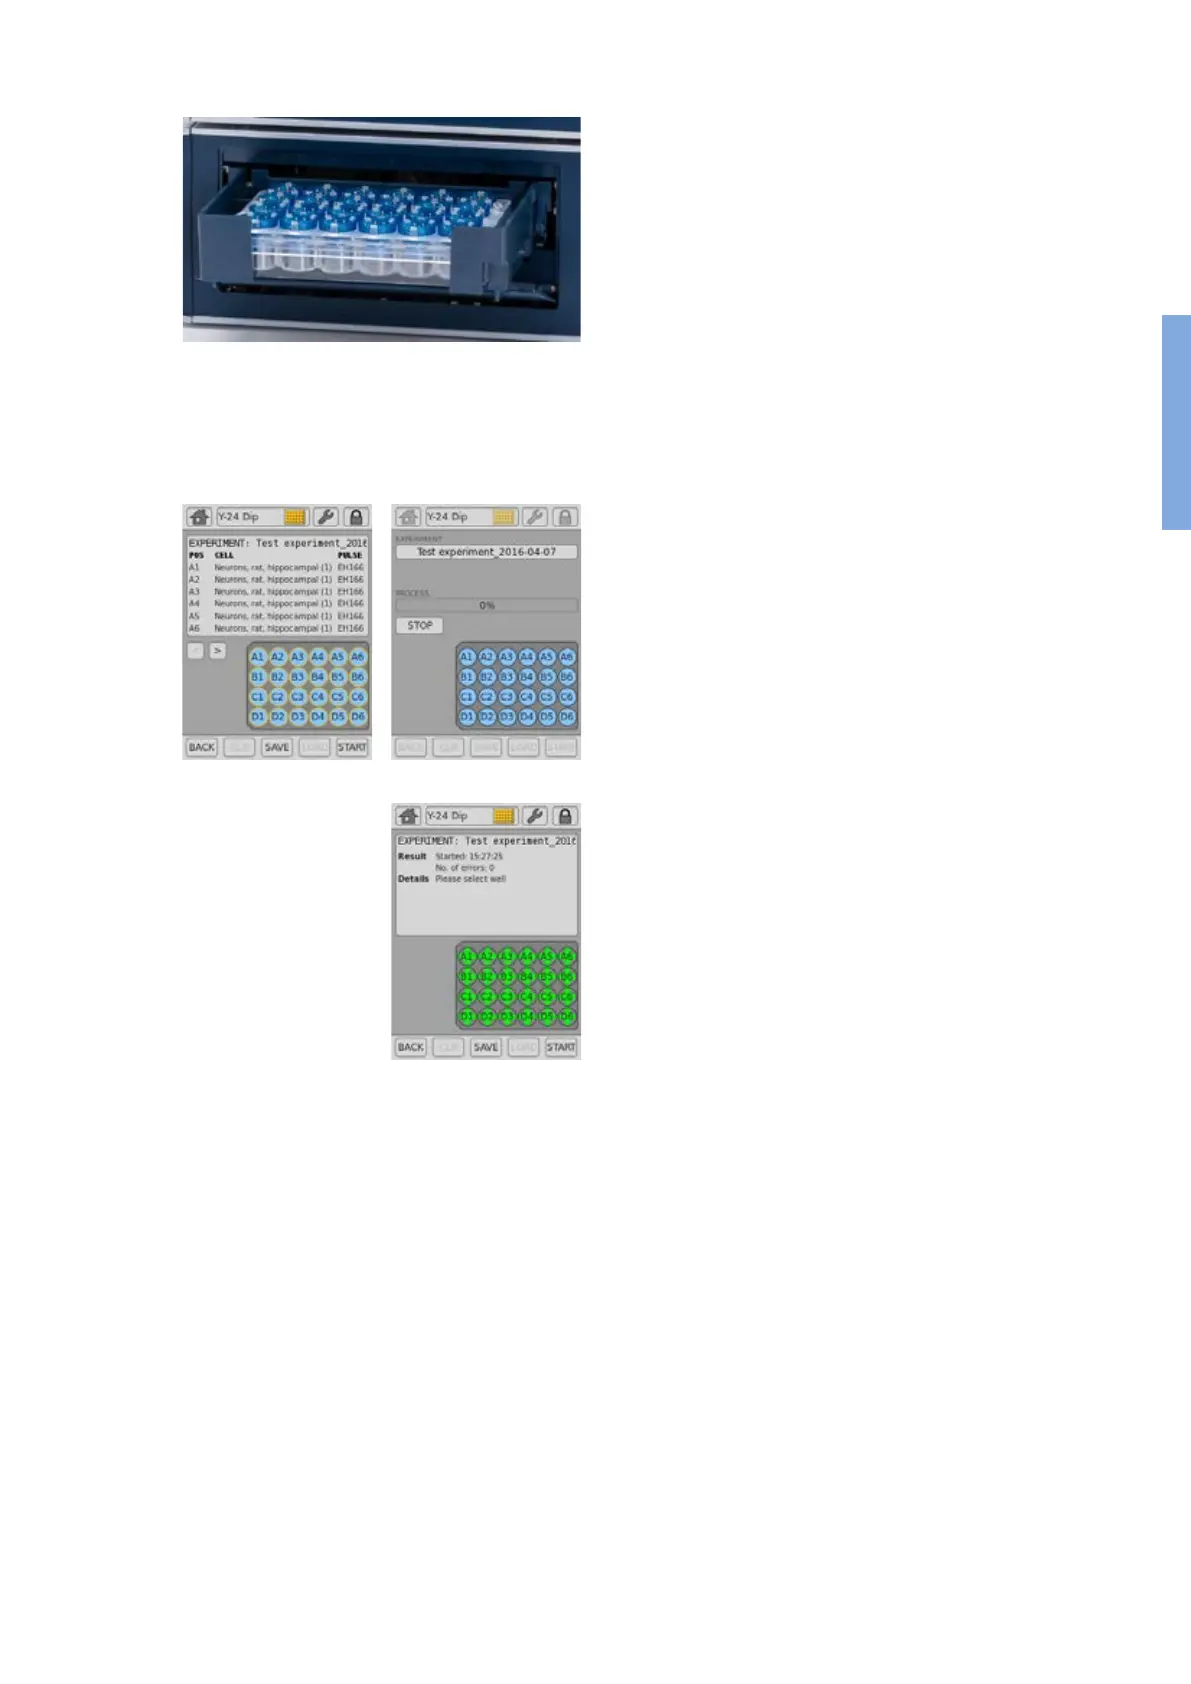
9. Insert the 24-well Dipping Electrode Array into the 24-well culture plate
containing your Nucleofection samples. Make sure that the dipping
electrode array is inserted in the right orientation.
10. Place 24-well plate with inserted dipping electrode array into the
retainer of the 4D-Nucleofector™ Y Unit. Well “A1” must be in upper
left position. If the array-plate sandwich was entered in the wrong
orientation an error message will appear after pressing “START”.
11. It is not recommended to re-use dipping electrodes as this may lead
to suboptimal transfection eciencies. An RFID chip contained in
the dipping electrode lid logs usages and after pressing “START” the
software will check for used wells and oer you dierent options how
to continue.
2.10.3 Running the Experiment
12. After loading the samples press “START” to run the experiment (gure
2.18, A).
13. The progress of the experiment is indicated by changing the color
of the cuvette or well positions (gure 2.18, B) (for color codes see
chapter 4).
14. When the experiment is complete, a result le summarizing the
Nucleofection process will be displayed (gure 2.18, C).
15. The result le will be saved automatically by the system and can be
reopened as described in chapter 2.12.2.
16. You can repeat the same experiment by pressing “START” again.
A message will appear asking “Do you want to pulse the same
experiment again?”.
17. Press “OK” to start the experiment, “NEW” to return to the “Experiment”
screen and dene a new experiment or “CANCEL” to return to the
“Results” screen.
A B
C
Figure 2.17: Loading of samples (Y Unit)
Figure 2.18: Experiment progress (Y Unit)
2