4D-Nucleofector™ Manual – Bioscience Solutions 25
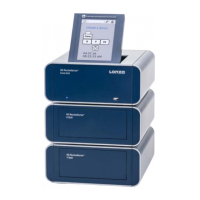
2.11.2.2 Dening a New Experiment
14. Press “NEXT” (gure 2.24, A) to dene experiment parameters or
select a previously saved experiment by pressing “Choose existing
experiment” (gure 2.24, B).
15. Press the field “CELL TYPE PROGRAM” to choose predefined
Nucleofection conditions from a cell type list (gure 2.24, C). Use
the search (magnifying glass symbol) or the sort list functions (A-Z)
to nd conditions more quickly.
a. Select the desired cell type code by tapping on the appropriate
line of the cell list. The cell type selected will be highlighted. For
additional information about the cell type selected press “i”.
b. To conrm your selection press “OK”.
c. If required, modify pulse code by pressing the letter or number
code elds. A keyboard will appear, enabling you to change settings.
The solution code can be modied via a selection list.
16. Instead of dening solution and program code via the CELL TYPE
PROGRAM, both parameters can also be selected manually, e.g. in
case no predened cell type program is available. For adding new cell
type programs, please refer to chapter 2.12.3
17. Optional: At this stage (or at step 20) you can save your dened
experiment for future use by pressing the “SAVE” button (gure 2.24,
D). A keyboard will appear allowing you to dene a name (max. length:
26 characters).
18. You may enter further information about your experiment by touching
the “Info” eld and typing in your text (gure 2.24, E).
19. Conrm and save the experiment parameters by pressing “OK” or
“SAVE”
20. On the next screen (gure 2.24, F), press “OK”.
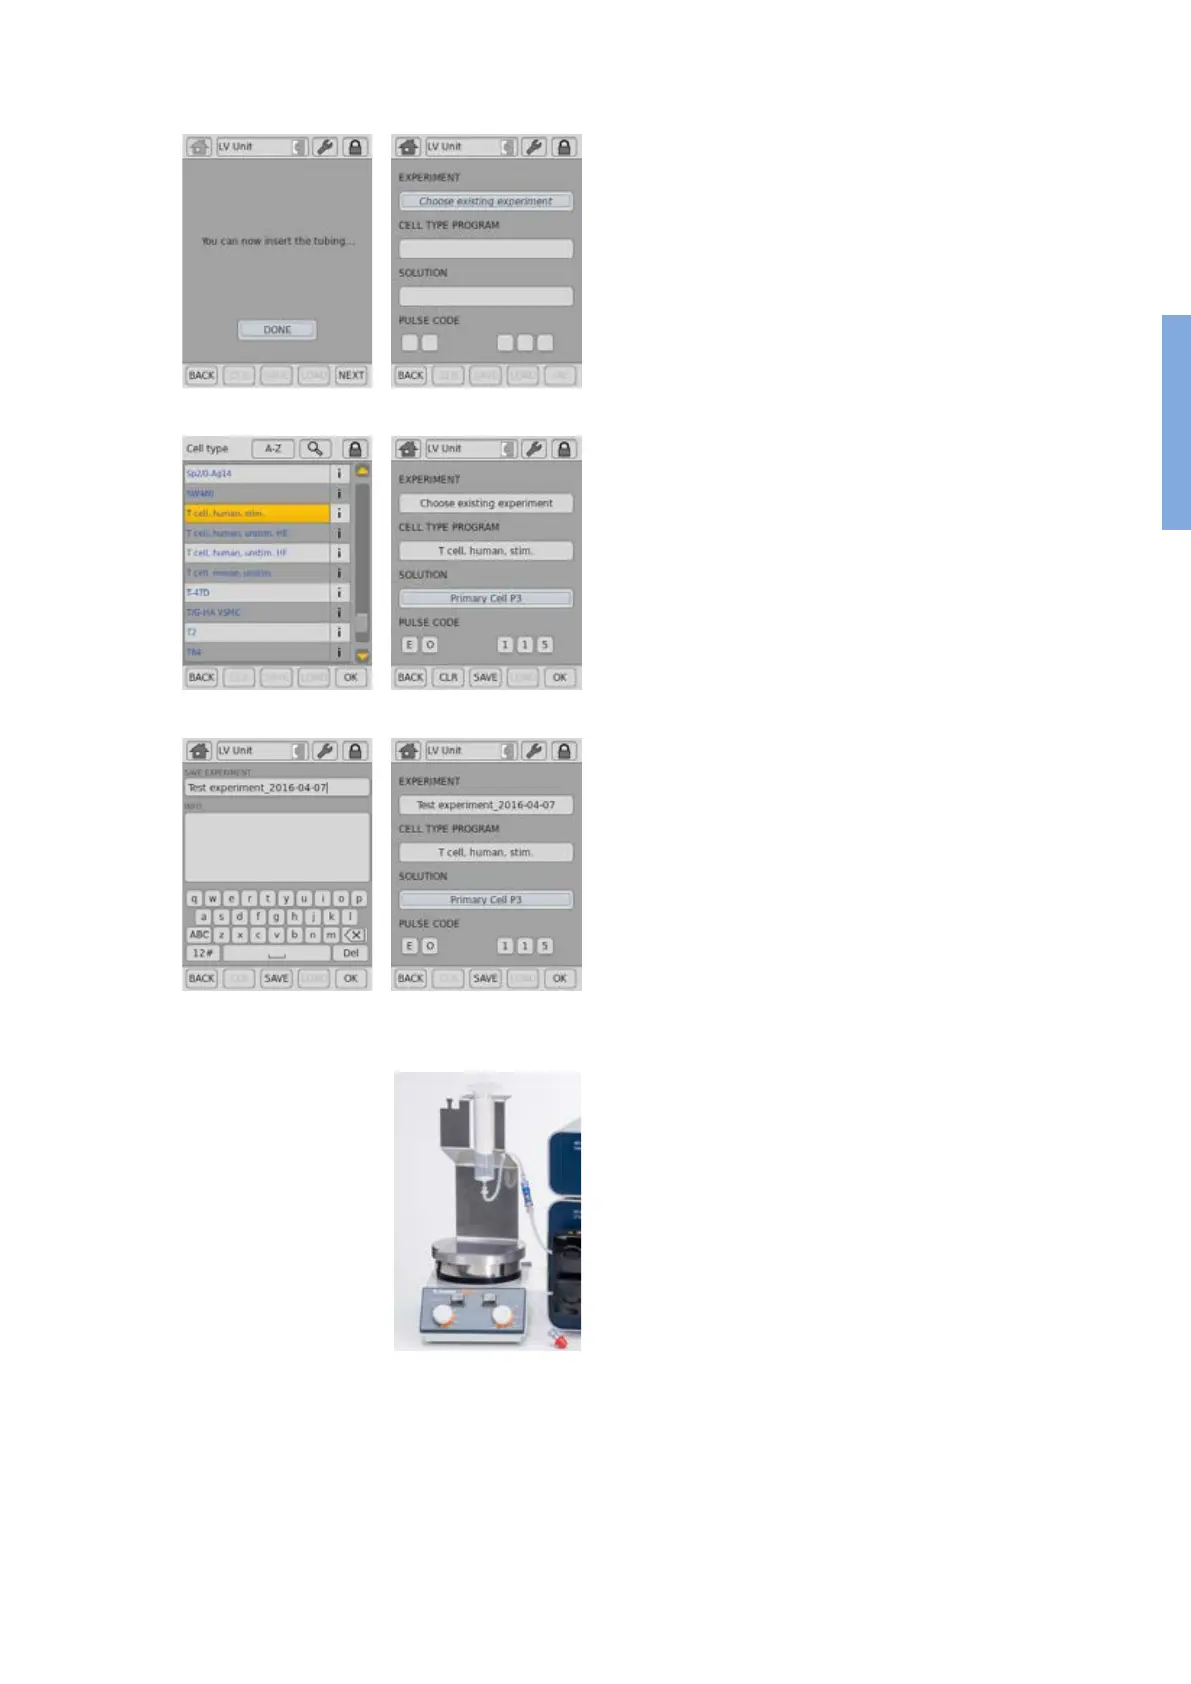
Before continuing, prepare your samples:
21. Prepare cell suspension under the sterile hood (for detailed
recommendations, please refer to cell type-specic protocol)
22. Fill a dened volume of cells and substrate into the inlet reservoir(s)
mounted on a 4D-Nucleofector™ LV Reservoir Rack.
23. Place the rack with the cell suspension reservoir on a magnetic stirring
platform to avoid cell sedimentation when working with larger volumes.
Start stirring the cell suspension at ~300 rpm. Ensure that magnet is
truly stirring.
24. Remove red caps from the Spiros connectors on the inlet tubes of the
cartridge and the blue caps from the swabbable injection port of the
outlet reservoirs and connect both (gure 2.24, G).
25. The system is now fully assembled. Check correct assembly as shown
in gure 2.25.
System with one inlet reservoir
A
C
D
B
C
E
F
Figure 2.24: Experiment denition (LV Unit, LV Nucleocuvette™
Cartridge)
2