34 Bioscience Solutions – 4D-Nucleofector™ Manual
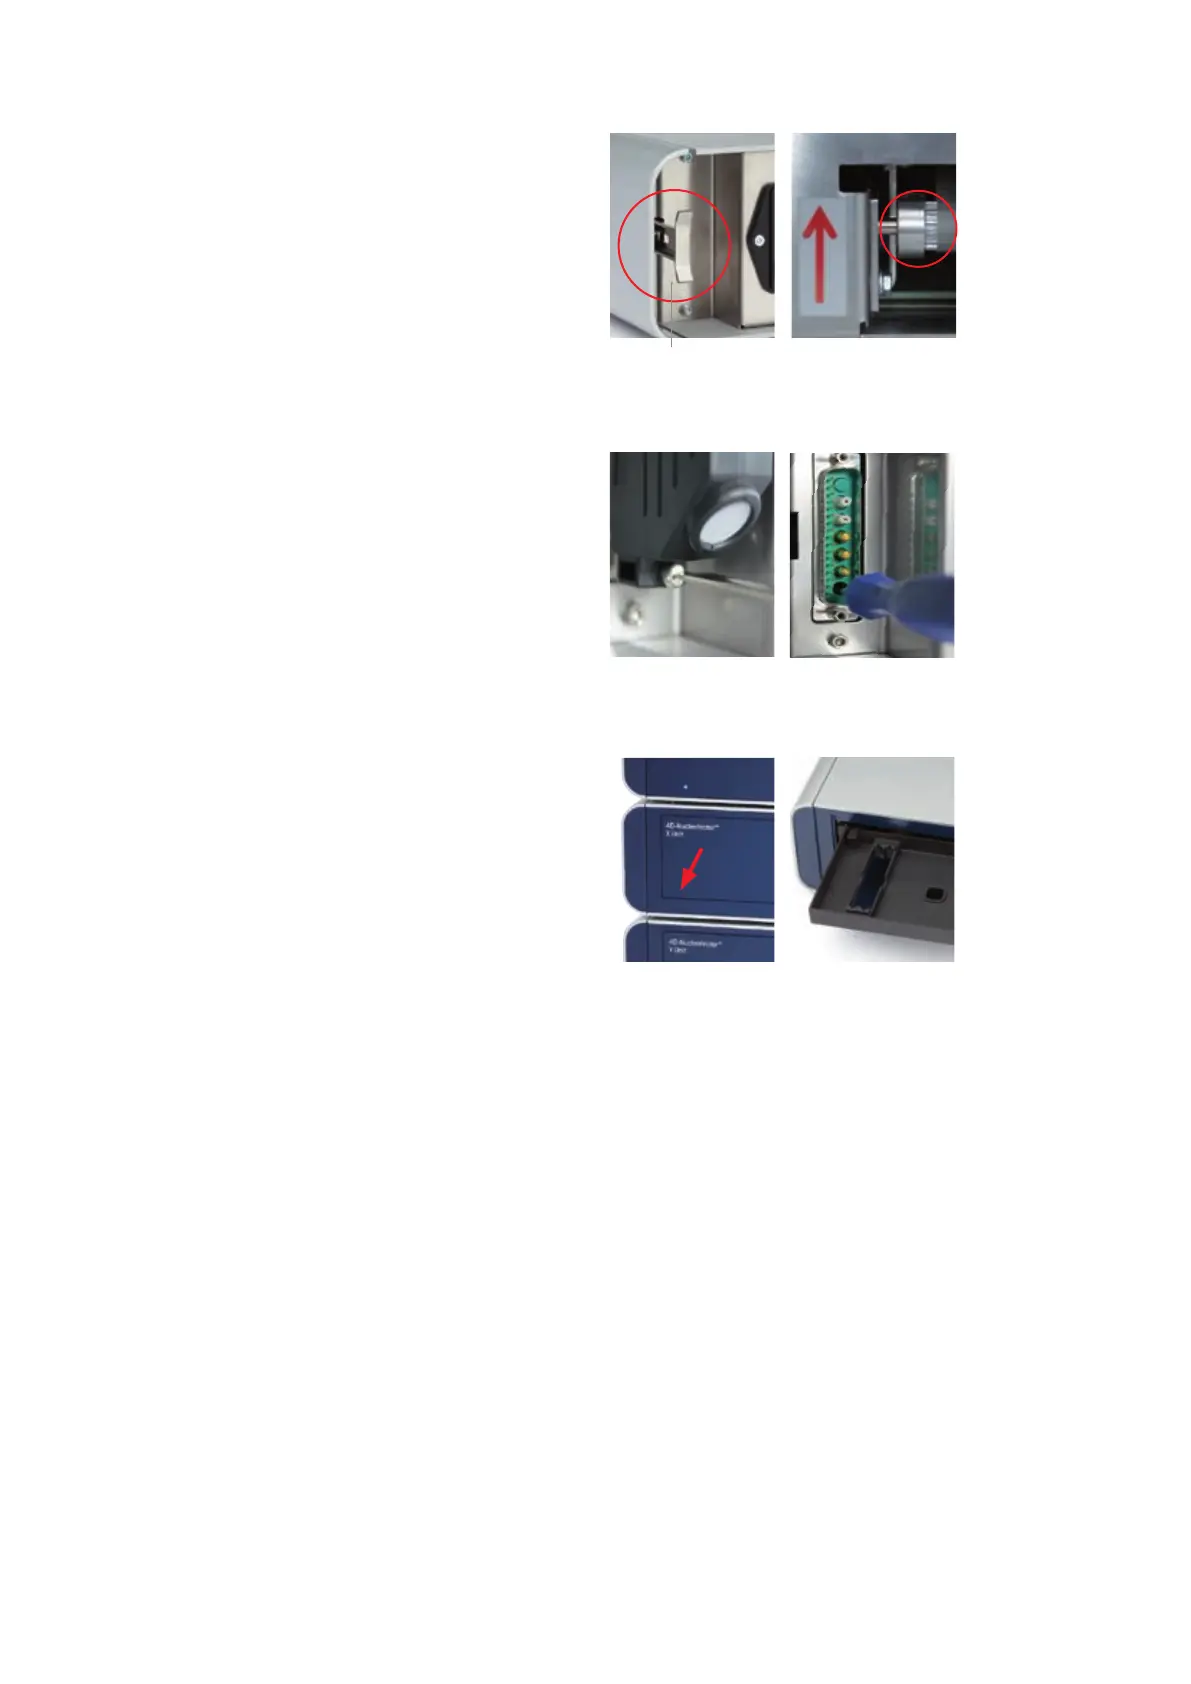
Figure 3.1: Rescue of samples
C D
A
Unlocked
F
E
B
3.2 Rescue of Samples (X and Y Unit)
This chapter describes how to rescue your samples from the X or Y Unit
in case of system malfunction or break down of electricity. Depending
on the model variant (see table 2.1 on page 8) the process diers
slightly (gure 3.1).
Model variant A (Older):
– Unplug system from main power
– Remove side panel from the X or Y Unit (gure 3.1, A)
– Turn wheel into direction of the red arrow as far as it will go
(gure 3.1, B)
Model variant B (Newer):
– Unplug system from main power
–
Remove the terminator cap or cable connection to next unit (gure
3.1, C)
– Insert screw driver supplied with the 4D-Nucleofector™ System in the
lower hole of the plug receptacle (gure 3.1, D)
–
Turn the screw manually counter-clockwise until the screw blocks
(may require > 60 turns). Turn back clockwise one full turn.
Further steps for both model variants (Both):
– Open the front ap manually (gure 3.1, E)
– Pull the tray cautiously towards you (gure 3.1, F)
– Remove the Nucleocuvette™ Vessels and rescue your cells
– Contact your Lonza representative to solve potential technical issue