OPTIONAL EQUIPMENT (CONTINUED) PAGE 41
Insulation Installation (required only for face seal installations)
1. With the insert drawn 12" away from the fireplace, glue the insulation strip included with the
surround panel kit to the back of the panels using RTV silicon or stove gasket cement. The
insulation should be installed so it overlaps the fireplace opening to form a seal between the
panels and the fireplace face. Let the silicon or cement dry.
2. Push the insert into the fireplace, insuring a seal is made with the insulation between the panels
and the fireplace face. Use a screwdriver to tuck any exposed insulation behind the panels.
Brass Trim Installation (Optional, for decorative purposes only)
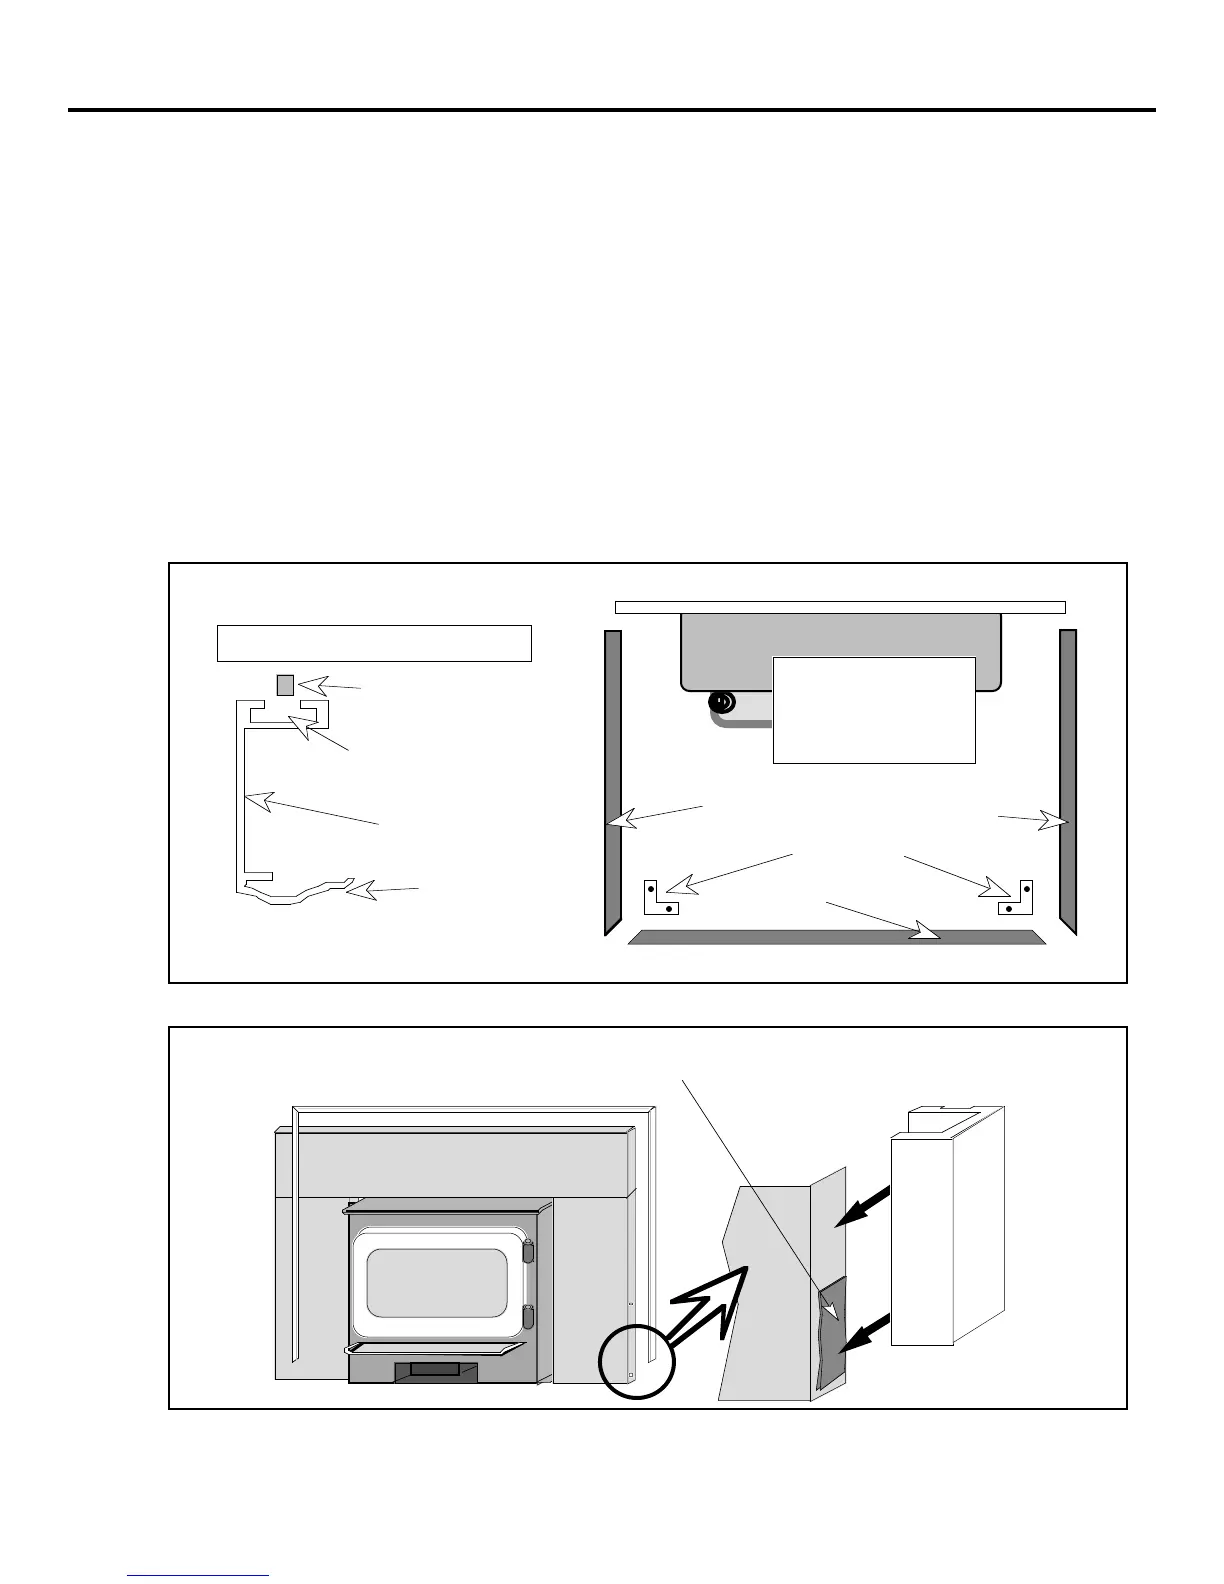
1. Lay the three pieces of brass trim on the floor in front of the insert. Arrange the brass trim so
that it resembles the illustration below. The rounded edge of the trim that will be facing
outwards when installed should be facing down.
2. Insert each "L" bracket leg into the groove in the 45° cut end of each side piece. Slide the other
leg of each "L" bracket into the groove in each end of the top piece. Tighten the four set screws
with a screwdriver into the "L" brackets, insuring that the 45° cuts are butted together to form a
neat joint. Pick up the brass trim and slide it over the top panel until the trim is flush with the
bottom edge of the top panel.
"L" Brackets
Top Trim
Left Trim
Right Trim
CROSS SECTION OF BRASS TRIM
Set screw that holds the
"L" bracket in place
Groove where the "L"
bracket fits into
Groove Where Top
Panel Fits Into
Front Side
Insert
Lay the trim on the
floor in front of the
insert with the rounded
portion facing down.
3. Some kits include double-back tape. For those kits, follow the instructions below.
Attach a square of double-back tape to each of the bottom corners of the surround
panels before installing the trim. This will keep the panels from flaring at the bottom.
Surround
Panel
Surround Panel
Brass Trim