p/n 18603-001, Rev. C LTV
®
1200/1150 Ventilator Service Manual Page 8-21
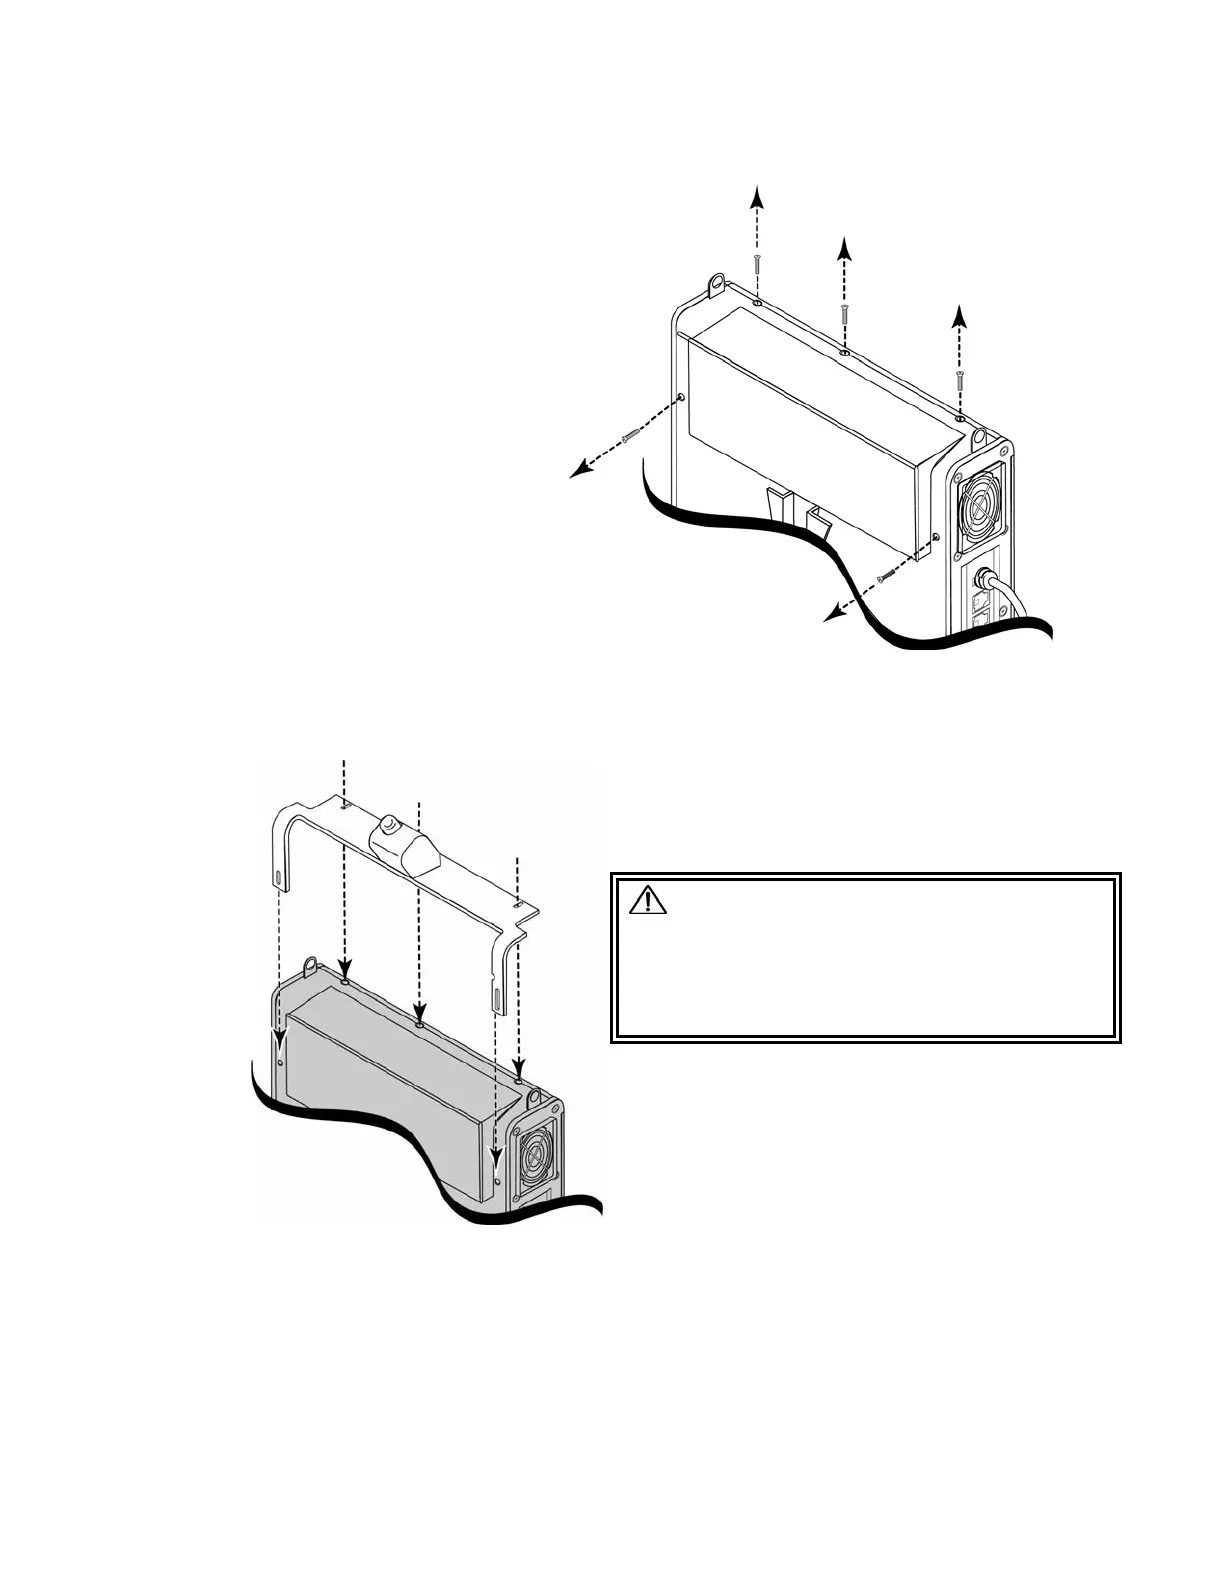
To attach the LTM mounting assembly (p/n 17916-001):
1) Place the disconnected
ventilator on a clean, dry
surface.
2) Use a Philips screwdriver and
remove the five screws from
the top and back panel of the
ventilator, as indicated in the
illustration.
3) Position the ventilator and mounting bracket as shown in the illustration.
4) Place the mounting bracket onto the ventilator and align the mounting bracket screw
slots with the corresponding screw holes in the ventilator.
5) Insert and thread five #4-40 X 3/8” pan-head screws (P/N 10879) through the screw
slots in the legs and top of the mounting bracket, as indicated in the illustration.
6) Torque tighten all five mounting screws to 60 in-oz (0.42 Nm). You may need to
apply some pressure to the back panel and housing to correctly align the threads
and insert the screws
WARNING
Mounting Screw Use – Internal damage to the
ventilator may result if the wrong length
mounting screws are used when installing or
removing external accessories.