p/n 18603-001, Rev. C LTV
®
1200/1150 Ventilator Service Manual Page 8-25
LTM/LTV
®
mounting bracket, reinstallation (for earlier model LTM)
Parts required for replacement: Tools required:
• Replacement Screws Kit, P/N 11149
Replace if damaged:
• LTM/ LTV
®
mounting bracket, P/N 11125
• LTM/ LTV
®
mounting Block, P/N 11146
• Phillips screwdriver with
torque meter
• 7/64” Allen wrench
To reinstall the LTM/LTV
®
mounting bracket:
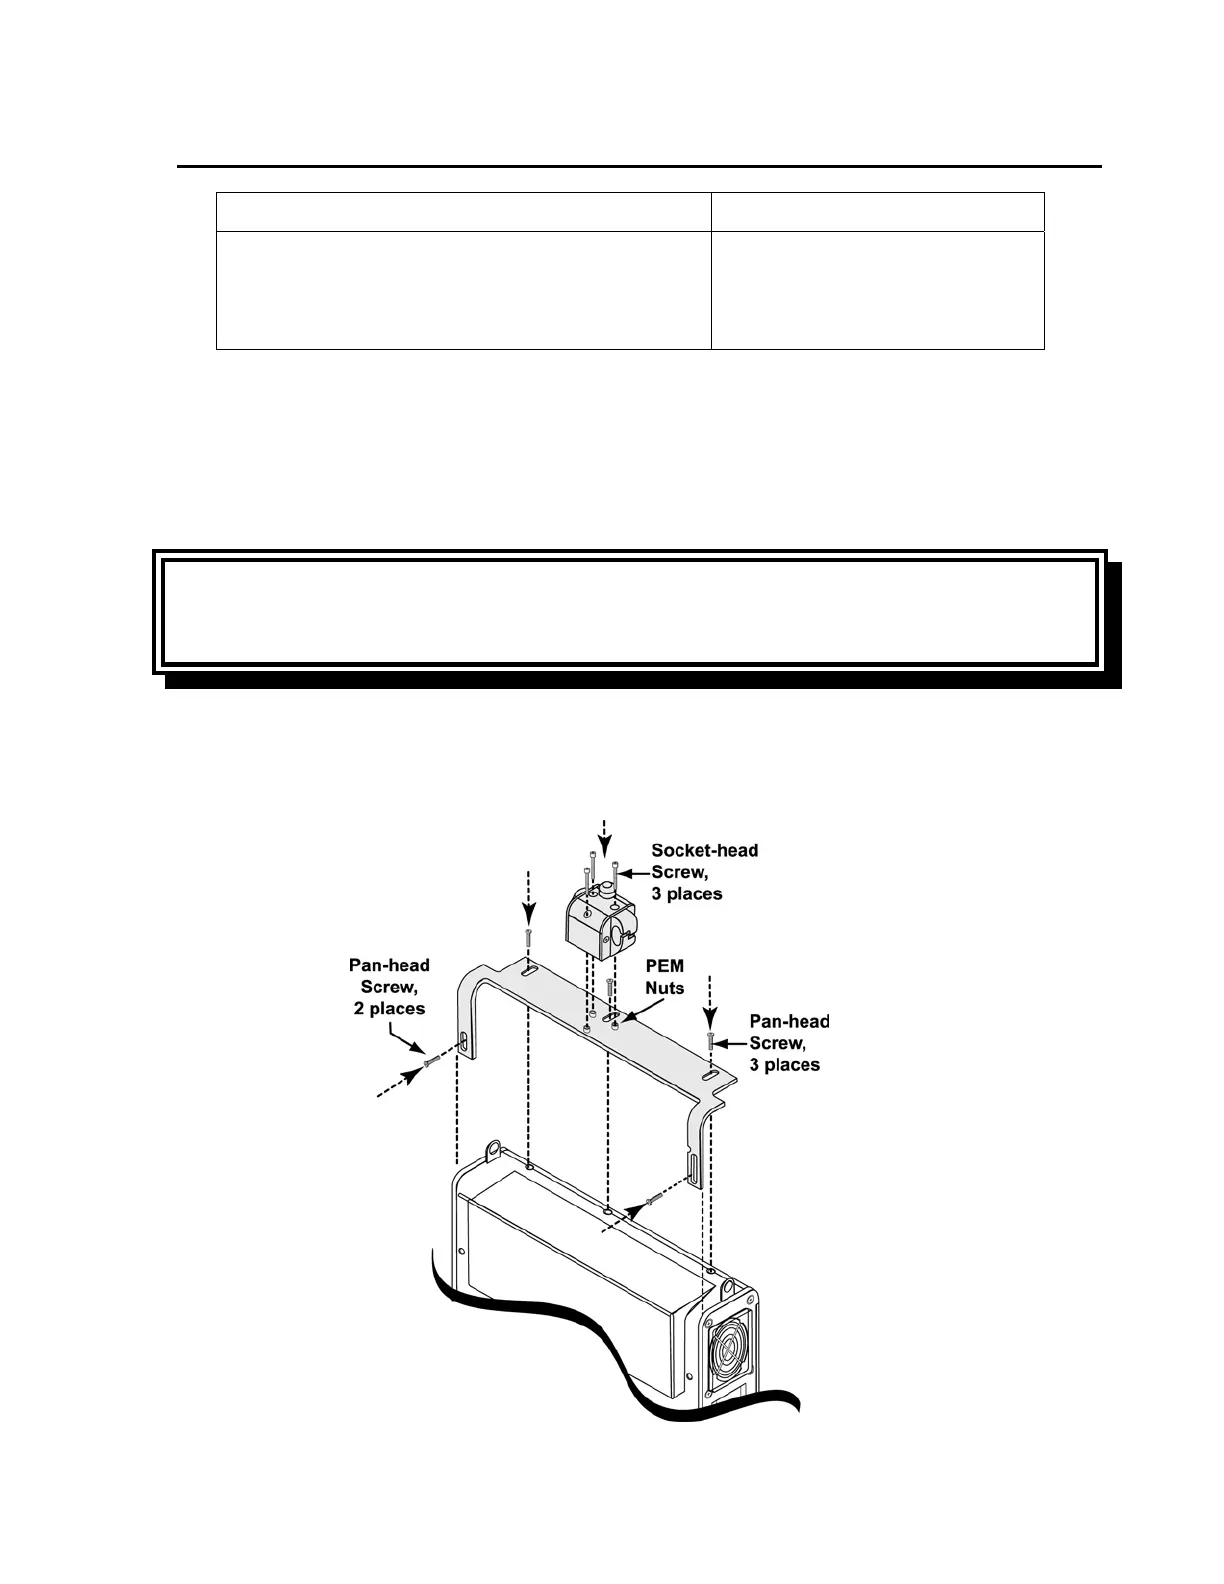
1) Orient the ventilator and mounting bracket as shown. Position the bracket on the
ventilator and align its screw slots with the screw holes in the ventilator back panel.
2) Insert five #4-40, 3/8” ventilator back panel mounting screws (P/N 10879) and torque
tighten to 60 in-oz (0.42 Nm). You may need to apply some pressure to the back panel
and housing to correctly align the threads and insert the screws.
WARNING
Screw location –Use of incorrect screws can cause ventilator failure and harm to the
patient.
3) Orient the mounting block to the mounting bracket as shown. Align its three counter
bored screw holes to the corresponding PEM
®
nuts on the bracket.
4) Insert three mounting block screws, use a 7/64” Allen-wrench and torque tighten to 60
in-oz (0.42 Nm).