Page 8-114 LTV
®
1200/1150 Ventilator Service Manual p/n 18603-001, Rev. C
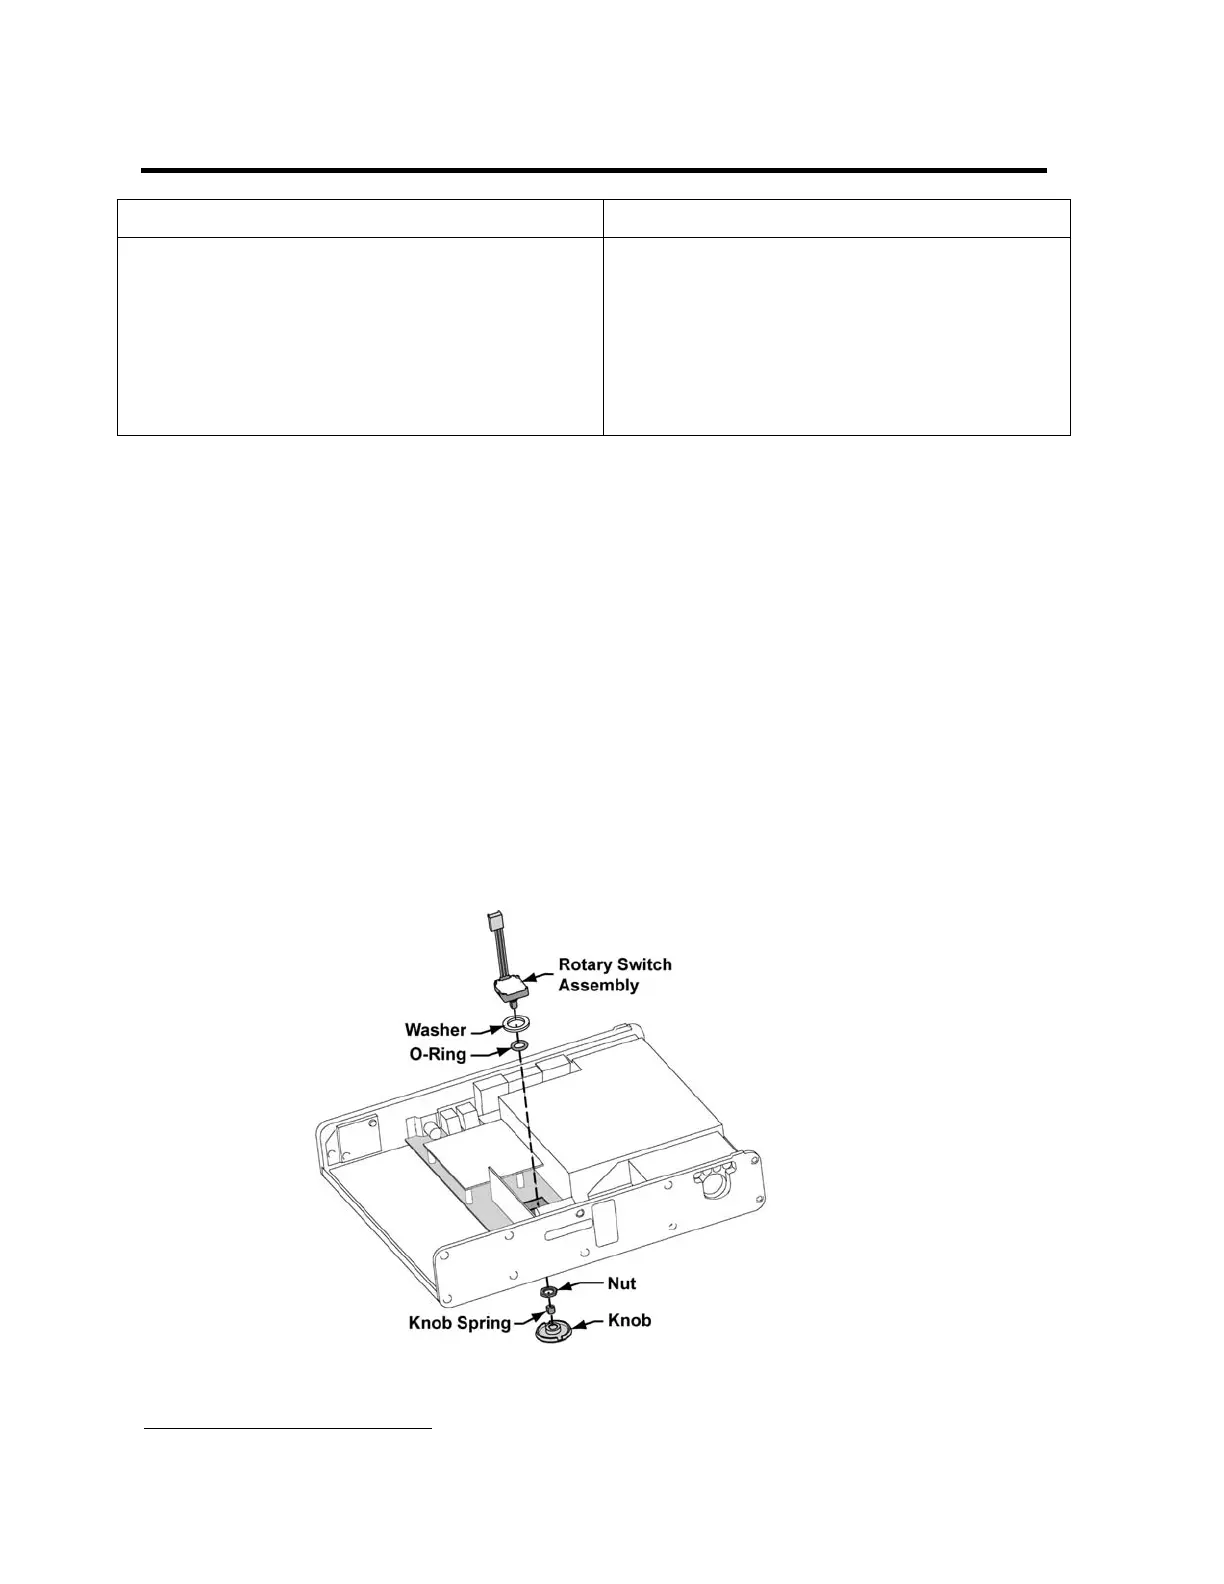
Rotary Switch (Set Value Knob) Assembly
Parts required for replacement: Tools required:
• Rotary Switch Replacement Kit P/N 14271
• Rotary Switch (with hex nut) P/N 11190
57
• Washer P/N 11644
57
• O-Ring P/N 11645
57
• Knob Spring P/N 10443
57
•
LTV
®
1200 Knob P/N 10111
57
• LTV
®
1150 Knob P/N 19037-001
• Phillips screwdriver with torque meter
• 2 small flat tip screwdrivers or dental picks
• 1/2” nut driver adapter for torque wrench
• 13mm nut driver adapter for torque wrench
• Grounded anti-static wrist strap
To remove and replace the Rotary Switch assembly:
1) With the ventilator face up, gently pry the knob off the rotary switch shaft using dental picks
or small flat-edged screwdrivers. There are 2 notches in the underside of the knob to make
this easier. Be careful not to damage the edge of the faceplate around the knob.
2) Remove the ventilator back panel and disconnect the internal battery cable (see instructions
on page 8-28).
3) Disconnect the 4-wire flow valve connector from the motor board.
4) Disconnect the Pisco connector from the oxygen pressure transducer on the analog board.
See diagram on page 8-33.
5) Disconnect the 3-wire flow valve connector from the power board.
6) Disconnect the flexible tubing from the airway pressure transducer on the analog board.
7) Remove the two (2) screws securing the accumulator to the turbine manifold spacer.
8) Move the accumulator, 4-wire flow valve cable and the tubing from the airway pressure
transducer aside.
9) Disconnect the rotary switch cable connector from the power board.
10) Use a 13 mm nut driver to remove and discard the retaining nut from the front of the
ventilator.
57
Contained in Rotary Switch Replacement Kit P/N 14271