Top climate system
with LUBING Touch Controller
Copyright © Lubing System - All rights reserved
21
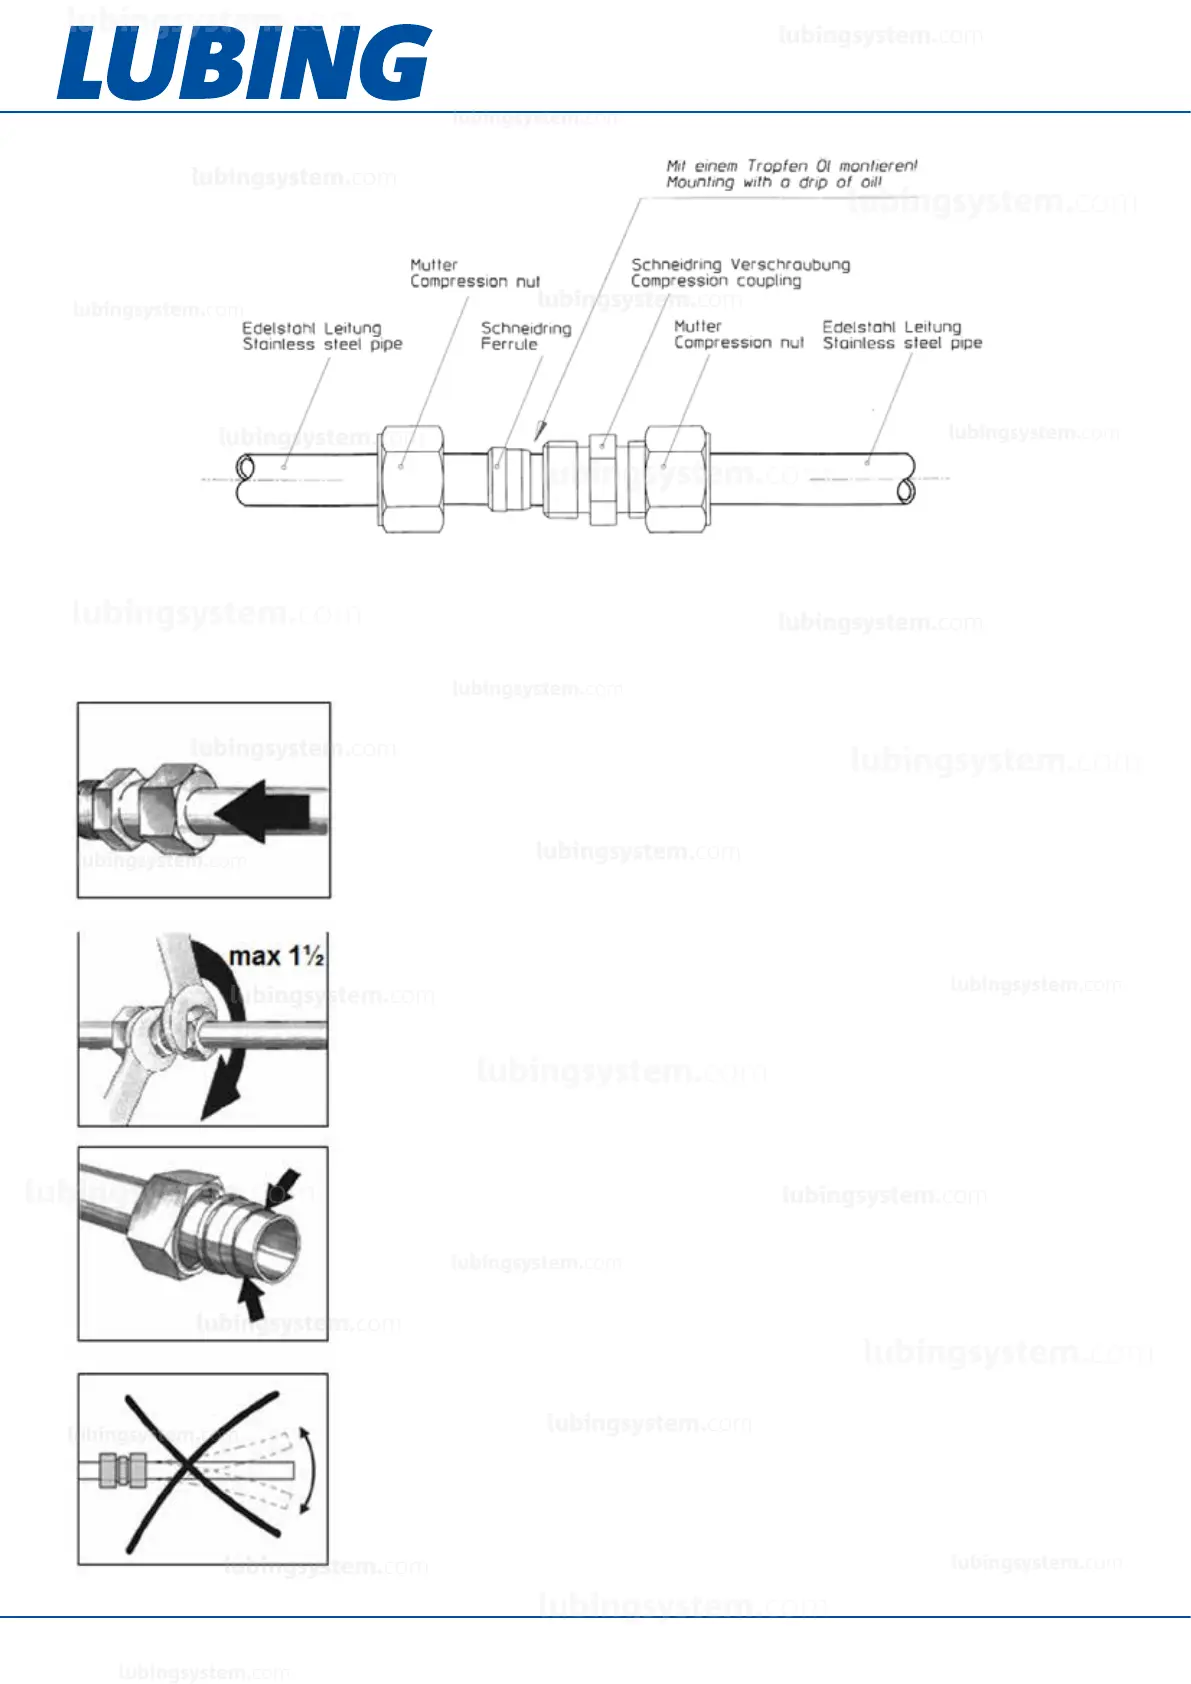
Required assembly tools:
Open-end wrenches (size 17/19/22), oil
The basic requirement for installation is a right-angled cut pipe end that is clean and burr-free.
Proceed as follows during assembly:
– Lightly oil the cutting ring and thread
– First push the union nut onto the pipe, then the cutting ring with cutting
edge pointing towards the pipe end.
– Screw on the union nut by hand until you feel the contact. Press the pipe
against the stop in the inner cone.
Note: Non-contact of the pipe end with the stop leads to incorrect assembly.
– Tighten union nut max. 1/2 revolutions. Hold the screw connection piece
with a wrench. The pipe must not rotate.
– To check correct assembly, loosen the union nut and check whether the
visible collar has formed on the pipe in front of the cutting edge (collar throw-up).
Then retighten the nut.
– After each loosening, the union nut must be tightened without increased
effort.
Never load screw connections with bending.
– Always mount the nozzle lines in their nal position and support them during
assembly.
– Do not mount nozzle lines on the ground.
lubingsystem.com
lubingsystem.com
lubingsystem.com
lubingsystem.com
lubingsystem.com
lubingsystem.com
lubingsystem.com
lubingsystem.com
lubingsystem.com
lubingsystem.com
lubingsystem.com
lubingsystem.com
lubingsystem.com
lubingsystem.com
lubingsystem.com
lubingsystem.com
lubingsystem.com
lubingsystem.com
lubingsystem.com
lubingsystem.com
c
lubingsystem.com
lubingsystem.com