Top climate system
with LUBING Touch Controller
Copyright © Lubing System - All rights reserved
25
4.5.7 Installation of nozzles
This installation step can only follow after installation and ushing of all lines (see chapter 4.1 “First start-up”).
The nozzles are screwed by hand (max. 1-1.5Nm) into the adapters of the nozzle lines. When screwing in, also
check the nozzle heads for tight t. There should be a free space of at least 3m in the spraying direction of the
nozzle. If there are obstacles in this free space, individual adapters can be closed with plugs (art. 7326).
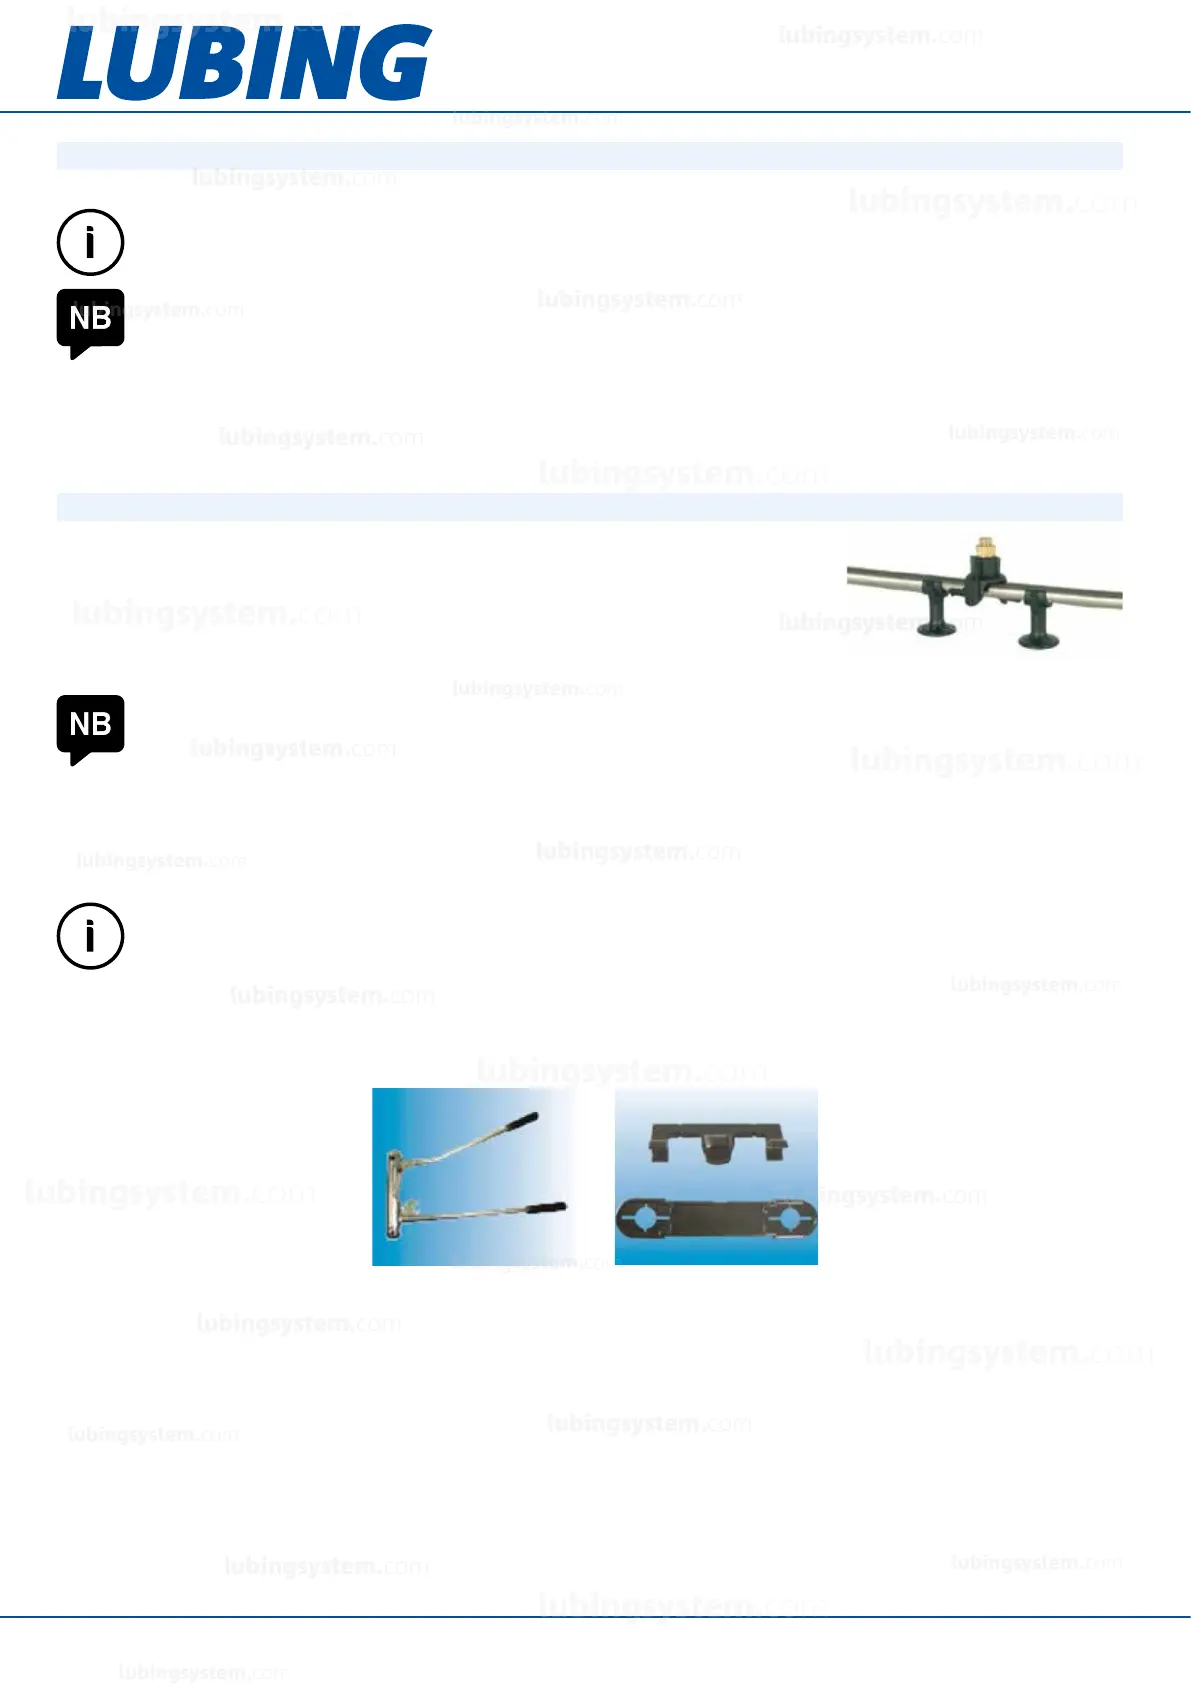
4.5.8 FlexClamp system
The FlexClamp system is an alternative to the nozzle lines with welded-on nozzle
adapters. This system enables exible installation of the spray nozzles at a desired
position after the pressure lines have been installed in the barn.
The pipes must rst be xed to the wall with the pipe holder (art. 7830) or suspended from the ceiling with a tension
wire or a support pipe.
Required assembly tools:
Hole pliers FlexClamp (art. 7880)
Mounting tool FlexClamp (art. 7840)
Placement of the holes:
Distribute the holes evenly throughout the house. Do not place holes closer than 10 cm to a tting. If possible, try
to place the holes in front of the air inlets. The holes must not be punched in such a way that the spray mist hits
climate sensors directly. The pipes have a longitudinal weld. The holes must be made opposite this weld.
Punch the nozzle line:
The hole angle can be adjusted using the level indicator on the punch pliers and checked during punching.
The nozzles should spray approx. 5-10° upwards (other angles may also be useful depending on the ambient
conditions). When punching, press the pliers together completely to ensure an optimum sealing t on the pipe.
IMPORTANT INFORMATION
Before mounting the nozzles, the system has to be ushed to ush dirt from transport and mounting out
of the system and to ensure proper operation of the nozzles.
IMPORTANT INFORMATION
Before installing the FlexClamp nozzles, the system should be ushed to ush dirt from transport and
mounting out of the system and to ensure proper operation of the nozzles (see chapter 4.1 “First start-
up”).
NOTE
The ushing and screwing of nozzles must be done gradually, starting from the pump unit. Only screw
nozzles into adapters that have been thoroughly rinsed.
NOTE
– Only stainless steel pipes ø12x0.8mm (art. 7827) may be used for the FlexClamp system. Only this
pipe can be punched with the special hole pliers.
– The pipes must be oriented so that they are not perforated on the longitudinal weld.
– The stainless steel pipes ø12x0.8mm cannot be bent.
– Use the connecting pipe ø12x1mm (art. 7327) at bending points.
Art. no. 7880 Art. no. 7840
lubingsystem.com
lubingsystem.com
lubingsystem.com
lubingsystem.com
lubingsystem.com
lubingsystem.com
lubingsystem.com
lubingsystem.com
lubingsystem.com
lubingsystem.com
lubingsystem.com
lubingsystem.com
lubingsystem.com
lubingsystem.com
lubingsystem.com
lubingsystem.com
lubingsystem.com
lubingsystem.com
lubingsystem.com
lubingsystem.com
c
lubingsystem.com
lubingsystem.com