www.lynxspring.com
®
USER GUIDE
Lee’s Summit, MO 64086
sales@lynxspring.com
All Rights Reserved
Revised 2/1/2019
JENE-EG534-V2
Page 6 of 31
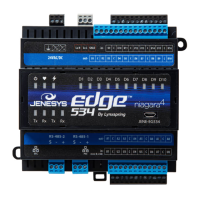
JENEsys Edge 534 Startup procedure
The startup of the JENEsys Edge 534 – AX is a two-step process as follows:
1. Commissioning the controller with 3.8.111 or 3.8.401, installing the latest Onyxx Driver, and;
2. Updating the Onyxx system version
From your PC, use the Niagara Workbench 3.8.111 or 3.8.401 installed with the “installation tool” option (checkbox
“This instance of Workbench will be used as an installation tool”). This option allows you to install necessary core files onto the
controller.
Download the latest Onyxx Driver package from our website, which includes necessary Niagara core files, a cleanDist file,
onyxxDriver.jar, platOnyxx.jar, and instructions. Follow the instructions provided in the driver package to arrange the files
appropriately, then to commission the controller and update the Onyxx system version. A station with an Onyxx Network is
required to initiate the Onyxx system version update. See Onyxx Network Quick Start for details on how.
Onyxx Network Quick Start
This section provides a collection of procedures to use the onyxxDriver to make Onyxx Proxy Points, the station interface to
physical I/O points. As with other NiagaraAX drivers, you can do most configuration from special “manager” views and property
sheets using Workbench.
Configure the onyxxNetwork
To add and configure the onyxxNetwork, perform the following main tasks:
• Add an onyxxNetwork
• Discover and add Onyxx Devices
Add an onyxxNetwork
Use the following procedure to add an onyxxNetwork under the station’s Drivers container.
To add an onyxxNetwork in the station:
Step 1: Double-click the station’s Drivers container, to bring up the Driver Manager.
Step 2: Click the New button to bring up the New DeviceNetwork dialog.
Step 3: Select onyxxNetwork, ensure number to add is 1, and click OK. This brings up a dialog to name this
network.
Step 4: Click OK to add the onyxxNetwork to the station.
Discover and add Onyxx Devices
In the Onyxx Driver architecture, file directories act as “device-level” components.
To discover Onyxx Devices:
Step 1: Double-click the onyxxNetwork to access the Device Manager.
Step 2: Click the Discover button to launch an Onyxx Device Discovery job.
Step 3: When complete, discovered Onyxx Devices are displayed in the top pane in the “Discovered” table. The
bottom pane, labeled “Database,” is a table of Onyxx Devices that are currently mapped into the Niagara station.
The database will remain empty until a device is added.
Step 4: Click to highlight the discovered Onyxx Device(s) you wish to add, then click the Add button. The Add
dialog appears, in which you can accept all defaults (
Figure 3-5).
Step 5: Click OK to add the Onyxx Device(s) to your station.
Manually adding Onyxx Devices
Manually add Onyxx Devices, using the New button in the Device Manager.
Add Onyxx Proxy points
As with device objects in other drivers, each Onyxx Device has a Points extension that serves as the container for Proxy
points. The
onyxxDriver Point Manager is used to create Onyxx Proxy points under any Onyxx Device.
This section provides quick start procedures for both tasks, as follows:

 Loading...