19
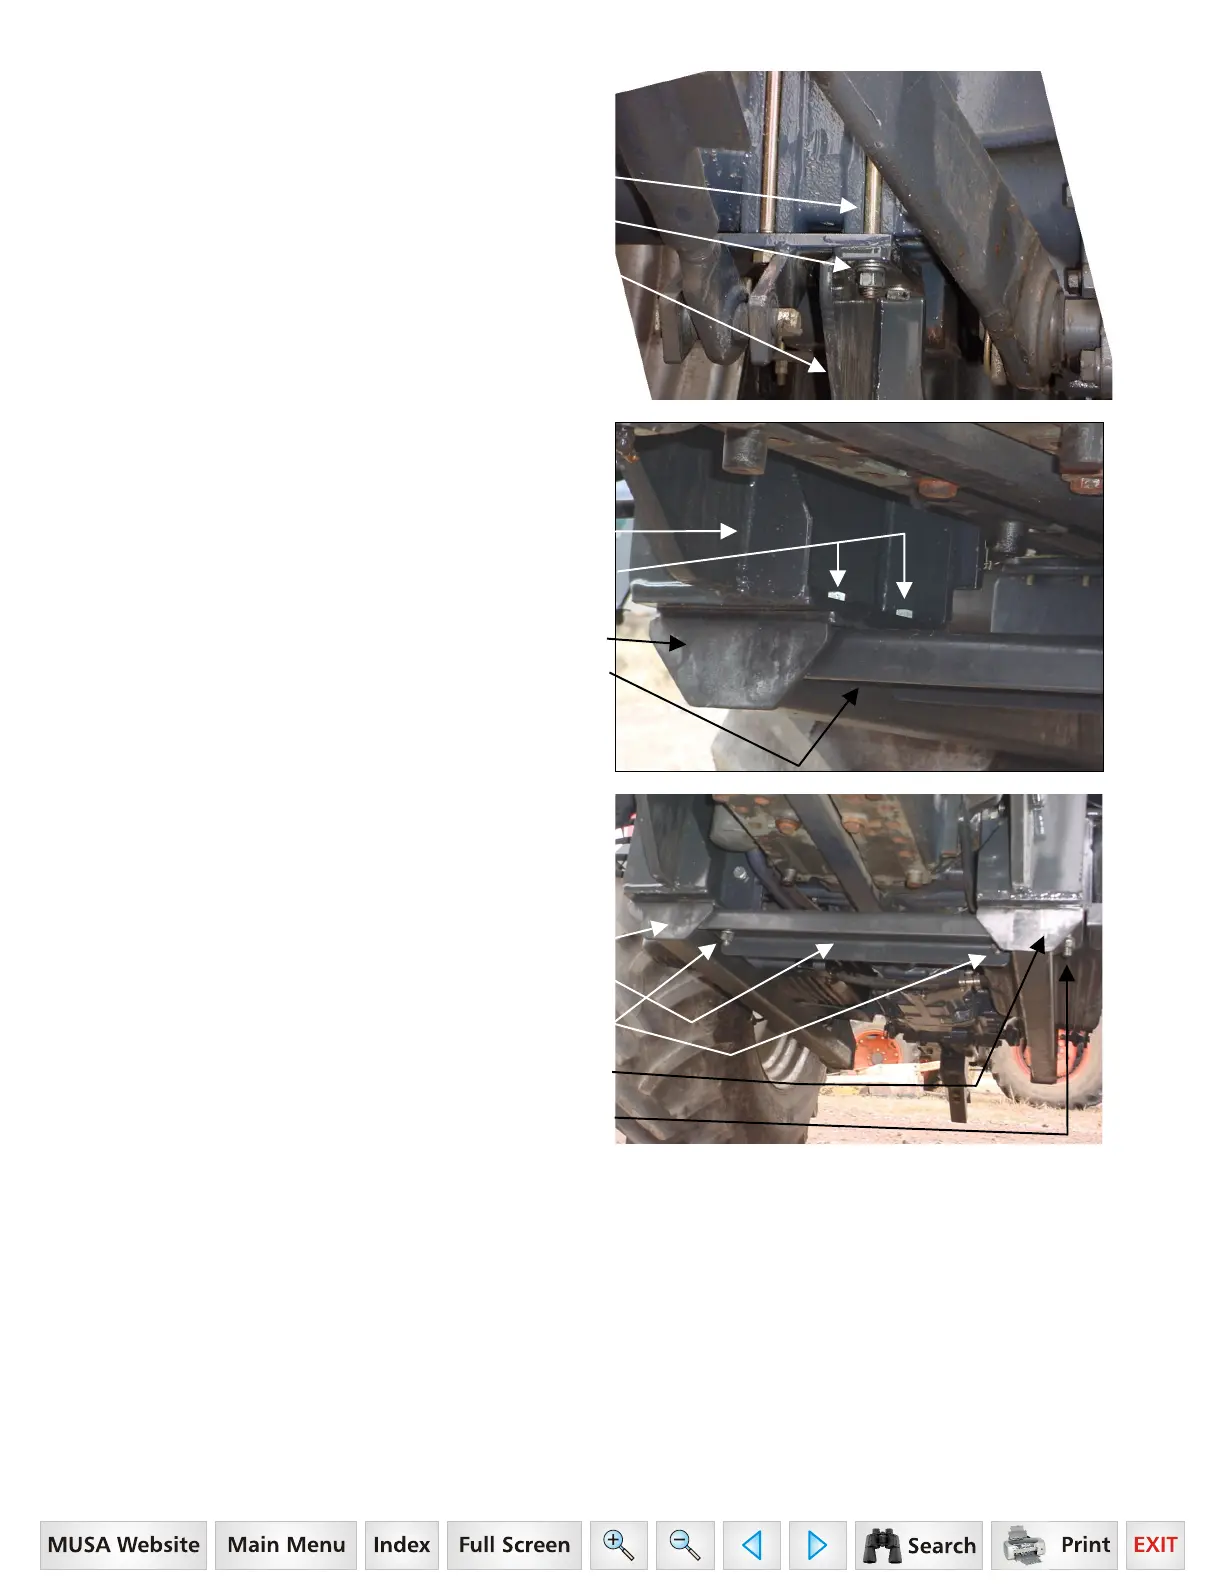
3.2.9. Install rear rail to rear axle as shown re-using
bolts and lockwashers just removed along with 1/2"
flatwashers included with mounting kit.
Position of bolts previously removed.
Tractor Bolt and Lockwasher along with
Mounting Kit 1/2" Flatwasher, 2 places each side
Rear Rail, 1 place each side
3.2.10. Remove hoist from center bracket.
3.2.11. Install opposite brackets using previous
instructions.
3.2.12. Install crossbrace to RH and LH center brackets
using 5/8" x 2" hex bolts Grade 5, lockwashers,
flatwashers, and hex nuts, 2 places Inside only.
RH Center Bracket
5/8" x 2" Hex Bolt Grade 5,
5/8" Lockwasher, and 5/8" Hex Nut,
2 places each side inside only
RH Rear Rail
Crossbrace
3.2.13.
Reference Photo:
5/8" x 1-3/4" hardware, securing rear rail to center
bracket is located in outside 2 holes.
5/8" x 2" hardware, securing crossbrace and rear rail to
center bracket is located in inside 2 holes.
RH Rear Rail
Crossbrace
5/8" x 2" hardware,
inside 2 holes each side
LH Rear Rail
5/8" x 1-3/4" hardware,
outside 2 holes each side
NOTE: Do not tighten any of the crossbrace
hardware until all other mounting bracket hardware
is torqued to specifications.
CRITICAL: Torque all mounting kit hardware.
 Loading...