3-10
NOTE: Steps d. through g. below are specific to each probe:
o ST Probe
or
o U/S Probe
or
o EX Probe
ST Probe Only
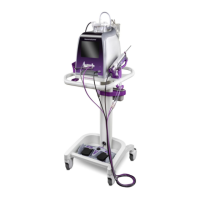
NOTE: Ensure the holster’s firing fork is securely tightened before attempting to load the probe. If it is
loose, use a coin to tighten it. DO NOT OVER-TIGHTEN.
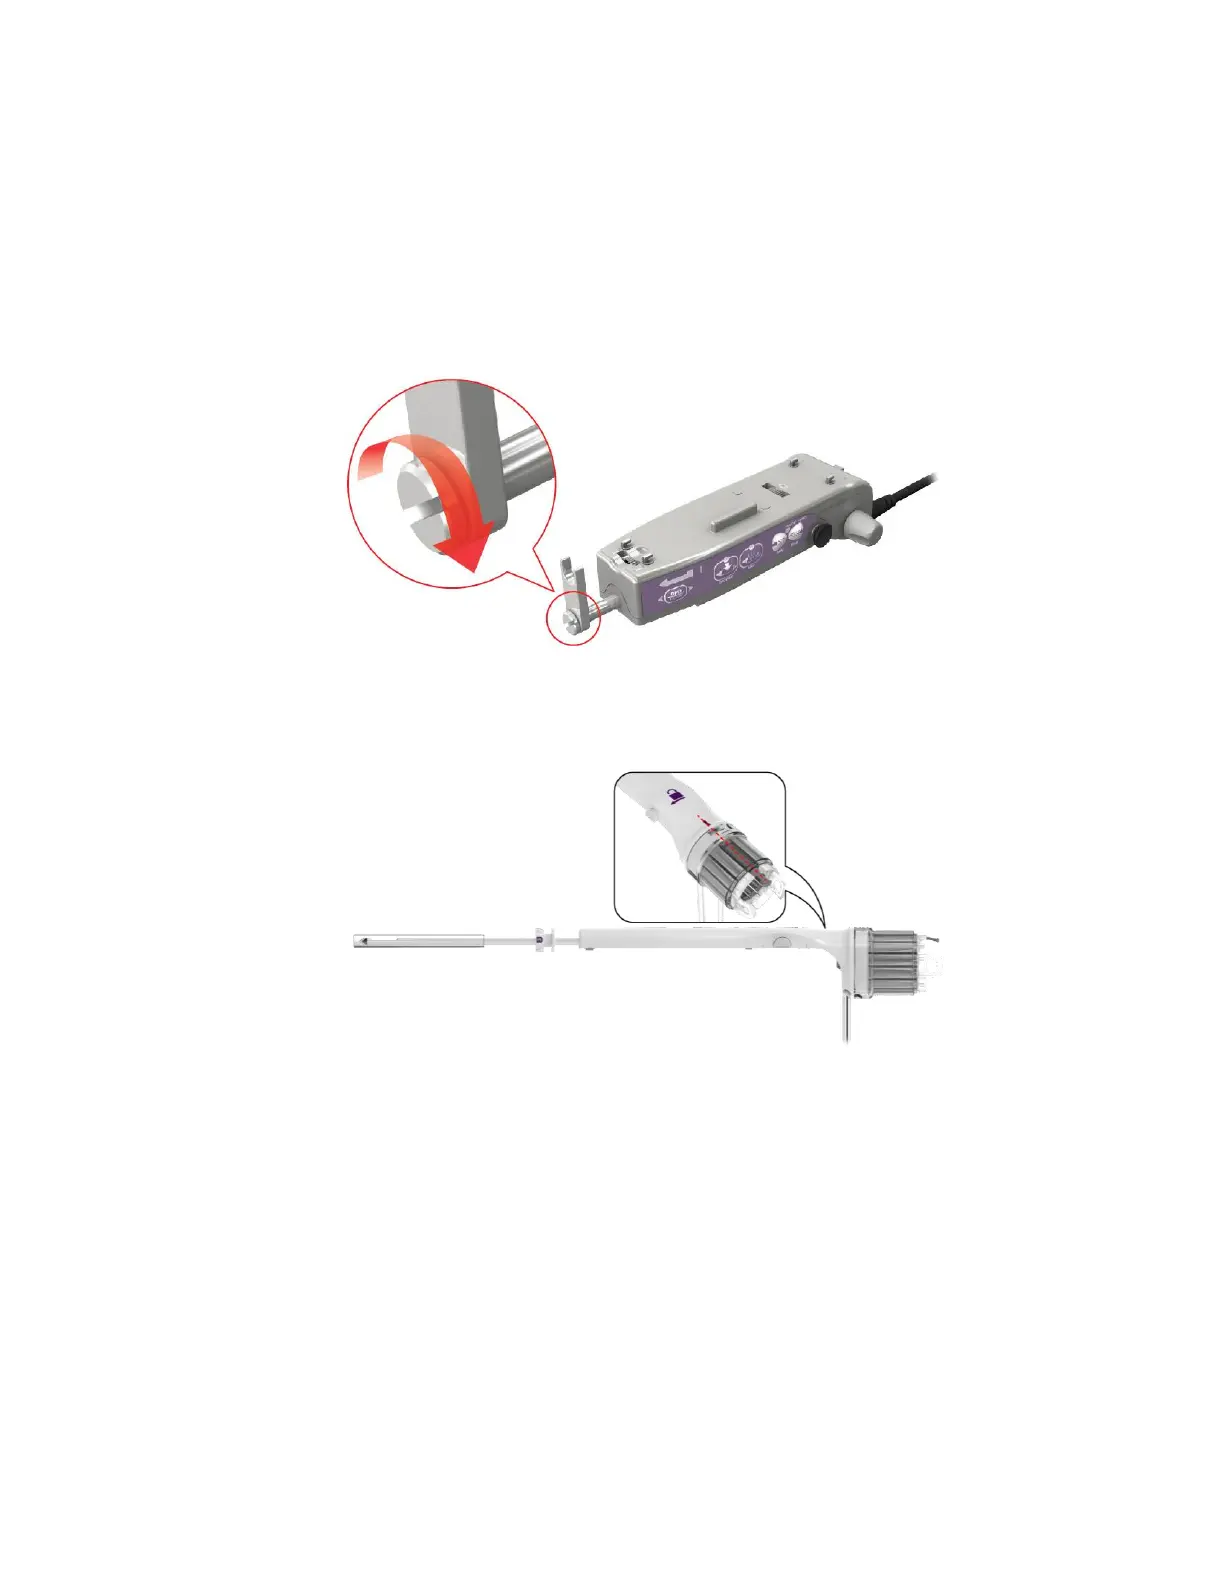
d. Before the probe is attached to the holster, ensure that the Specimen Management System’s marker
port is aligned with the alignment indicator on the probe body, as shown below. Ensure the SMS is
fully seated on the probe, and that the tissue strips are fully seated in the SMS chambers.
NOTE: Ensure the probe’s vacuum tubing is to the right of the holster electrical cable when loading
the probe onto the holster.
e. Grasp the probe body and engage the probe thumbwheel slot with the holster firing fork, then engage
the probe alignment slot with the holster alignment mount.
f. To attach, align the needle hub, press down, and forward. Do not force. Take care to avoid pinching
the vacuum lines in the holster.