12
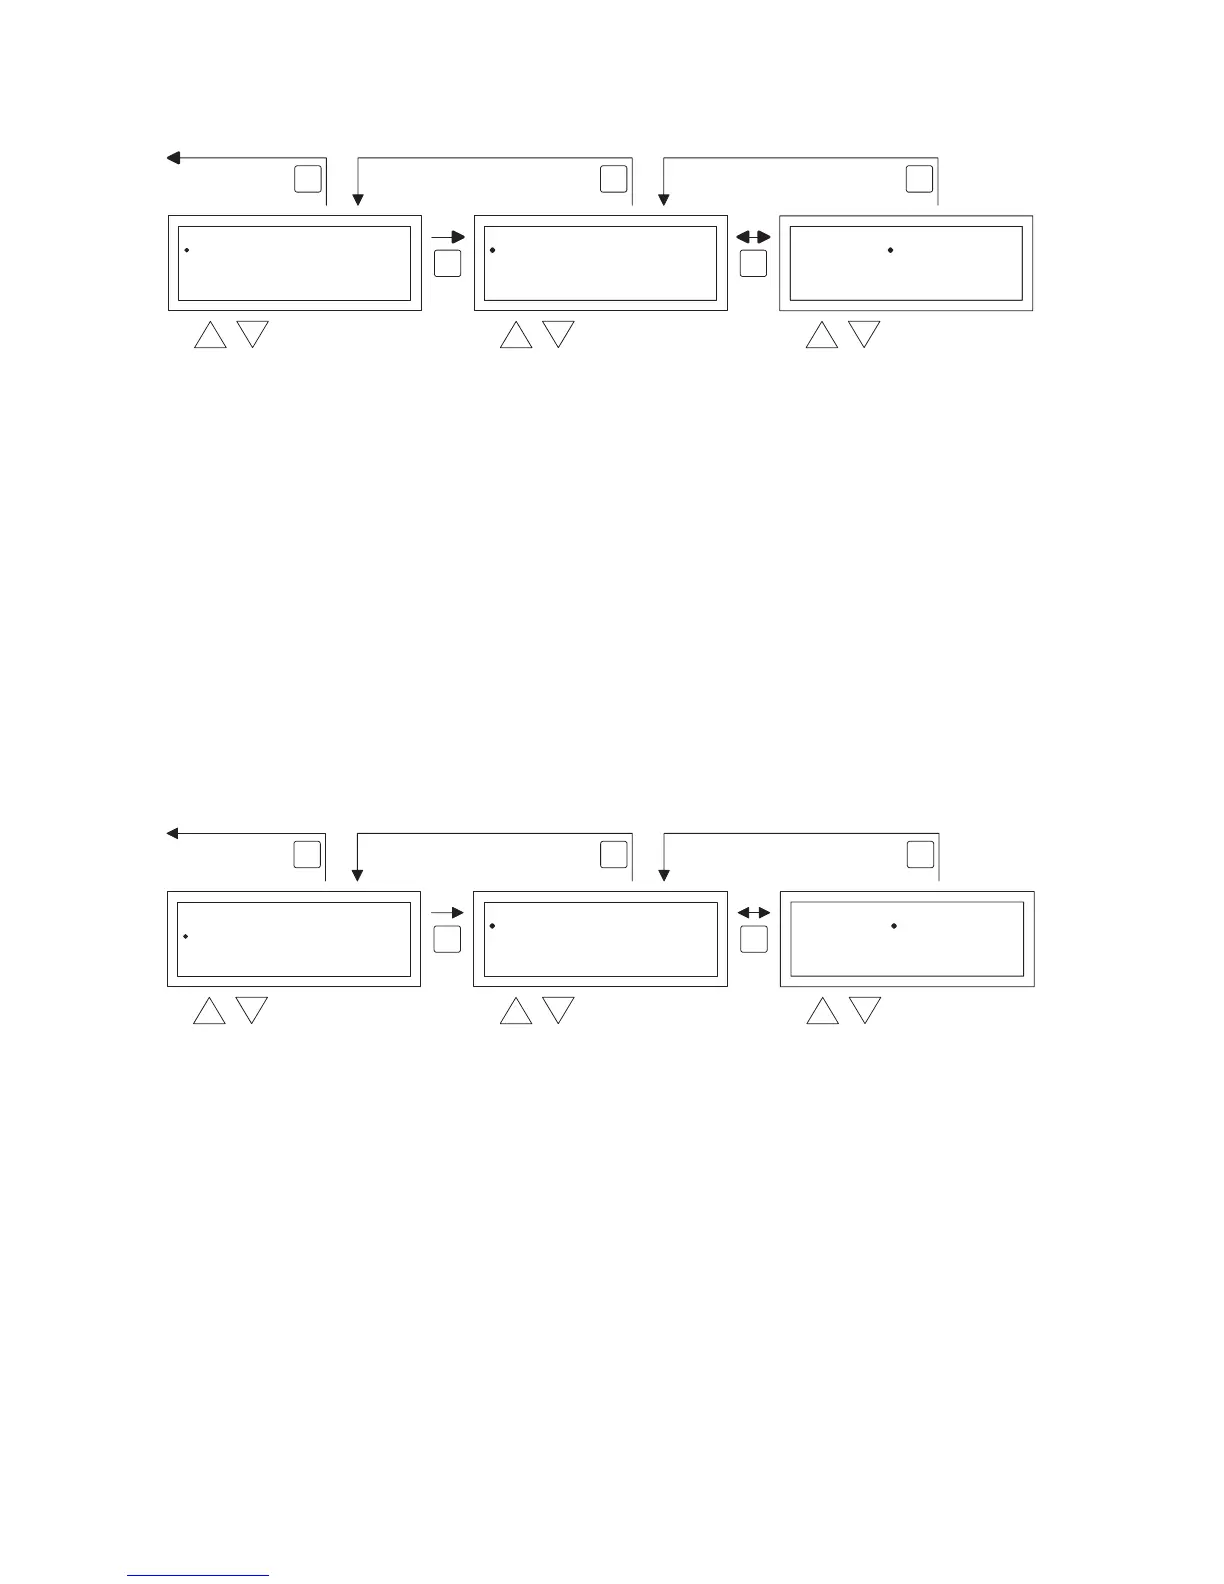
5.2 User menu: change the temperature setting
To change the temperature setting you follow the images below.
•
In the user menu select the menu-item temperature and then push the OK push-button.
•
With the and button, select the mode of operation which you wish to change and con-
rm this with the OK button.
•
The display jumps to the temperature setting of the chosen mode of operation. With
the and button, change the temperature setting and conrm this with the OK button.
Follow the steps above to change the other temperature settings.
When you are nished with changing the temperature settings:
•
After the last change you press the OK button to conrm this.
•
Then you push the ESC button to go back to the user menu again.
5.3 User menu: change/set the clock program
To adjust the existing clock program or to enter new times:
•
You select the menu item clock program and then you push the OK button.
•
Now change the existing clock program or input a new clock program following the images
below.
•
Now with the and button, you select the menu-item program and then push the OK but-
ton
•
With the and button, select a new or existing program block (1 to 20) and then push the
OK button.
•
Now with the and button, you select Day and then push the OK button
•
Now with the and button, you change to the desired days and then push the OK button
again.
(12345, 1234567, 1, 2, 3, 4, 5, 6, 7, 67, 2345 or off).
1=Monday, 2=Tuesday, 3=Wednesday, ……, 6=Saturday, 7=Sunday
•
Now with the and button, you select the switch time program and then push the OK
button
•
now with the and button you change the hours and minutes from the start and end times,
in that order. Conrm each entry with the OK button after which the display goes automati-
cally to the following entry. After you conrm the last entry you automatically go back to the
menu-item clock program
User Menu
Clock Program
Special day
Settings
Temperature
OK OK
ESC ESCESC
 Loading...