2.2 Factory settings
•
Temperature : Day 18°C
Eco 15°C
Night 08°C
Frost 05°C
•
Clock program : Program block 1
Day 12345
Switch time 08:00 >> 17:00
Switch to Day
•
Exception day : off
•
overtime timer : Maximum setting time 03:00hrs
Switch to Day
•
Ventilator high/low : Day High
Eco High
Night High
•
Heater high/low : Heater High
Differentiation 1.0K
•
Selection temperature sensor : Sensor Thermostat
•
Calibrate temperature sensor : 0.0°C
•
Summer / winter time : Automatic
•
Pin code : 1 0 0 0
3.0 Installation and initial starting
3.1 General
•
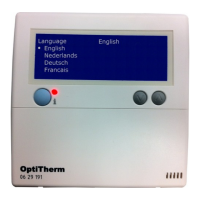
After unpacking check the OptiTherm and if also ordered, the external sensor(s) delivered with
it for damage.
•
At the same time check the correctness of the type/model
(Thermostat: OptiTherm 06 29 191, external sensor: Digital sensor conc. 2 Wires 0629194).
Contact the supplier if the thermostat is damaged or it is not the correct type/model.
3.2 Positioning
In order to determine an appropriate place to mount the OptiTherm you must consider the
points below:
– Place the OptiTherm in the room to be heated, because it is supplied with an internal room
sensor. This is not applicable when an external sensor (optional deliverable) connected to the air hea-
ter(s).
– Mount the OptiTherm in a draft free location
– Do not mount the OptiTherm on a cold wall/partition.
– Do not mount the OptiTherm directly in the airow of the air heater(s).
– It is advised to place the OptiTerm at a distance of ±1.5m from the oor.
5
EN