OP32 – Installation manual
4. INSTALLING THE TRANSMITTER
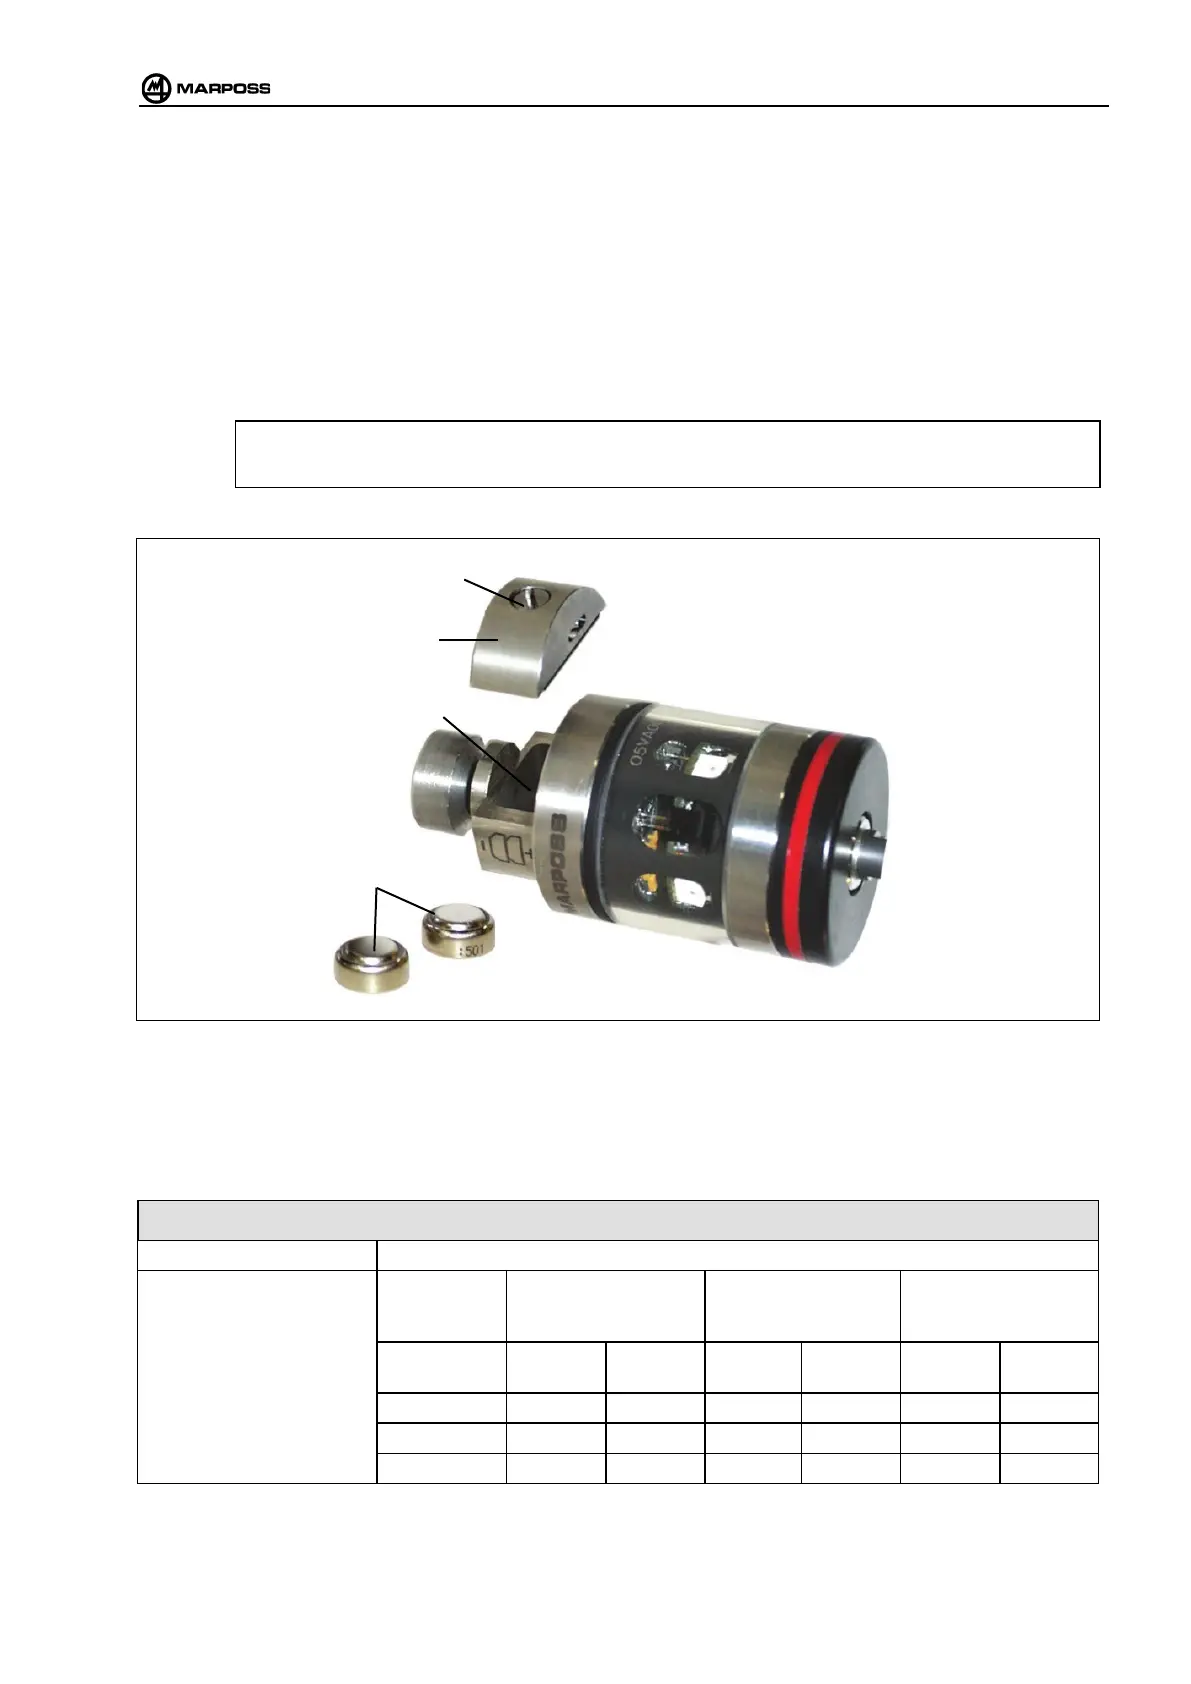
4.1 Inserting/substituting the OP32 transmitter battery
The OP32 transmitter uses two Alkaline SR44 -1.55V batteries.
The batteries (A) are housed in the battery compartment (B); to access them:
• remove the cover (C) undoing the screws with a screwdriver (D).
• Insert the battery, ensuring the polarity is correct (see indications on the probe body).
• Replace the cover, taking care not to damage the seal.
N.B.
The batteries are supplied separately, remember to insert them before installing the transmitter.
Figure 4-1. OP32 Inserting/substituting the batteries.
Battery duration depends how long the transmitter is used for, and the type of battery in use. As there is know way of
knowing the exact usage pattern, the duration is given based on the type of battery in use and in conditions of:
continuous use; use at 5%; and standby.
Table 4-1. OP32 Transmitter battery duration.
- ENERGIZER EPX76
- DURACELL D357H
With new batteries
indicator first appears
From the first time
until final shutdown
With new batteries
until final shutdown
OPERATING
CONDITIONS
Hours Days Hours Days Hours Days
In stand-by 8600 ≈358 1000 ≈42 9600 ≈400
Use at 5% 1500 ≈62 150 ≈6 1650 ≈68
Continuous 90 ≈4 10 ≈0,4 100 ≈4