OP32 – Installation manual
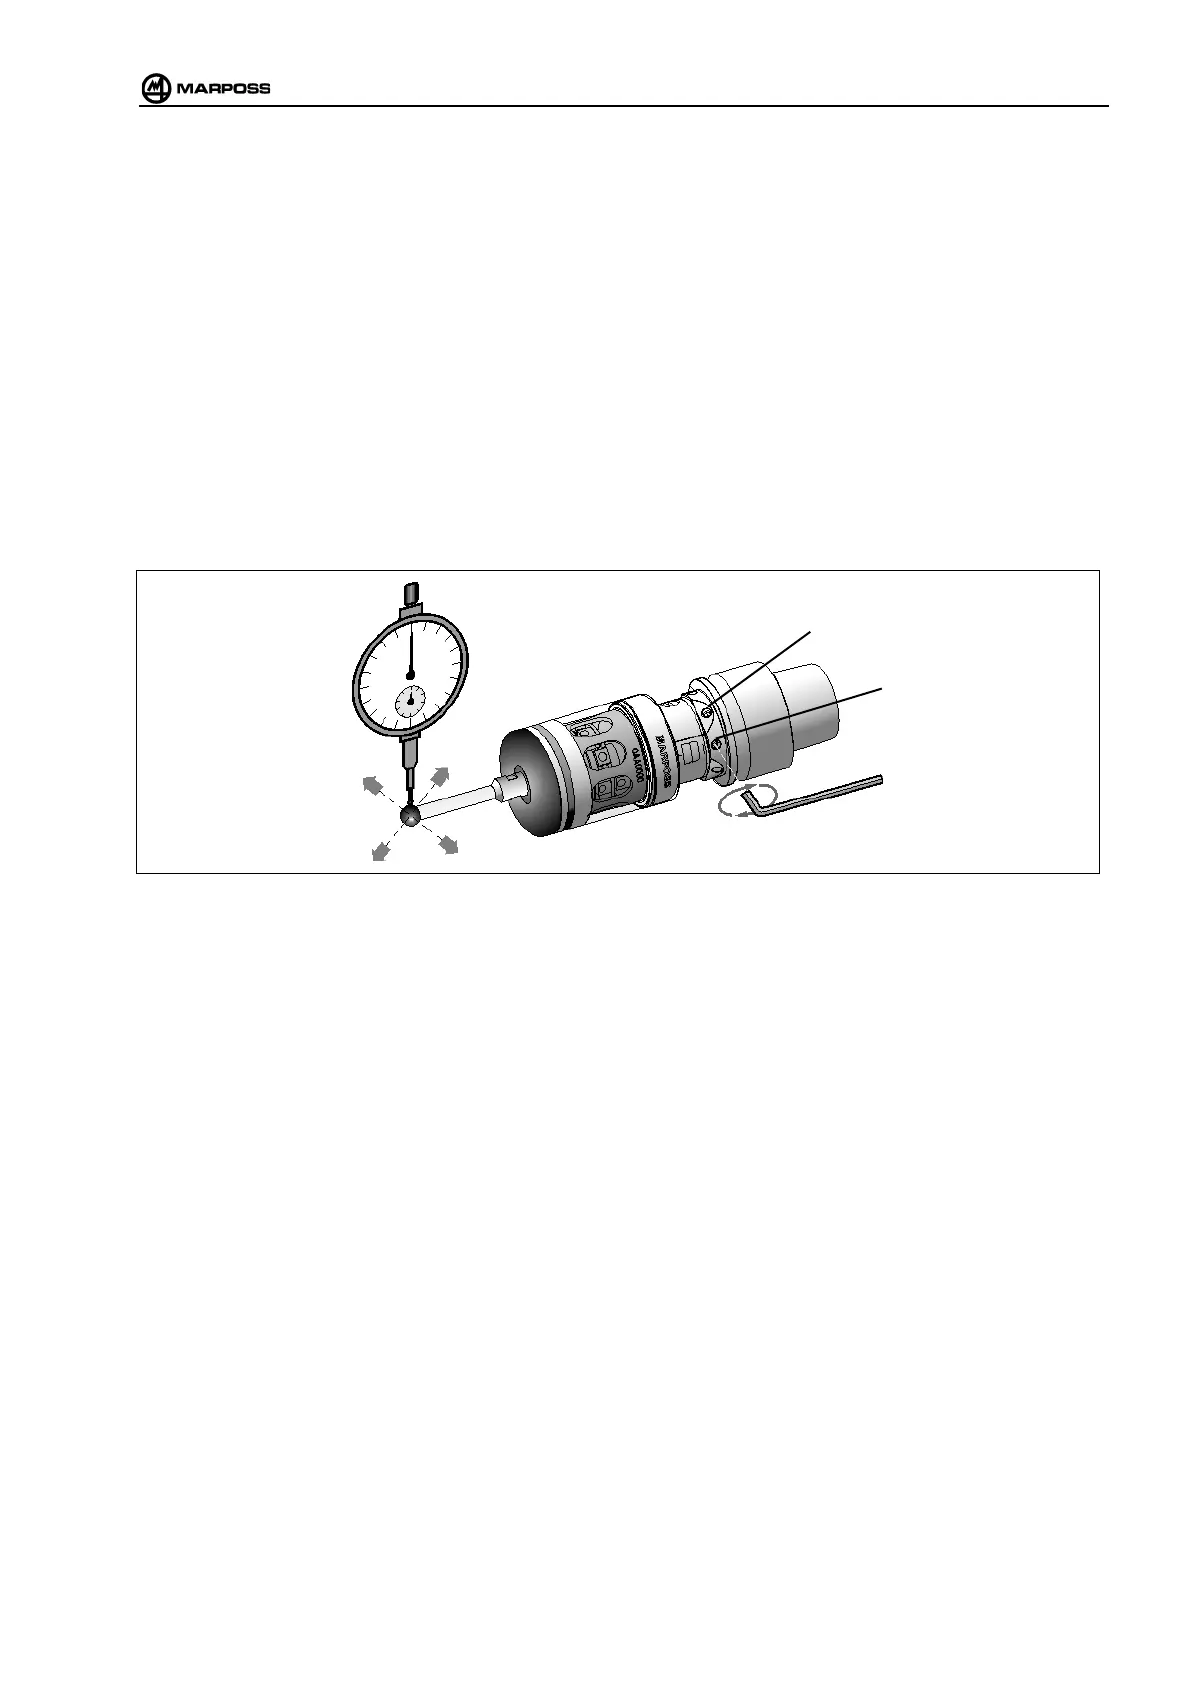
4.3 Installing the transmitter/probe on the cone
• Loosen the 8 grub screws on the cone
• Insert the probe body extreme (shank) into the cone up to the stop.
• Roughly centre the probe, gently tightening the grub screws.
4.4 Aligning the system
• Mount the finger on the probe (see para. 4.5 "Installing the finger").
• Roughly align the centre of the finger ball with the cone axis by adjusting the four grub screws (B).
• Adjust the probe with respect to the axis by tightening and loosening the screws in order to move it along the X
and Y axes. To move the probe in a given direction, tighten one screw and loosen the opposite one. In order to
achieve eccentricity below 20micron it may be necessary two adjust two screws in order to obtain an oblique
movement.
• Once the probe has been centred, first tighten the grub screws (A) that secure the probe to the cone to
0,6 Nm, then the aligning screws (B).
Figure 4-3. Mounting the transmitter on the cone.