Do you have a question about the marposs P3UP and is the answer not in the manual?
Describes product compliance with key safety and EMC directives.
Information on hazardous substances and conflict minerals with links.
Guidelines for proper disposal of electronic equipment for users.
Contact, address, and location information for Marposs S.p.A.
Model, manual code, language, and issue details of the P3UP.
Introduction, user warnings, and original language details.
Information on product warranty, technical support, and spare parts.
Explains manual conventions and key symbols used.
Describes the location and content of the P3UP identification plate.
Covers directives, conformity, operator roles, PPE, and general procedures.
Details authorized/unauthorized usage and residual risks specific to P3UP.
Covers PPE, training, work equipment state, moving loads, receiving material.
Procedures for packing, moving, transporting, and disposing of packaging.
Specifies environmental and physical conditions for storing the P3UP.
Prerequisites, environmental conditions, and prohibitions during installation.
Details type of environment, temperature, humidity, altitude, etc.
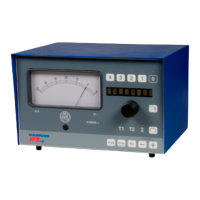
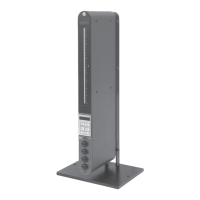
Describes the two available P3UP versions.
Details the rear panel connectors and their functions.
Lists key specifications like structure, power, I/O types, and EMC standards.
Explains the purpose and function of process memories.
Illustrates typical applications of the P3UP.
How to physically mount the P3UP unit.
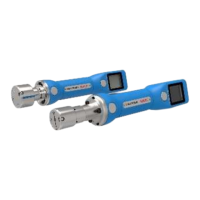
Procedures for connecting measurement heads to the unit.
Explains how to connect the unit's I/O to the machine.
Details Type A I/O variants, wiring, and specs.
Details Type AA I/O wiring and specifications.
Details Type B I/O wiring and specifications.
Details Type C I/O wiring and specifications.
Connection instructions for output voltages up to 150V a.c.
Connection instructions for output voltages between 150V and 250V a.c.
Details the 10-pin connector (W3) and its signals.
Explains how to adjust sensitivity using external resistors.
Details voltage, power consumption, current, and inrush current.
Instructions for correctly connecting the earth stud.
Steps to switch on the P3UP and what happens during startup.
Procedures for heads with adjustment guides.
Procedures for heads with latches.
Procedures for Unimar heads with a locking lever.
Procedures for heads using WEMAR type support.
Explains signal timing and logic for automatic operation.
Describes instrument zero-setting independent of head zeroing.
Details operating in measurement mode.
Procedure for setting up measurement control points.
Optional function for manual grinder adjustments.
How to select measurement channels (T1, T2, Sum).
Explains how to perform Zero Adjust (ZADJ) and ZERO modes.
Details the process and feedback when Zero Mode is executed.
How to use Pulse Feedback for corrections and its logic.
Overview of installed memory functions.
Filters measurement signal for stability when probes drop into interrupted sections.
Filters signal based on a programmable threshold.
Filters signal for fast variations and allows blocking via I/O.
Specifically blocks measurement via I/O input signal.
Controls measurement for surface/distance with internal sync.
Controls measurement for surface/distance with I/O sync.
Estimates stock metal removal.
Selects static or dynamic operating mode.
Explains the difference and selection method.
Steps to enter the programming menu.
Lists parameters available in the programming menu.
Defines delay between START CYCLE and measurement.
Defines the number of active grinder advance controls.
Enables and sets the C-1 zero control value.
Manages C1 control trigger times.
Defines pulse feedback increment/decrement.
Enables automatic zero-setting for pulse feedback.
Locks/releases Zero Adjust in automatic mode.
Changes knob rotation direction for zero adjust.
Adjusts knob sensitivity.
Disables retraction during delay time.
Manages automatic head search after C0 trigger.
Confirmation message for AUTO to MANUAL switch.
Restores parameters to default values.
Shows the software version.
Selects display brightness level.
Configures damping memory.
Configures continuous sampling memory.
Configures memory for planes.
Configures stock removal estimate memory.
Confirms saving changes before exiting.
Summary of parameters and their configurations.
Summary of parameters accessible by the operator.
Describes alarm display, indication, and troubleshooting.
Lists specific alarms and their corresponding solutions.
Instructions for cleaning the electronic unit and front panel.
Instructions for cleaning the measurement heads.
Procedure for replacing the front panel knob.
Notes on operations requiring authorized personnel.
| Resolution | 0.1 µm |
|---|---|
| Accuracy | ±0.5 µm |
| Power Supply | 24 VDC |
| Channels | 1 |
| Application | Dimensional Gauging |
| Display | LCD |
| Operating Temperature | 0°C to 40°C |
| Output | RS232 |