Setup 15
2. Configuring the installation
Once you have opened or created a configuration file as described in the previous section, various routes are
available to configure an installation consisting of a P3-100 and an array of video panels. These routes are
explained in this section.
Whether you are working on a PC or a P3-100, the configuration file is saved continuously while you work. At
any time, you can save this file to a USB memory device and transfer it between any PC running the Offline
Editor or P3-100.
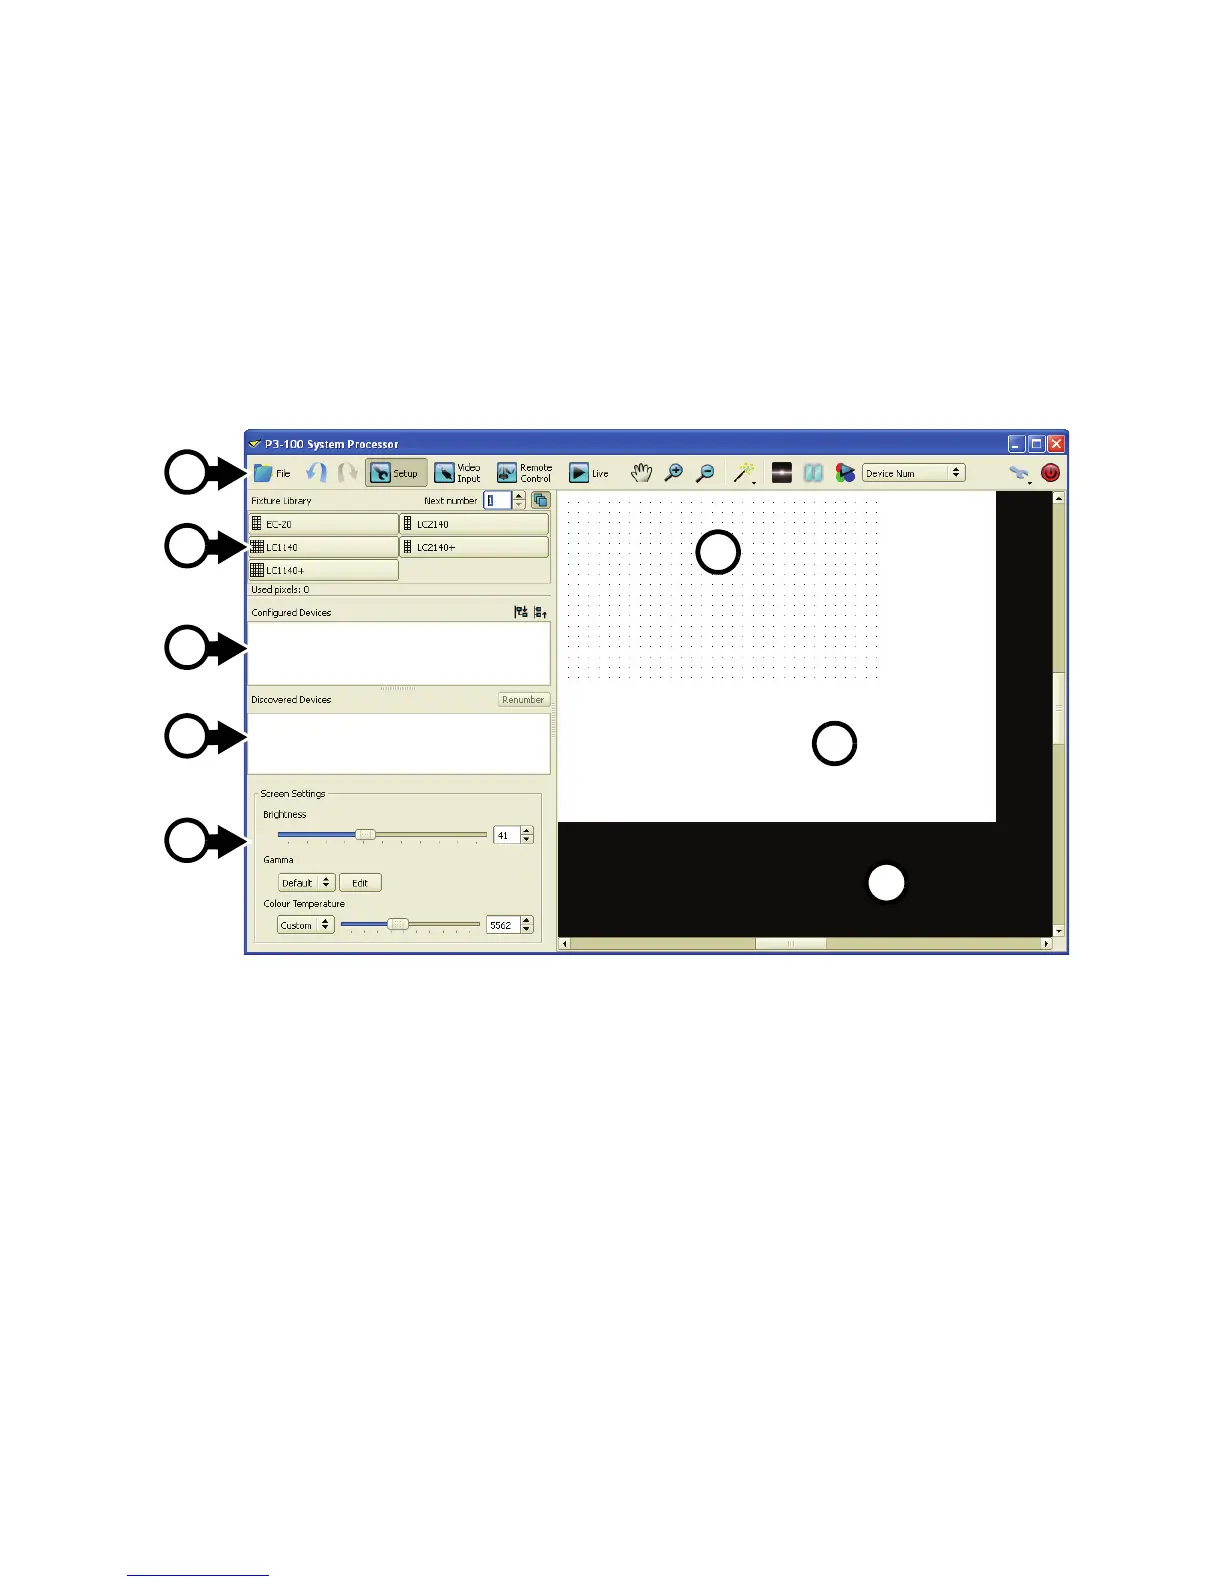
Setup view
Most of the configuration work is carried out in the Setup view. The Setup view is divided into the following
areas:
• A – Toolbar
• B – Fixture Library: overview of panels which exist in the fixture database and are available for placement
in the current configuration (= panels which are compatible with the dot pitch settings of the current
configuration).
• C – Configured Devices: list of panels which are configured in the on-screen installation (orange button)
or in the on-screen installation and physical installation (green button).
• D – Discovered Devices: list of panels which have been detected by the P3-100 System Controller, but
are not yet configured into the current configuration.
• E – Screen Settings: global screen settings that affect all panels (brightness, gamma & color
temperature).
• The Canvas consists of the following areas:
- The dotted area F is the workspace area, where panels can be placed in your on-screen installation.
- The white area G is the video area, where incoming video is mapped to.
- The black area H is not used.
Figure 8: Areas in Setup view
A
B
C
D
E
F
H
G