11921 Slauson Ave. Santa Fe Springs, CA. 90670 (800) 227-4116 FAX (888) 771-7713
26
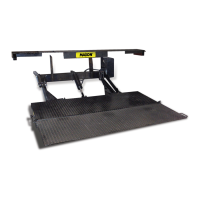
1. Unfold the fl ipover as shown
in FIG. 26-1.
LOCKING
ANGLE
UNFOLDING FLIPOVER
FIG. 26-1
WARNING
Do not remove lock angle except when instructed to do so in this manual.
!
NOTE: Liftgates are shipped
with a locking angle that
positions Liftgate cor-
rectly for high bed or low
bed installation.
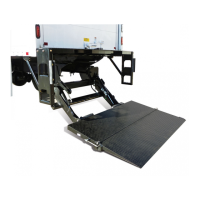
STEP 2 - WELD LIFTGATE TO VEHICLE - Continued
3. Attach chain and hoist on each side
of platform near the heel (FIG. 26-2).
(Place chain all around platform.)
Hoist the Liftgate, and then place fl oor
jack under main frame (FIG. 26-2).
Jack the Liftgate into position. Make
sure vehicle fl oor is horizontal. Main-
tain distance between fl oor and top of
main frame as shown in FIG. 26-2.
FIG. 26-2
HOIST HERE
VEHICLE FLOOR
(HORIZONTAL)
FLOOR JACK
MAIN
FRAME
WARNING
To prevent injury, support
Liftgate to keep it from tipping
over. Stay clear of place under
the platform where Liftgate
could fall on you.
!
LATCH
CAUTION
To prevent damage to latch on
the fl ipover, attach hoist chains
with clearance from the latch.
FLIPOVER
D
2. Measure distance “D” be-
tween the 2 cylinder pins cap-
tured by locking angle (FIG.
26-1). Refer to TABLE 26-1 to
verify if Liftgate is a high bed
or low bed model.
PIN
PIN
LIFTGATE MODEL
DISTANCE “D”
BETWEEN PINS
HIGH BED (42”-54” HT) 18-1/2”
LOW BED (36”-44” HT) 19-1/4”
DISTANCE BETWEEN CYLINDER PINS
TABLE 26-1
25-3/8” (HIGH BED)
21-1/2” (LOW BED)