Rem ote Cont rol cable provided by the manufacturer. You can refer the installation method as
the above figure shown. The video printer is ready to work immediately without any
configurations after a successful connection.
4.3.3
Network Printer Connection
1.
Connect the printer to the ultrasound system.
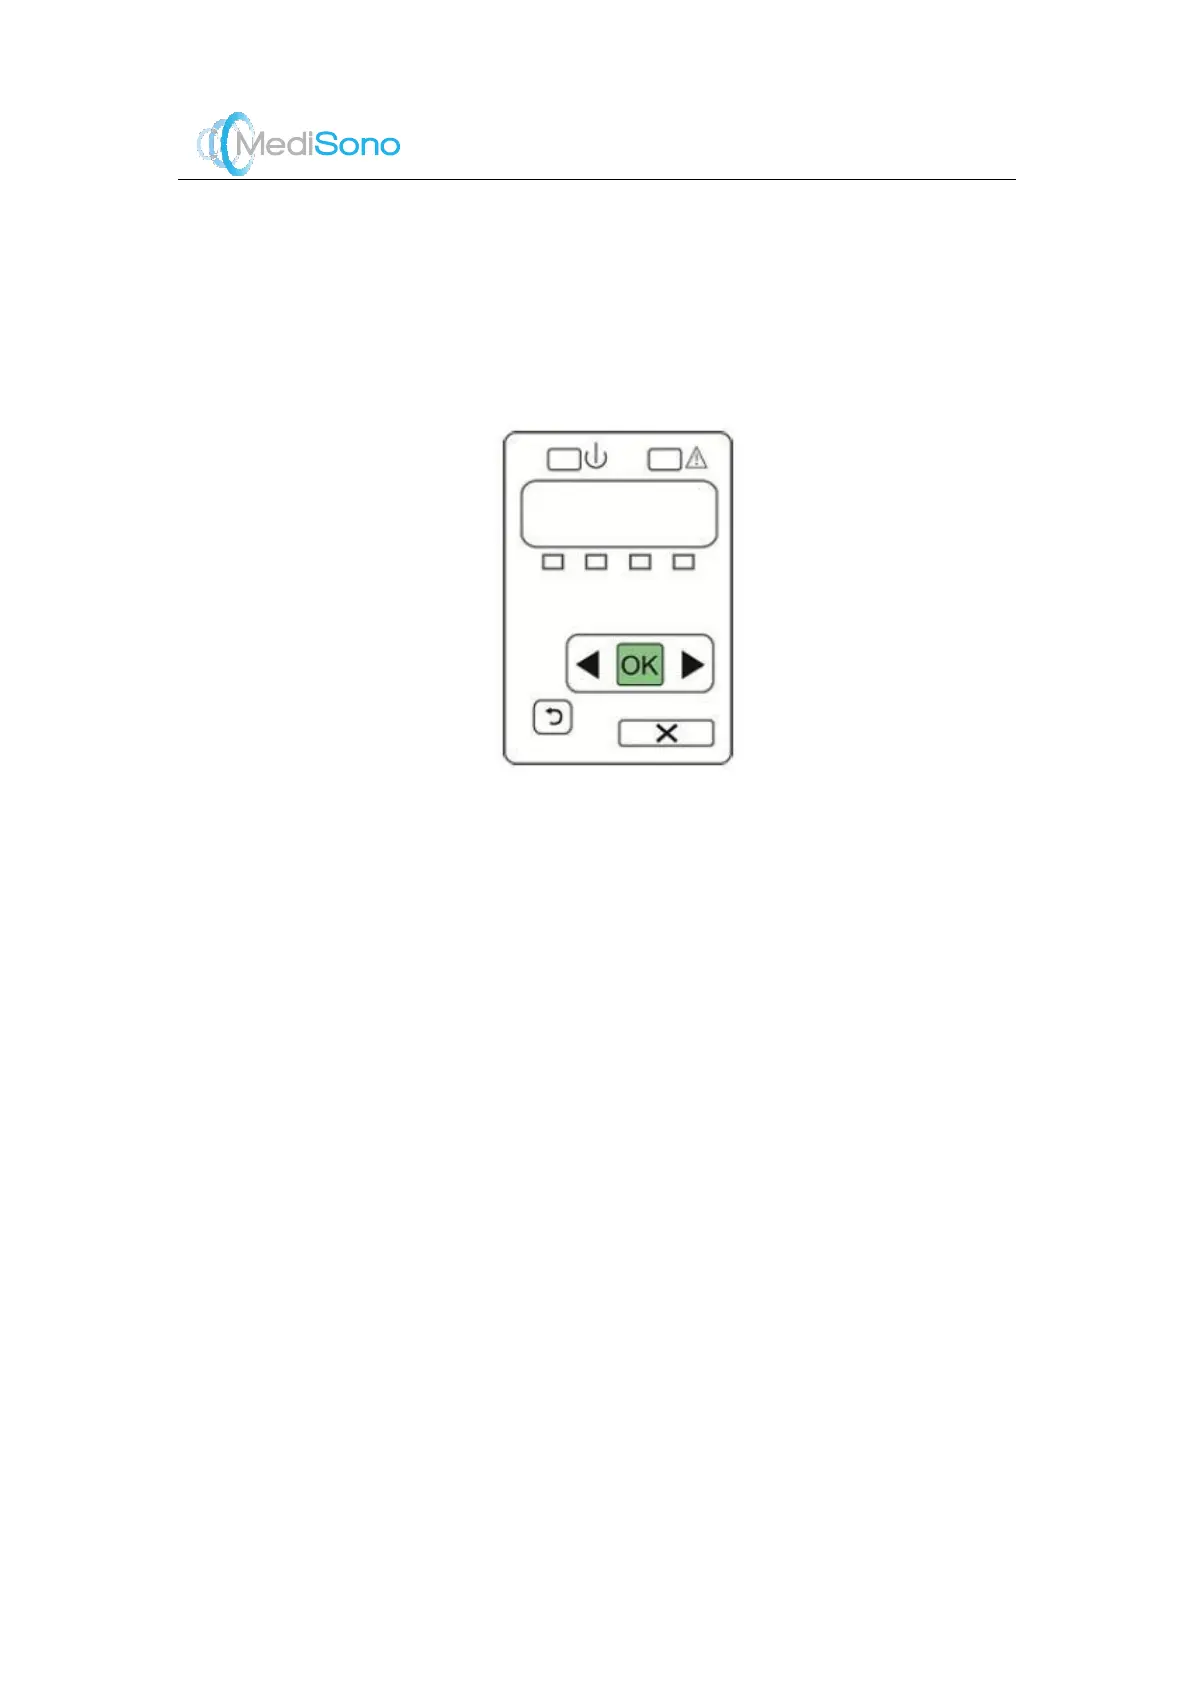
2.
Press
OK
on the control panel menu of the printer.
3.
Press the left or right key to select
Network Confi
, and then press
OK
to confirm.
4.
Press the left or right key to select
TCP IP Confi
, and then press
OK
to confirm.
5.
Press the left or right key to select
Manual
, and then press
OK
to confirm.
6.
An IP address is displayed, change it to 192.168.254.183 by pressing the left or right key,
and then press
OK
.
7.
If the IP address is correct, use the left or right key to select
Yes
, and then press
OK
. If
the IP address is incorrect, use the left or right key to select
No
, and then press
OK
.
Repeat Step6 to enter a correct address.
8.
After setting IP address, set the subnet mask to 255.255.255.0 and default gateway to
192.168.254.183 in the same way as described above.
9.
Copy the driver file
deskjet.ppd
provided by the manufacturer into the directory of the
USB drive.
10.
Connect the drive to the ultrasound system, and then start up the ultrasound system.
11.
Choose
System Settings
->
Peripheral
->
Add
->
Net Printer
.
12.
Enter the IP address of the printer, and then click
Test
to verify the printer connection.
13.
Enter the port number and print er model, and then select the driver file from the drop-
down list in the USB drive.
 Loading...