3
Quick instructions
3.1 Preparing EGIL for time
measurement
IMPORTANT
Read the chapter “Safety” before using
EGIL.
Always comply with local safety regula-
tions.
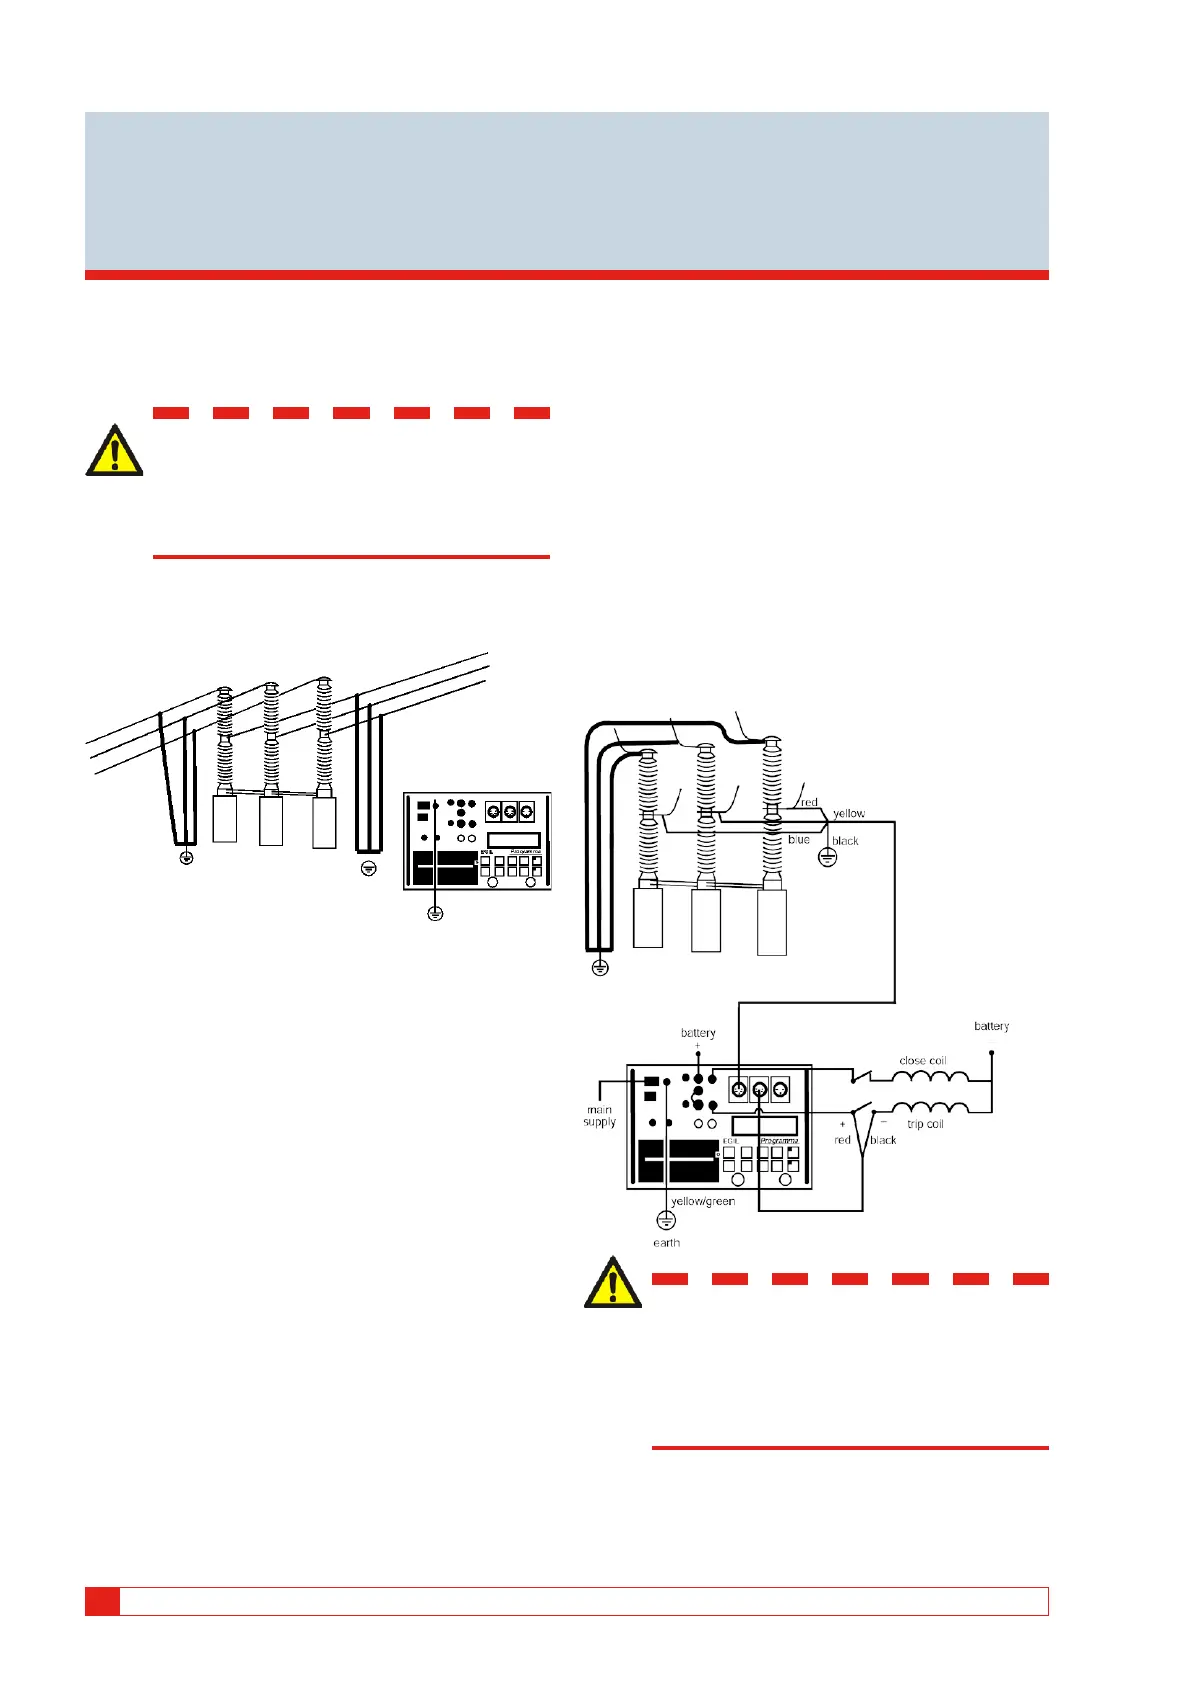
1] Check that EGIL and the breaker are ground-
ed as illustrated below.
2] Connect the power supply cable to EGIL.
3] Connect EGIL to the breaker: Connect the
time measurement cable to the main con-
tacts of the breaker and to EGIL TIMING
contact.
4] Connect the auxiliary contact measurement
cable to the auxiliary contacts in the operat-
ing mechanism, and to EGIL AUX1&2 contact.
5] A) If the measurement is on wet (AC voltage)
auxiliary contacts, set the timing auxiliary
inputs to wet mode (LED is off).
B) If the measurement is on wet (DC voltage)
auxiliary contacts, set the timing auxiliary in-
puts to DRY mode (LED is on). The red cable
must be connected to the positive side of the
auxiliary contact.
C) If the measurement is on dry auxiliary con-
tacts, set the timing auxiliary inputs to DRY
mode (LED is on).
6] Connect the breaker close coil to EGIL close
coil output.
7] Connect the breaker trip coil to EGIL trip coil
output.
8] Make sure a jumper (if the trip and close coil
have the same voltage source) is connected
between the trip coil input and the close coil
input.
9] Connect the battery + (plus) to EGIL coil
input.
10] Remove the ground connections from one
side of the breaker as shown in the picture
below.
IMPORTANT
When only one side of the breaker is
grounded while making the test, special
precautions must be observed to protect
service personnel and the test equipment
from harmful voltages.
11] Turn EGIL power switch to on.
The stored settings in memory 0 (zero) are
automatically recalled.
12 EGIL ZP-BM01E BM0087OE
3 QUICK INSTRUCTIONS
 Loading...