6.3 Removing / fitting the casing.
Tools required.
M5.5 hex socket wrench
Requirements.
Check that the following requirements have been met:
▪ The appliance has been disconnected from the power supply and protective measures have been taken to ensure
the power cannot be switched on again.
▪ The appliance is cool.
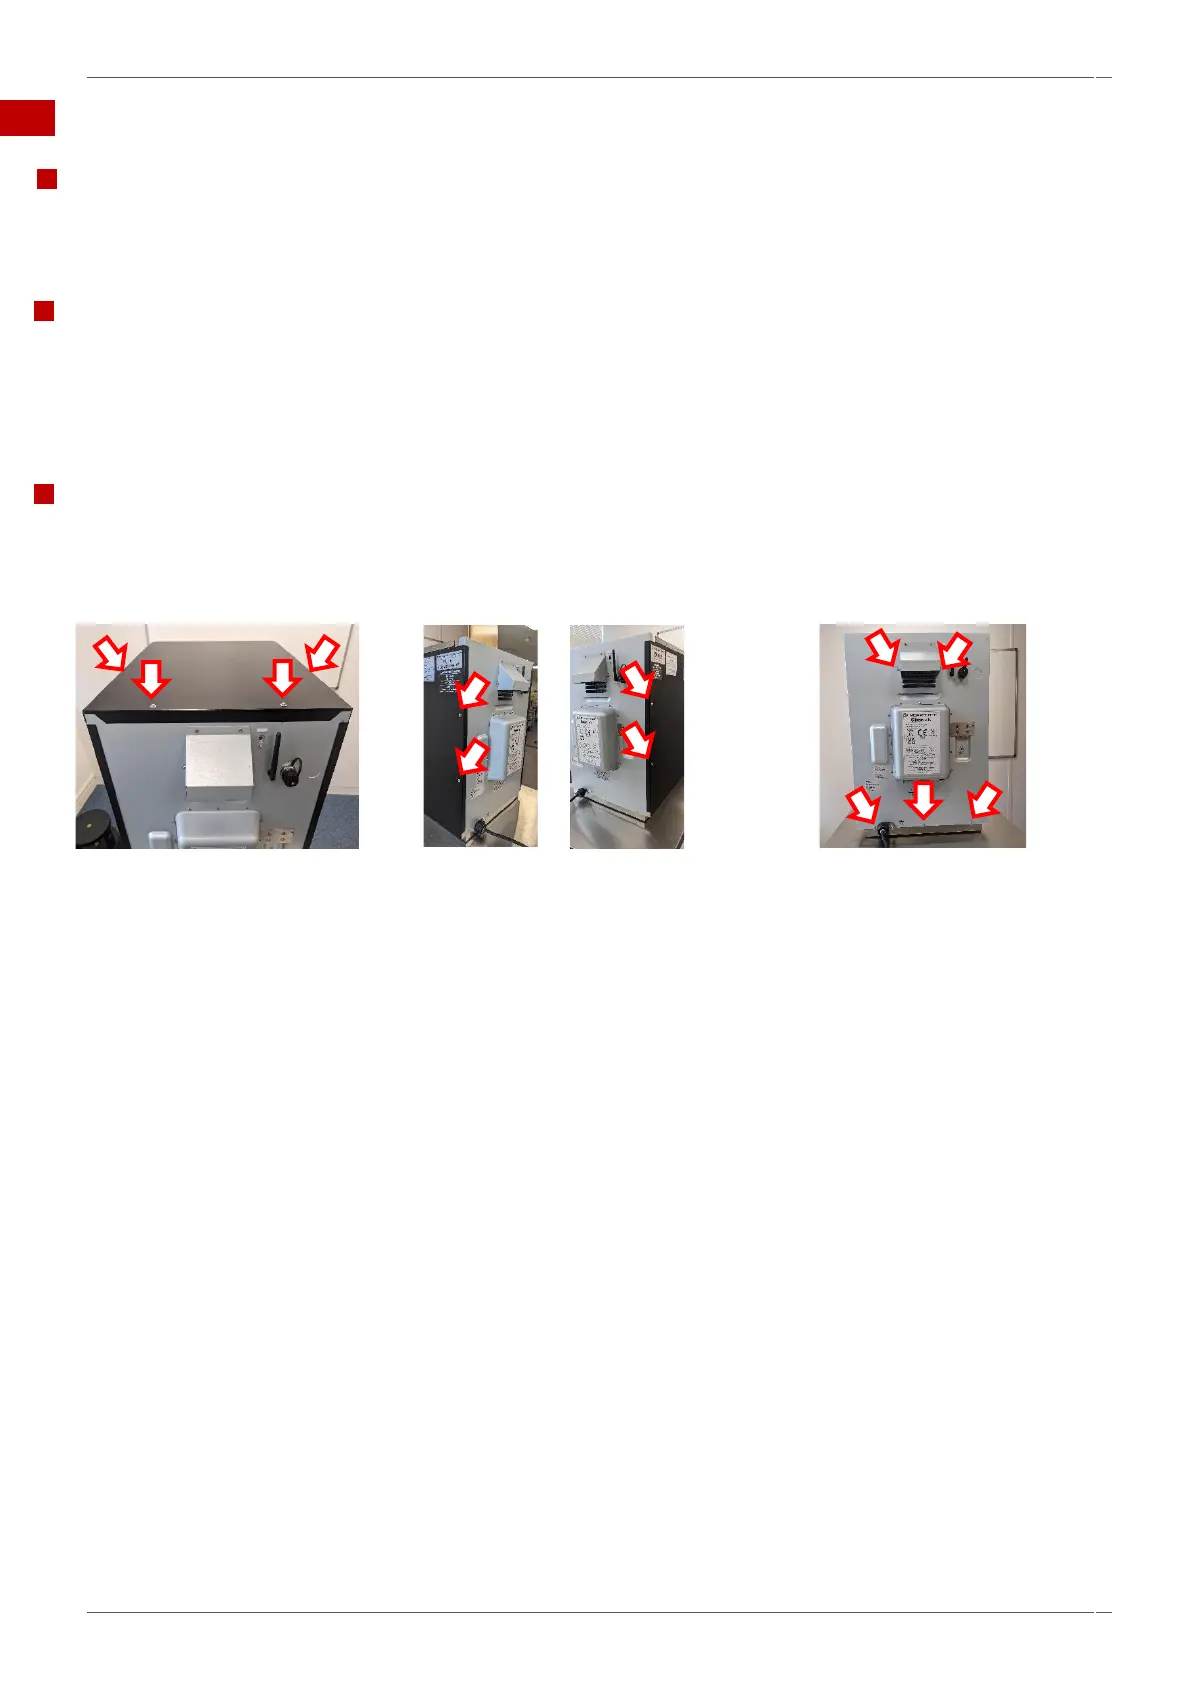
Removing the panels of the casing.
Overview of all M5.5 hex head flange bolts securing the panels of the casing.
1. Remove top panel first.
Unfasten the two M5.5 hex head
flange bolts on the top rear top
panel and the two M5.5 flange bolts
on either side.
Lift the top panel at the rear and pull
out from the front fixing to remove it.
2. Removing the side panels:
Unfasten the four M5.5 hex head
flange bolts (two per side) side panels
of the appliance attaching each side
panel to the back panel.
Slide the panels towards the back of
the appliance and out at the bottom to
remove them.
3. Removing the back panel:
Unfasten the five M5.5 hex head
flange bolts attaching the back panel
to the cooling duct (two bolts) and
the base plate (three bolts) of the
appliance.
Move the back panel up to remove
it.
Important: If the optional ethernet
cable is fitted, disconnect before
removing the back panel.
4. Ensure the high voltage capacitors are discharged before commencing any work.