Merrychef conneX
®
service and repair manual
1. Carefully peal back the sealing tape on the cooling duct (keep for reuse).
2. Unfasten the two M3 x 4 CSK Philips SS Screws and flat washers to disconnect the Cavity Overheat Thermostat from the
cooling duct.
3. Unplug the magnetron high temperature thermostat and earth lead.
4. Unclip the wiring loom from the cooling duct.
5. Unfasten the four Pozidriv screws on the outside of the cooling duct.
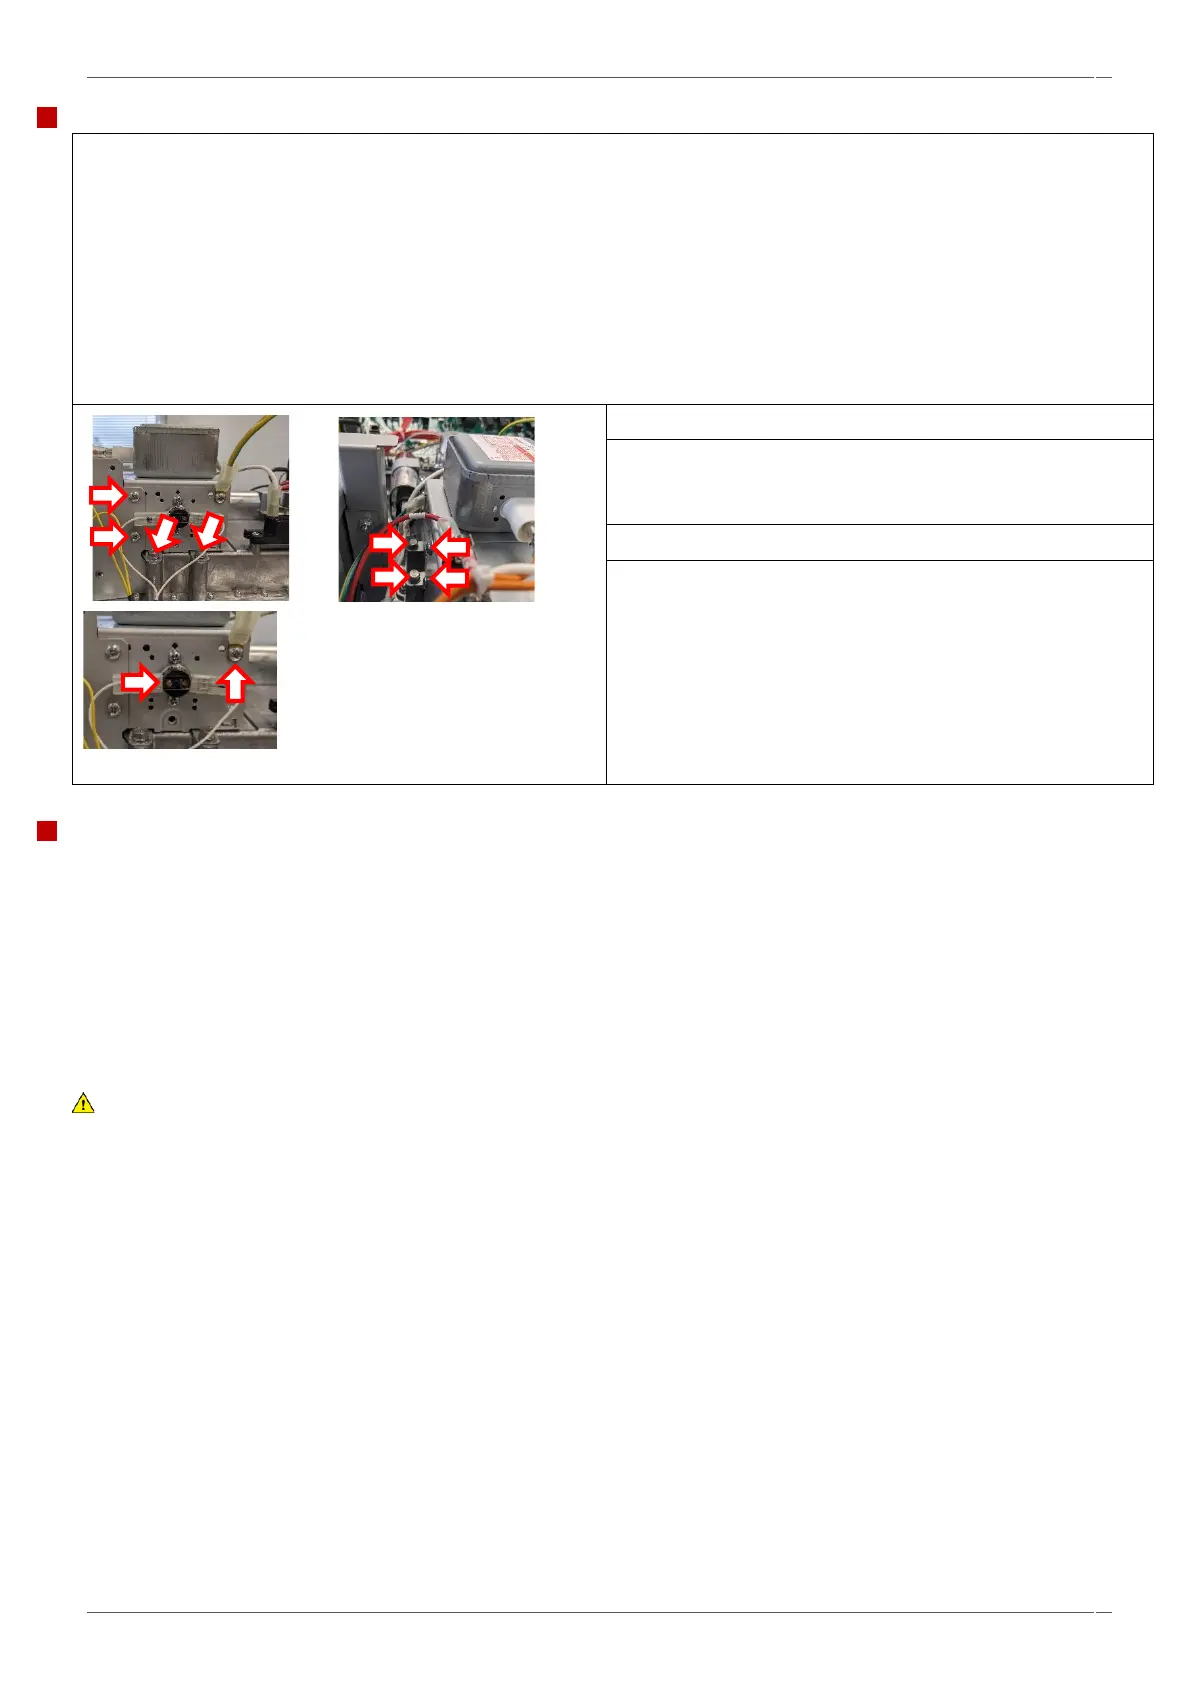
7. Disconnect the wiring from the magnetron.
8. Unfasten the four M8 hex cap bolts to remove the
magnetron. There is one pair of bolts on each side of the
magnetron.
9. Lift the magnetron out of the waveguide.
10. Remove the magnetron overheat thermostat and earth
tab, for refitment on to the replacement magnetron.
Fitting a magnetron.
• Follow the steps in the reverse order to fit a replacement magnetron. Use new self-tapping screws for the overheat stat
and earth tab.
• Ensure the magnetron overheat thermostat is refitted in the same location to ensure correct operation.
• Ensure the RF (Radio Frequency) gasket is correctly seated.
• Fit all the M8 bolts loosely, then tighten in a cross pattern to ensure the magnetron seats evenly. Torque to 2.1
Nm.
• Refit the cooling duct, ensuring the high temperature tape is reapplied on the top meeting faces between the duct
and magnetron. Refit the cavity overheat thermostat, torquing the screws up to 1Nm.
WARNING
Ensure nothing has become trapped under the magnetron mounting points (e. g. insulation material) while fitting the
magnetron. This can lead to microwave leakage.
NOTICE:
If the electric connections have not been restored properly this may lead to malfunction/damage of the oven.