|
33
VIKING / VIKING COMBI
Rev. 2.0 (1.8.2017)
Installation
6.1.5. Industrial safety during installation
Beware of sharp edges of sheet constructions in the kettle pillars when installing the unit.
Do not switch the power on, if the unit’s installation area is wet or moist.
6.2. Installation
Check before installation from the installation drawing that there is enough space behind the kettle for
tilting. Check also the location of the fl oor drain.
The kettle can be installed in the following two ways:
• On subsurface installation frames, frames cast into the fl oor
• On surface installation frames, frames fi xed between the kettle and the fl oor
Remove the front panels of the control pillar and support pillar when installing. It is recommended to put
wooden slats below the kettle axles when raising the unit during the installation to avoid possible falling
of the kettle. If you are installing a kettle group, fi rst separate the kettles. Begin the installation with the
left-hand kettle and do not forget to support the right-hand kettle after removal from the left-hand tem-
porary support.
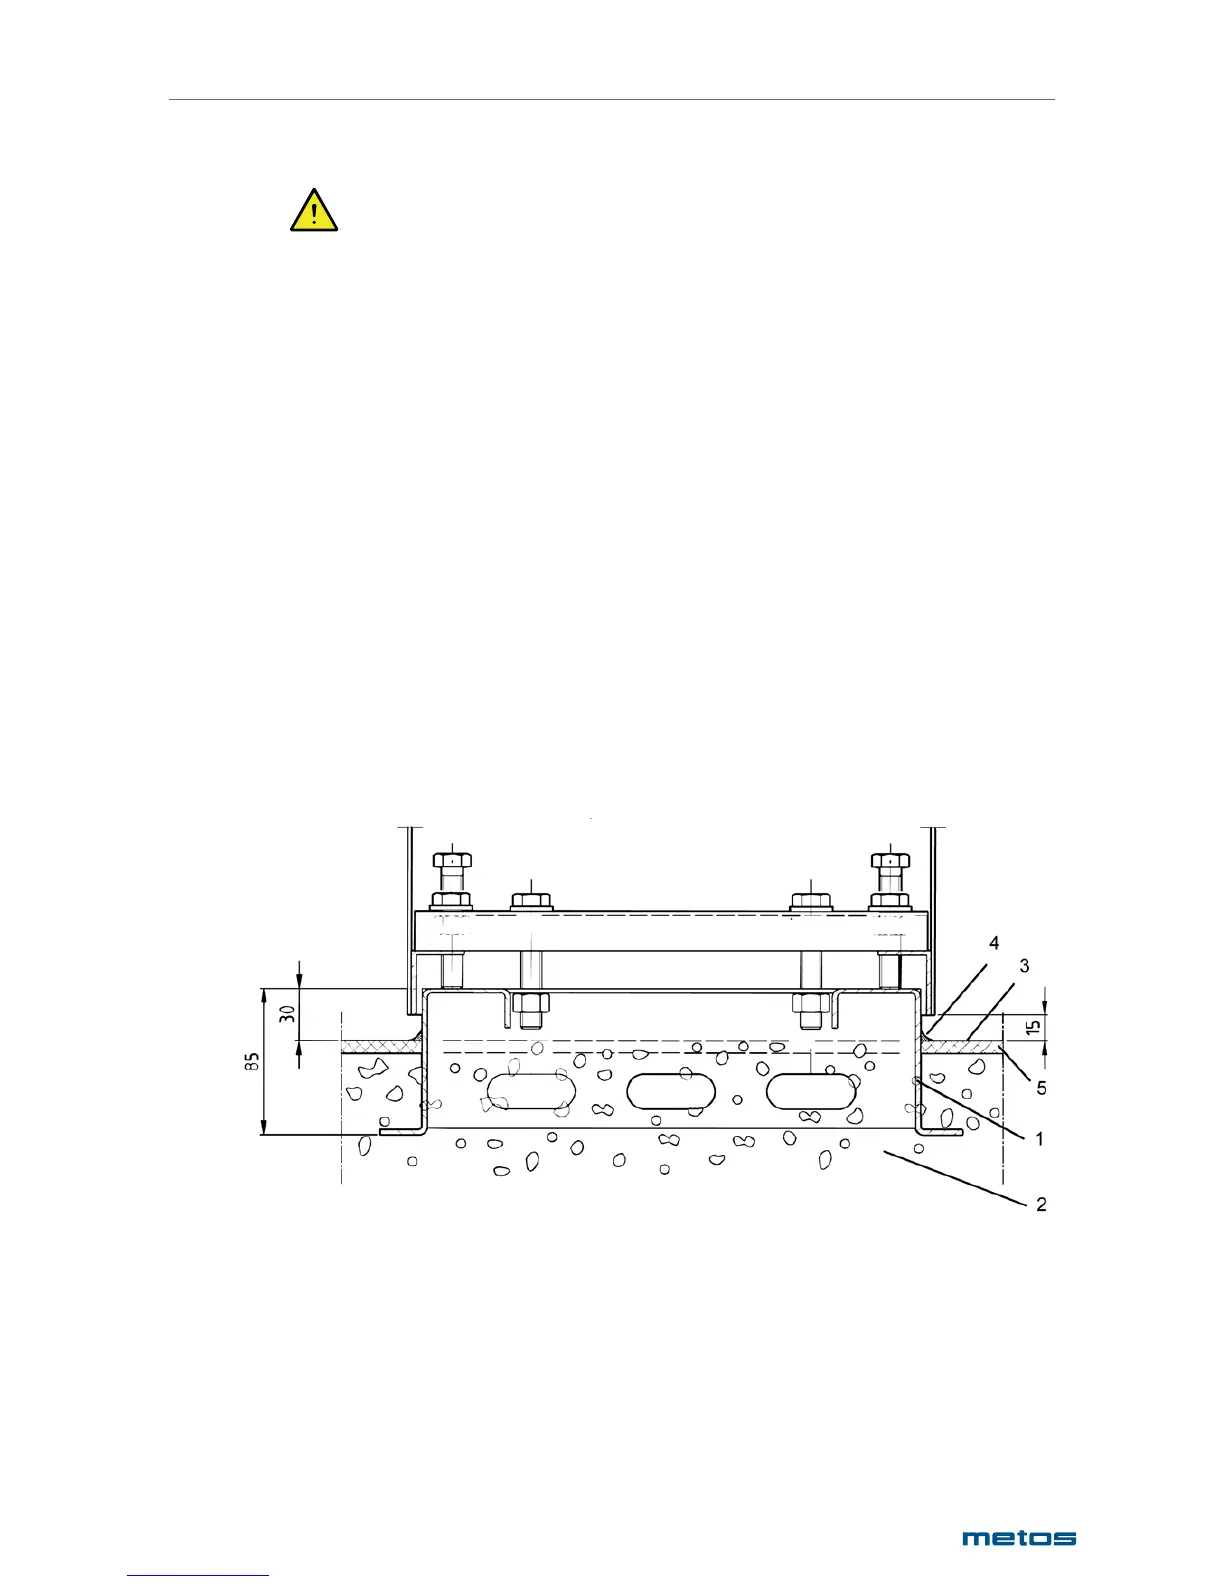
6.2.1. Installation on subsurface frames cast into the fl oor
The optional subsurface installation frame is to be correctly positioned before casting. The frame should
be installed in a horizontal position and fi xed so that it will not move during the casting. The top of the
installation frame must be approx. 30 mm above the fi nished fl oor surface. The junction between the
fl oor and the frame is to be covered with fl ooring material up to the level of the installation frame as
shown in the picture below.
1. Installation frame
2. Concrete casting
3. Finished fl oor surface
4. Silicone mastic
5. Acrylic fi ller
Place the kettle on the installation frame and adjust to a horizontal position with the adjusting bolts
which are in the corners of the pillars. When the kettle is in a horizontal position, it must be fi xed to the
installation frames with the help of M12 fi xing bolts. The control pillar has 4 bolts and the support pillar
has 2 bolts. Tighten the adjusting nuts carefully. Do not seal the space between the kettle pillars and
installation frame as there must be enough change of air.