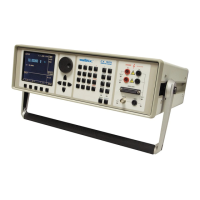
144
24.3. Basic steps of the performance verification test
Verification procedure consists of following steps:
• 20 V DC voltage test with linearity check
• DC voltage internal ranges 20 mV, 200 mV, 2 V, 240 V, 1000 V test
• 20 V AC voltage test with linearity check
• AC voltage internal ranges 20 mV, 200 mV, 2 V, 20V, 240 V, 1000 V test
• 200 mA DC current test with linearity check
• DC current internal ranges 200 uA, 2 mA, 20 mA test
• AC current internal ranges 200 uA, 2 mA, 20 mA, 200 mA test
• AC/DC high current ranges 2 A, 20 A test
• AC/DC power 480VA 2400VA (AC power with PF 0, +0.5, -0.5) test
• Resistance test in points 10, 100, 1k, 10k, 100k, 1M, 10M, 50M Ohm on DC
• Capacitance test in points 1n, 10n, 100n, 1u, 10u, 50u F on frequency 1000 Hz
• Frequency nominal value 1 kHz test
• Multimeter internal ranges 20 mVDC, 200 mVDC, 2 VDC, 10VDC, 25mADC, 200 Ohm, 2 kOhm,
frequency 1 kHz test
• Distortion checking of AC voltage, range 20 V.
24.4. Procedure
Following part describes procedure of performance verification test. Recommended measuring points are the
same as the points in table of limits (see tables below).
1. Connect the calibrator to the mains and let them switched on for at least one hour in a laboratory at 23±1
o
C.
2. Perform ACAL procedure (see chapter Calibration mode).
3. Connect voltage input of the standard multimeter to the voltage output terminals of the calibrator. Set
appropriate parameters on the standard multimeter to achieve its best accuracy.
4. Perform 20 VDC linearity, DC voltage, 20 VAC linearity, AC voltage tests according to the tables I, II, III,
IV. Deviations should not exceed specified limits.
5. Connect current input of standard multimeter to the current output terminals of the calibrator. Set
appropriate parameters on the standard multimeter to meet its best accuracy.
6. Perform 200 mADC linearity, DC current, AC current tests according to the tables V, VI, VII. Deviations
should not exceed specified limits.
7. Connect current output terminals of the calibrator to the current terminals of resistance shunt 100 mOhm.
Connect voltage input of standard multimeter to the voltage terminals of the resistance shunt. Set range
100 (200) mV on standard multimeter.
8. Perform AC/DC high current test on range 2 A according to the table VIII. Deviation should not exceed
specified limit.
9. Connect current output terminals of the calibrator to the current terminals of resistance shunt 10 mOhm.
Connect voltage input of standard multimeter to the voltage terminals of the resistance shunt. Set range
100 (200)mV on standard multimeter.
 Loading...