3 R 74 en 9
4.5 Replacing the seat
S- or U-seat (not DN25-50) can be changed as described in
4.5.1 & 4.5.2. For DN25-50 and other seats, the valve needs
to be dismantled as described in 4.6
4.5.1 Detaching the S- or U-seat
The valve must be removed from the pipeline.
Turn the segment (3) so that it does not touch the
seat, Fig. 20.
In DN 65-100 valves (excluding the low-Cv versions),
unfasten the blind flange (10) and push the segment
into the back position, Fig. 21.
DN 65-100 valves can be dismantled, as described in
4.6, to make the replacement of the seat easier.
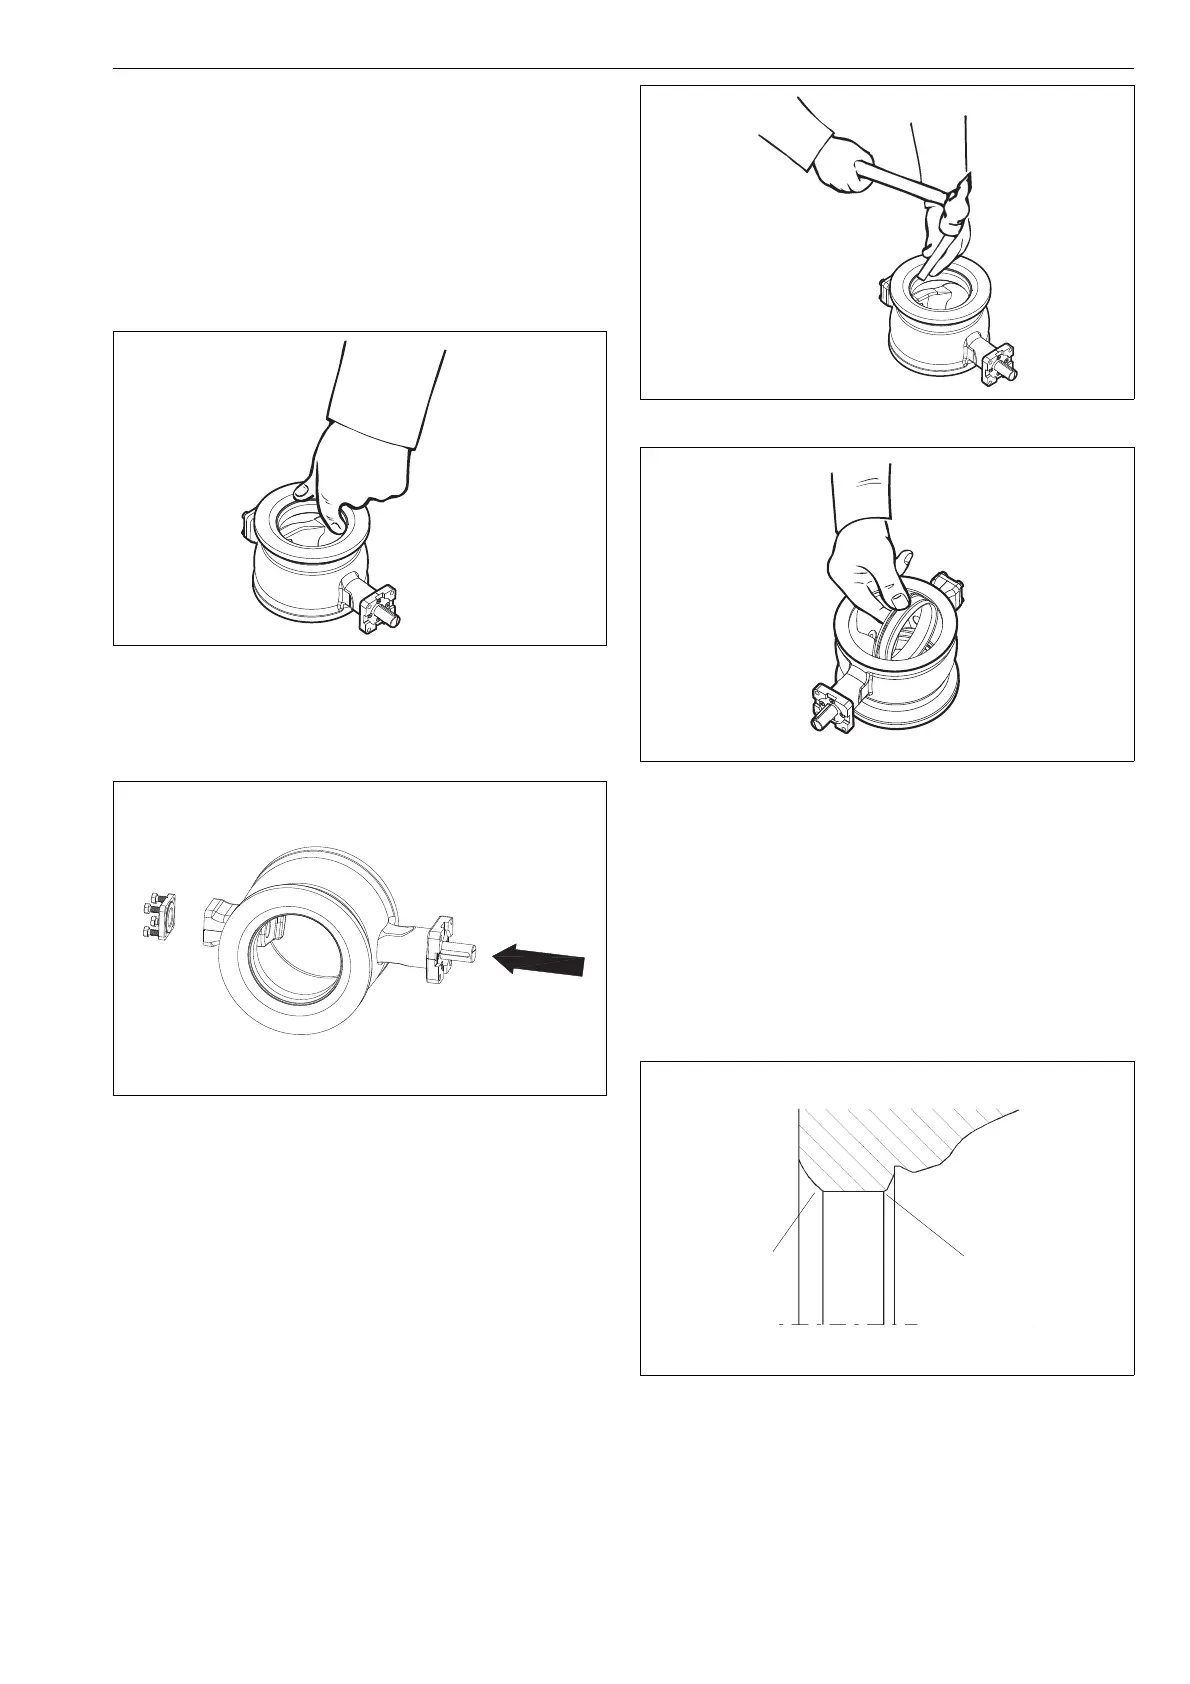
Tap the seat (4) with a soft spindle all around the cir-
cumference from the upstream side to make it fall
into the body, Fig. 22.
Turn the valve and lift the seat from the body
through the downstream flow port, Fig. 23.
Clean and check the removed parts.
4.5.2 Installing the seat
The back seal (6) of the segment seat (4) is normally a lip
seal. The seat is easier to install if the back seal is precom-
pressed. An O-ring seal does not need precompression.
Clean the flow port that houses the seat. Remove
any burrs. Round off the edges using a fine abrasive
paper and clean the flow port carefully, see Fig. 24.
Place the back seal (6) onto the seat (4).
Lubricate the flow port, seat (4) and back seal (6) and the
lock spring (5) with a volatile lubricant, e.g. Hyprez.
Make sure that the lubricants are compatible with
the medium.
Only for a lip seal: Push the seal carefully into the
flow port for about 15 minutes, Fig. 25. The following
work phases must be completed before the precom-
pression is lost.
Place the lock spring (5) on the seat.
When the valve is opened, the ends of the spring
must be by the V-shaped opening, see Fig. 26.
Place the seat package into the body as shown in
Figs. 27 and 28.
Fig. 20 Turning the ball segment
Fig. 21 Removing the blind flange
Fig. 22 Knocking off the seat
Fig. 23 Lifting the seat
Fig. 24 Rounding the sharp edges
sharp edges
must be
rounded off
sharp edges
must be
rounded off

 Loading...