Easidew Online User’s Manual
Michell Instruments 21
INSTALLATION
2.13.3 Transmitter Mounting - With Additional Process Connection Adapter
!
The following procedure must be carried out by a qualifi ed
installation engineer.
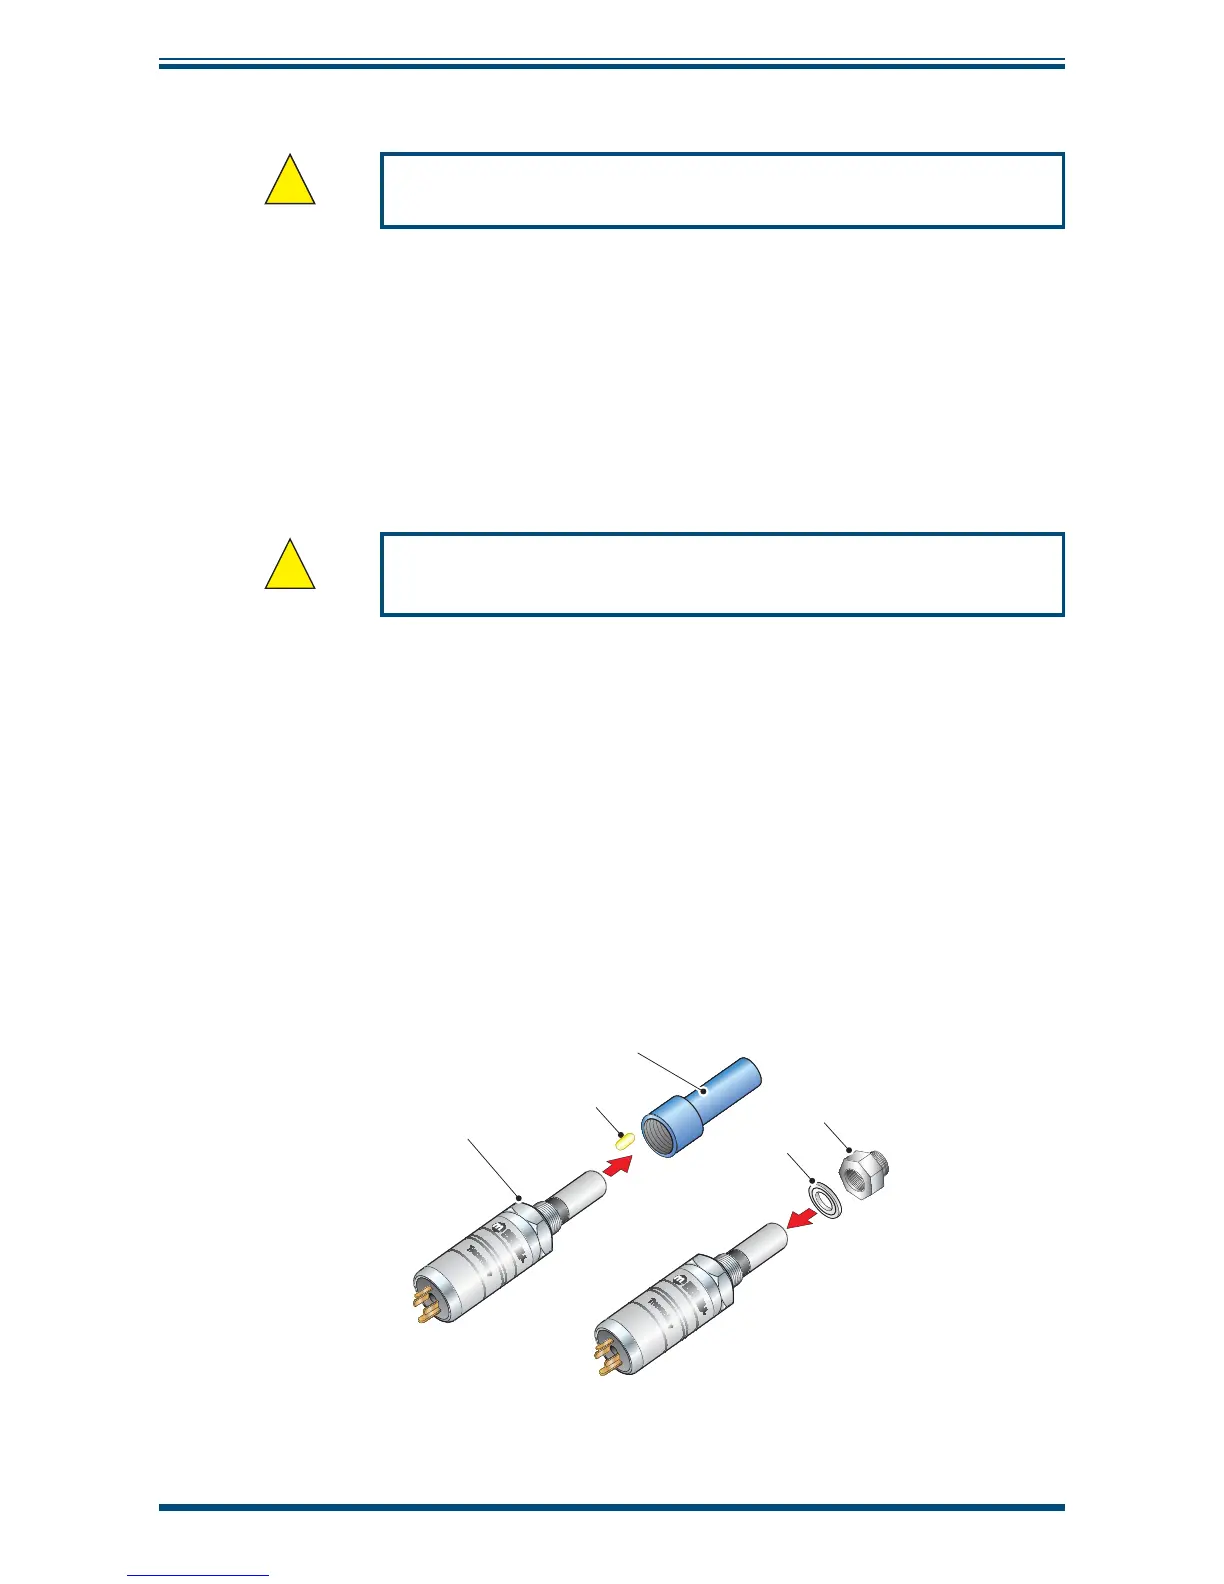
To mount the adapter into the transmitter, proceed as follows (see
Figure 20)
:
1. Ensure that the protective cover (2), and its desiccant capsule (2a), have
been removed from the tip of the transmitter.
2. Fit the bonded seal (3) over the threaded part of the transmitter body.
3. Screw the adapter (4) onto the threaded part of the transmitter and tighten
to 30.5 Nm (22.5 ft-lbs). NOTE: Use the fl ats of the hexagonal nut and
not the sensor body.
!
WARNING: Under no circumstances should the sensor guard be
handled with the fi ngers.
4. Screw the transmitter (1) with its seal (3) and adapter (4) into the sample
block (see Section 2.4.1) or pipeline (see Section 2.4.2) and fully tighten
using a wrench until the seal is fully compressed and to the following torque
settings:
G 1/2” BSP 56 Nm (41.3 ft-lbs)
3/4” - 16 UNF ` 40 Nm (29.5 ft-lbs)
1/2” NPT Use a suitable sealant e.g. PTFE tape using
correct taping procedures
NOTE: Use the fl ats of the hexagonal nut and not the sensor body.
1
2
3
4
2a
Figure 20
Transmitter Mounting with Adapter