Easidew Online User’s Manual
30 97094 Issue 18.5, March 2016
OPERATION
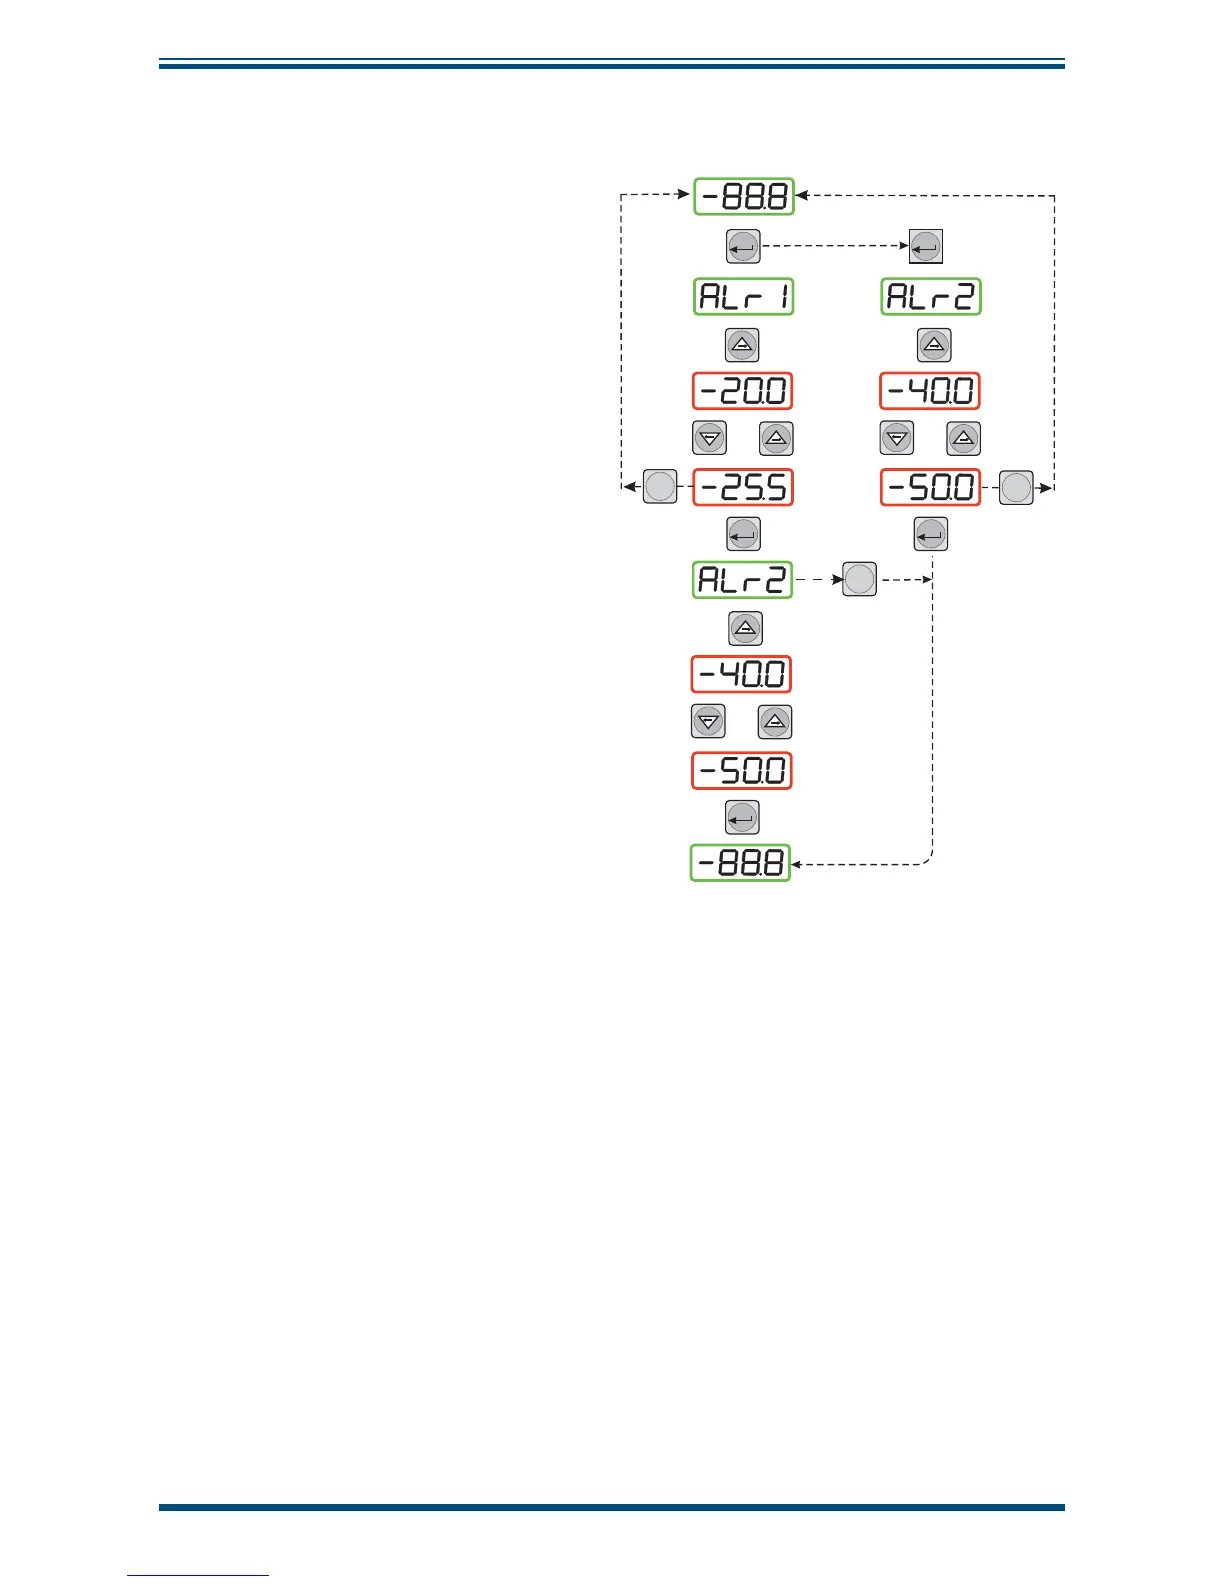
3.3.3 Alarm Level Set-Up
Figure 25
Set-up Alarm Levels
SET SET
SET SET
SET
Set x2 for Alarm 2 only
Current
Value
Current
Value
New
Value
New
Value
Main Display
P
P to exit if setting
Alarm 1 only
P to exit
without
setting
Main display
P
P to exit
without
setting
P
The alarm set-point levels are set-up
from the program menu as follows
(to exit to the main display without
saving any new settings press the
P
key):
Figure 25
shows the operational key
sequence.
To set-up both alarm set-points:
1. Press the
SET key once, ALr1
will be displayed. (To set Alarm
2 only, press the
SET key twice
and follow the Alarm 2 branch
instead).
2. Press the key to display the
fl ashing current Alarm 1 set-
point (-20°C in this example).
3. Use the and keys to set
the required value (-25.5°C in
this example).
4. Press the
SET key once to store
the new (or existing) value for
Alarm 1 and to enter the set-
up menu for Alarm 2,
ALr2. (To
exit to the main display without
changing Alarm 2 set-point
levels, press the
P key.)
5. Press the key to display the
fl ashing current Alarm 2 set-
point (-40°C in this example).
6. Use the and keys to set
the required value (-50°C in
this example).
7. Press the
SET key once to store
the new value for Alarm 2. The
display then returns to the main
dew-point temperature display.