Easidew PRO XP User’s Manual
Michell Instruments 15
INSTALLATION
2.8 Preparation of the Sensor Cable
The sensor cable is not supplied with the Easidew PRO XP, but
there are 2 off bootlace ferrules supplied. Maximum conductor
size is 0.75mm² (0.03²”).
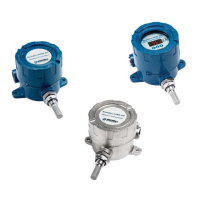
Correct preparation of the cable conductors is essential to ensure a reliable connection
to the sensor terminals.
1. Strip the insulation from each conductor to 8mm, without damaging any
wire strands.
2. Using a crimp tool such as the CK 3682 (RS 343-8824), correctly attach
each ferrule.
Figure 14
Wire and Crimp Details
2.8.1 Terminal Block Connection - Easidew PRO XP EX1 (Non-Display)
1. Remove the enclosure lid by carefully unscrewing anti-clockwise
2. Remove the 4-way terminal block from its header on the pcb, being careful
not to put any strain onto the earth wire already attached.
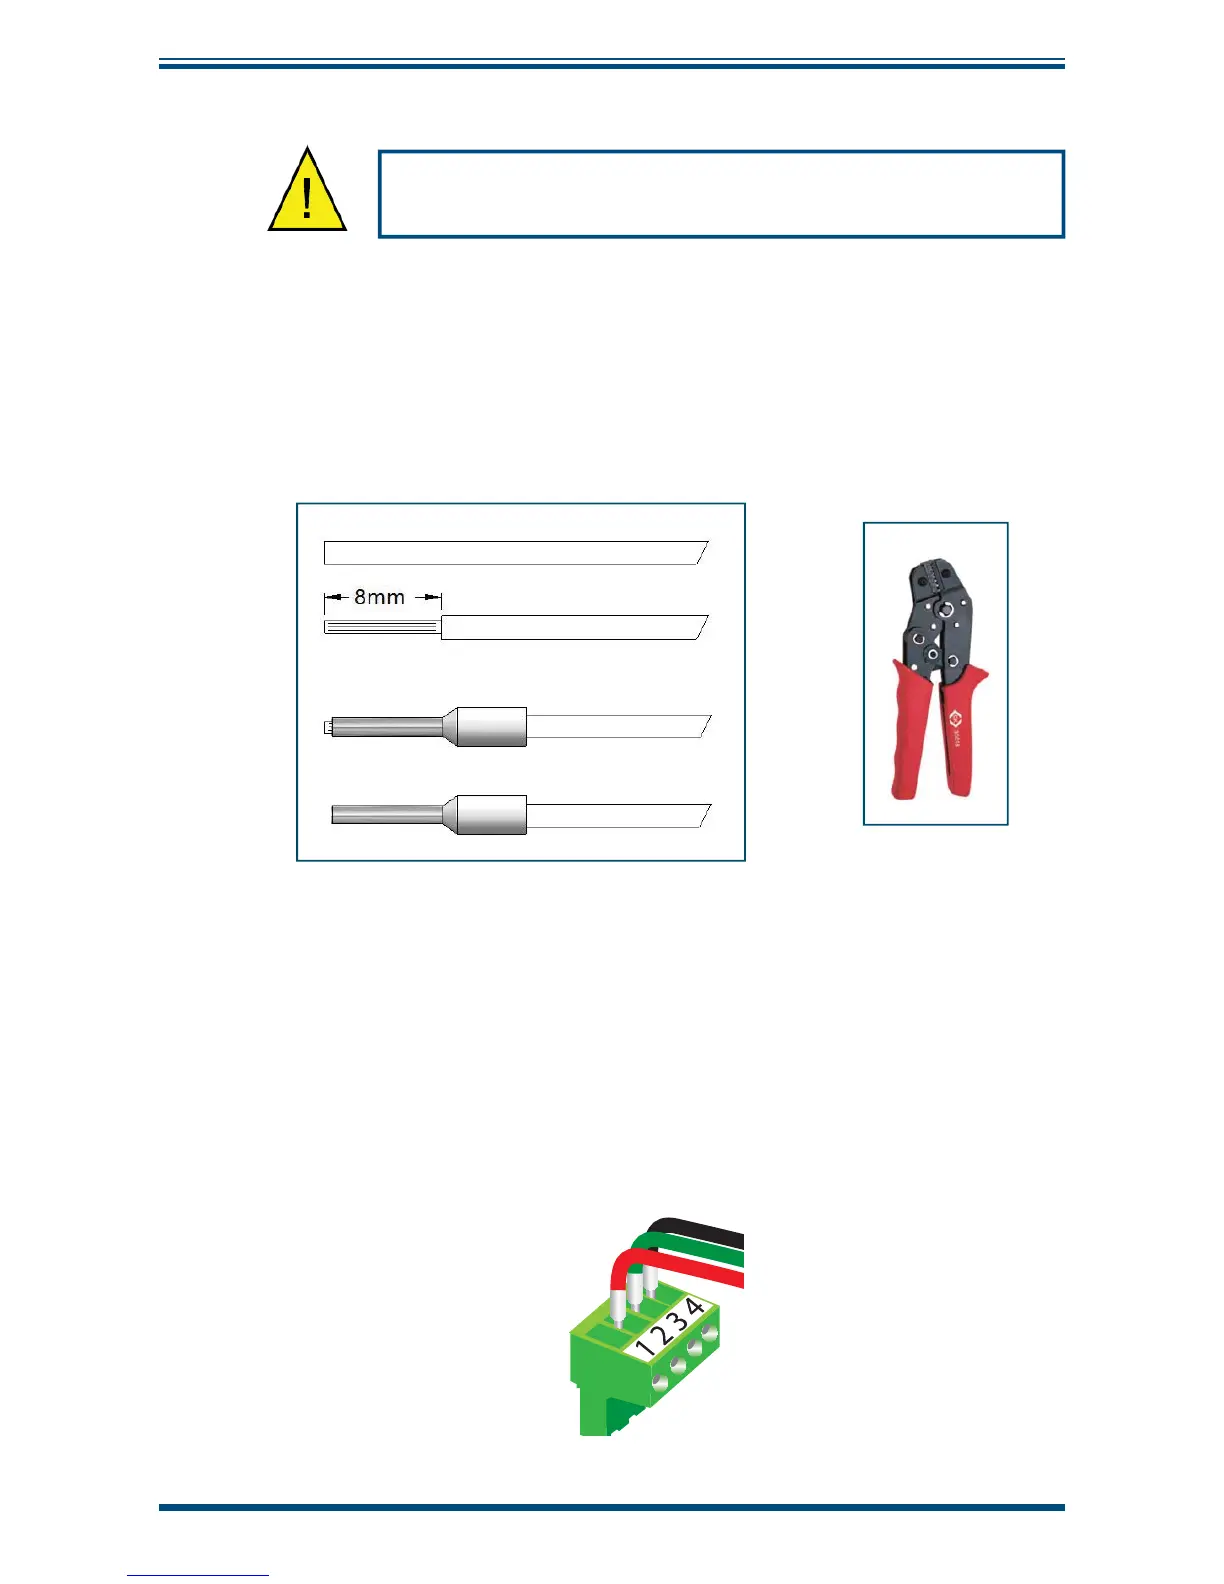
3. Mount each of the power and return wires into positions 2 and 4 as
shown, and tighten with a fl at-blade screwdriver (min torque 0.25Nm (0.2
lbf-ft)).
Figure 15
Terminal Block Connection - Easidew PRO XP EX1 (Non-Display)
4. Plug the terminal block back into the header.