Microair Avionics M760 Transceiver Installation & User Manual
M760Q Install & User Manual 01R12.doc Page 13 of 36 30
th
March 2010
3.9 EXTERNAL INTERCOM
Where the M760 is to be installed with an external intercom, the internal VOX intercom should be
disabled in the Program Mode Menu. See section 6.2.
Wire only a single mic line (pin 1), along with the PTT (pin 7), the headphone (pin 14), and a ground line
(pin 11 or 12) to the intercom. Follow the intercom manufacturer’s instructions for further installation.
Wire the remote memory line (pin 13), directly to the remote memory button location. This line is
NEVER connected to the external intercom. Refer to the Microair Avionics website
www.microair.com.au
for more details and wiring diagrams with commonly used intercoms.
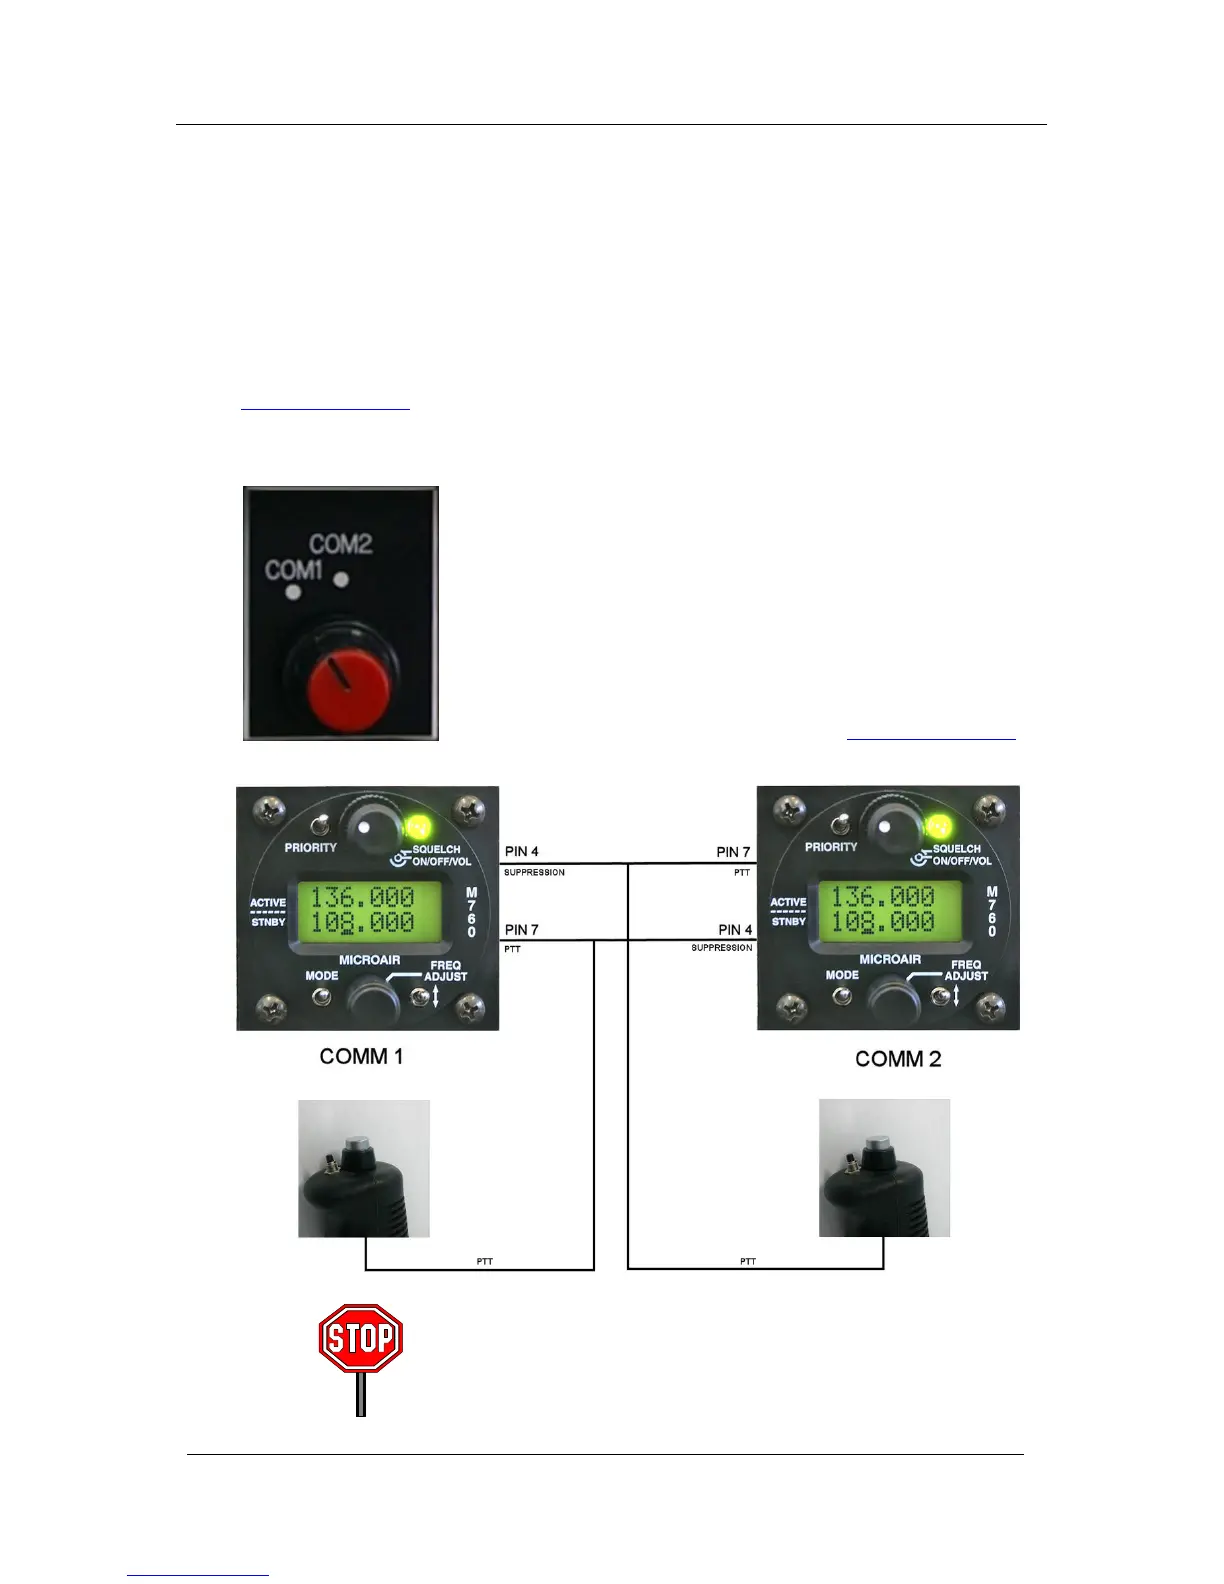
3.10 DUAL COMM INSTALLATION
Where two M760’s are to be installed in the aircraft, the interlock or
suppression lines must be installed. Each interlock line shall be wired from
(pin 4) on the first radio to the PTT line (pin 7) on the second radio, and
vice versa.
The interlock lines allow a radio to sense when the other radio is
transmitting, and deactivate to prevent any chance of damage, or allow
distortion noise to occur.
Microair recommends the use of a clearly labelled rotary selector or multi-
pole switch to switch the microphone and PTT lines Refer to the Microair
Avionics website for additional wiring diagrams ( www.microair.com.au
).
Switching from comm1 to comm2 will move all radio functions
including intercom from one radio to the other. Ensure that both
radios have the internal VOX intercom set up correctly