2: Installation
14 U3000/U4000 User Manual
(Issue 2.0)
2.4 Installing the USB Virtual Com. Port (U4000 only)
The USB connection requires a virtual com port to be installed on the computer. The necessary driver can be
provided by Micronics or downloaded from http://www.ftdichip.com/Drivers/VCP.htm.
1. Access the above url and download the driver for your particular operating system. The download takes
the form of a zip file.
2. Extract all the files from the zip file into a folder and note its location (e.g. Desktop\USBDriver).
3. Switch ON the U4000 instrument and connect it to the USB port on the PC.
4. A “New device found” message will appear and ask you for the location of the software installation
files for the new device.
5. Use the Browse button to select the path to the unzipped driver files and then click OK.
6. Follow the on-screen instructions to install the driver.
7. At the end of the driver installation routine you must carry out a minor configuration change to the newly
installed virtual com port. The way in which you gain access to the com port set-up window will vary
depending on your operating system. The following example applies to Windows XP.
8. Select Control Panel>System to open the SYSTEM PROPERTIES window.
9. Click the Device Manager button to open the DEVICE MANAGER window.
10. Scroll down to the Ports region and you will find the new FDTI port installed (e.g. USB Serial Port
with a high port number).
11. Right-click on the com port and select Properties.
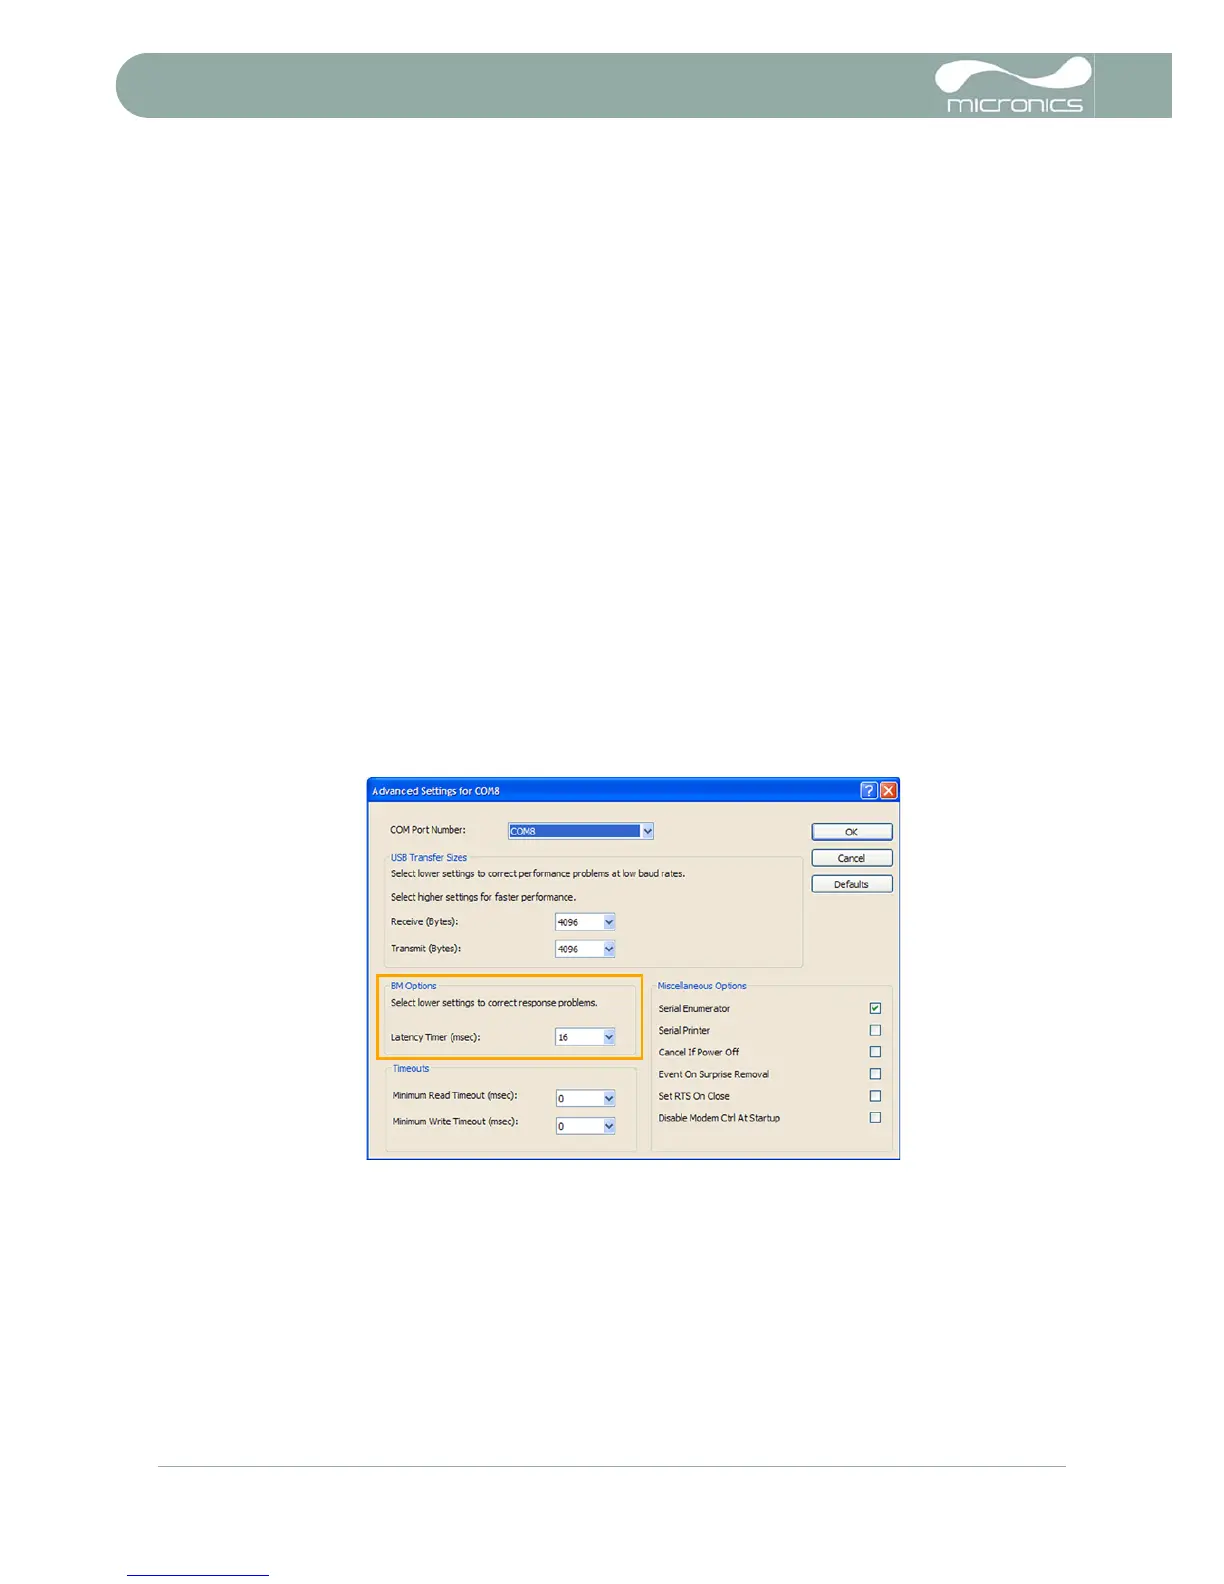
12. From the PROPERTIES window select the Port Settings tab then click the Advanced button. The
ADVANCED SETTINGS window should open similar to that shown below.
Figure 2.12 Com. Port configuration
13. In the BM Options area change the Latency Timer value from 16 msec (default) to 1 msec.
14. Select OK to implement the change, and then close the remaining windows that were opened.
15. Your computer should now be able to communicate with the U4000 instrument via the USB port in the
same way as any other standard USB device.