16 M AIR User Manual
7. Use the Gain fader to compensate for changes in level caused by
theprocessor.
8. Engage the Key Filter with the on/o button.
9. Select between an aggressive Linear or smooth Logarithmic operation,
andbetween Peak or RMS input response. RMS is most common in
compressors, and responds to the average level of incoming audio,
whereasthe Peak setting responds to brief spikes in loudness that would
beallowed through when set to RMS.
10. Access the Key Filter parameters by pressing this button.
11. Adjust the Attack knob to set how quickly the compressor takes eect when
the input signal rises above the threshold.
12. Adjust the Hold knob to set how long the compressor takes to enter the
release cycle once the audio drops below the threshold.
13. Adjust the Release knob to set how quickly the compressor releases after the
audio drops below the threshold.
14. Press the Auto button to allow the compressor to automatically set several
advanced parameters based on the input signal.
15. Select a high-pass, low-pass or mid peak frequency and slope for the
key lter. The specic frequency can be selected by dragging the line across
the frequency chart.
16. Select a source for the key lter.
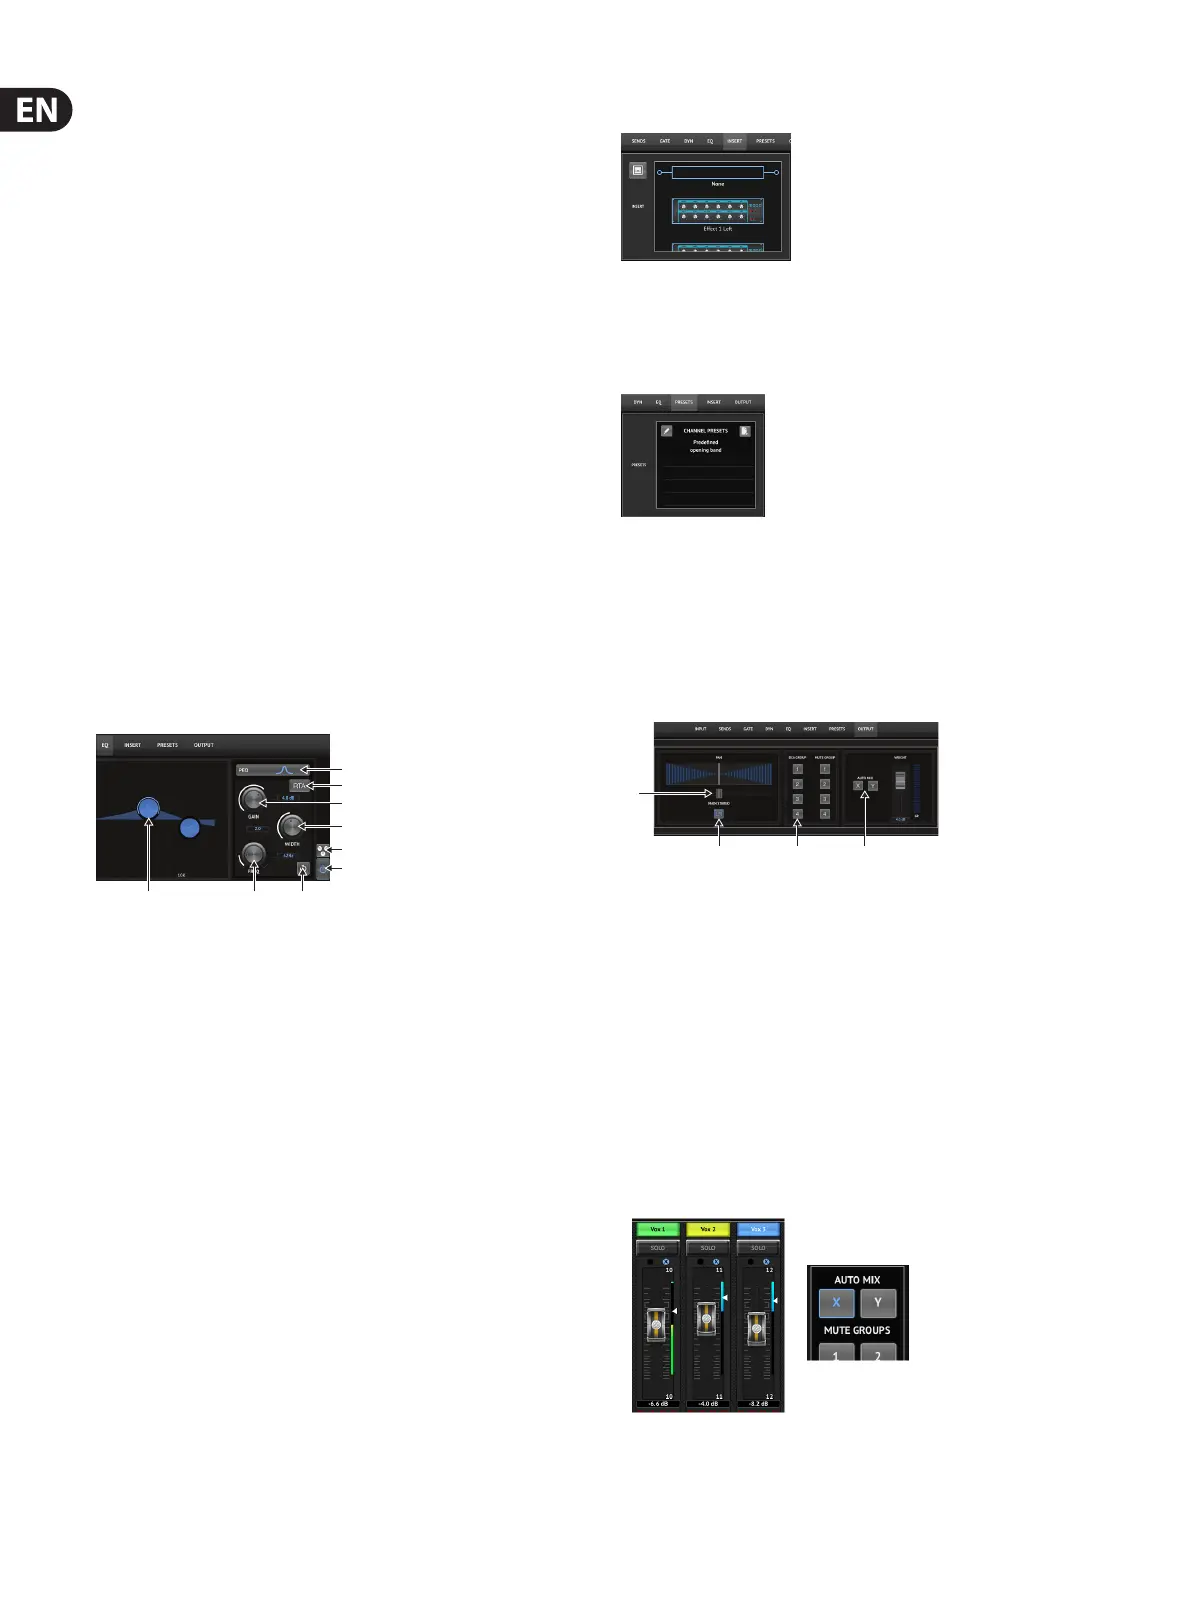
5.6 Channel EQ
1. Select the type of EQ for each of the 4 bands. Typically cut or shelf EQs are
used for the highs and lows, whereas PEQ (parametric) and VEQ (vintage)
areused for the mid range adjustments.
2. Use the Gain knob to adjust the desired boost or cut to the
selectedfrequency.
3. Adjust the Width (Q) to determine how wide or narrow the frequency
adjustment will be.
4. Use the Freq(uency) knob to select the center frequency for PEQ and VEQ
types, and the starting frequency for cut or shelf EQs.
5. Engage the EQ with the on/o button.
6. Press this button to open the preset list where your settings can be saved
can recalled.
7. Press one of the band buttons to select the band. Drag the button left/right
to set the frequency, and up/down to set the boost or cut. The desired band
must be selected before adjusting the width parameter.
8. Engage the RTA (real time analyzer) with this button. The RTA is pre-EQ by
default, but can be adjusted on the Setup - Audio/MIDI page.
9. Press this button to reset the currently-selected band.
5.7 Insert
Press the folder icon to engage the insert eect. Scroll through the list of eects
blocks to select the desired routing.
5.8 Presets
The Presets tab allows channel presets to be recalled, edited and saved.
Pressthepage icon on the right to save a new preset. Press the pencil icon to
edit or delete a preset, and press on one of the saved presets to save changes
orloadthatpreset. Note that the Snapshots function also works for saving and
recalling specic elements.
5.9 Output
1. Adjust the panorama in the stereo eld.
2. The channel can be unassigned from the main LR outputs, which is useful to
ensure that click tracks or talkback mics are not heard by the audience.
3. Assign the current channel to one of the DCA or Mute groups.
When assigned to a DCA, the associated group number will appear just
above the channel fader. When assigned to a Mute Group, the corresponding
red box beneath the channel's fader will light up.
4. The Auto Mix function is very useful for meetings or panel discussions where
multiple microphones are used for speech. The mic channels can be assigned
to one of two auto mix groups, which will automatically attenuate the
channels that are not currently receiving signal. Select the X or Y auto mix
buttons in the Output tab to assign several channels to an auto mix group.
(1)
(8)
(2)
(3)
(6)
(5)
(1)
(2) (3) (4)