23 M AIR User Manual
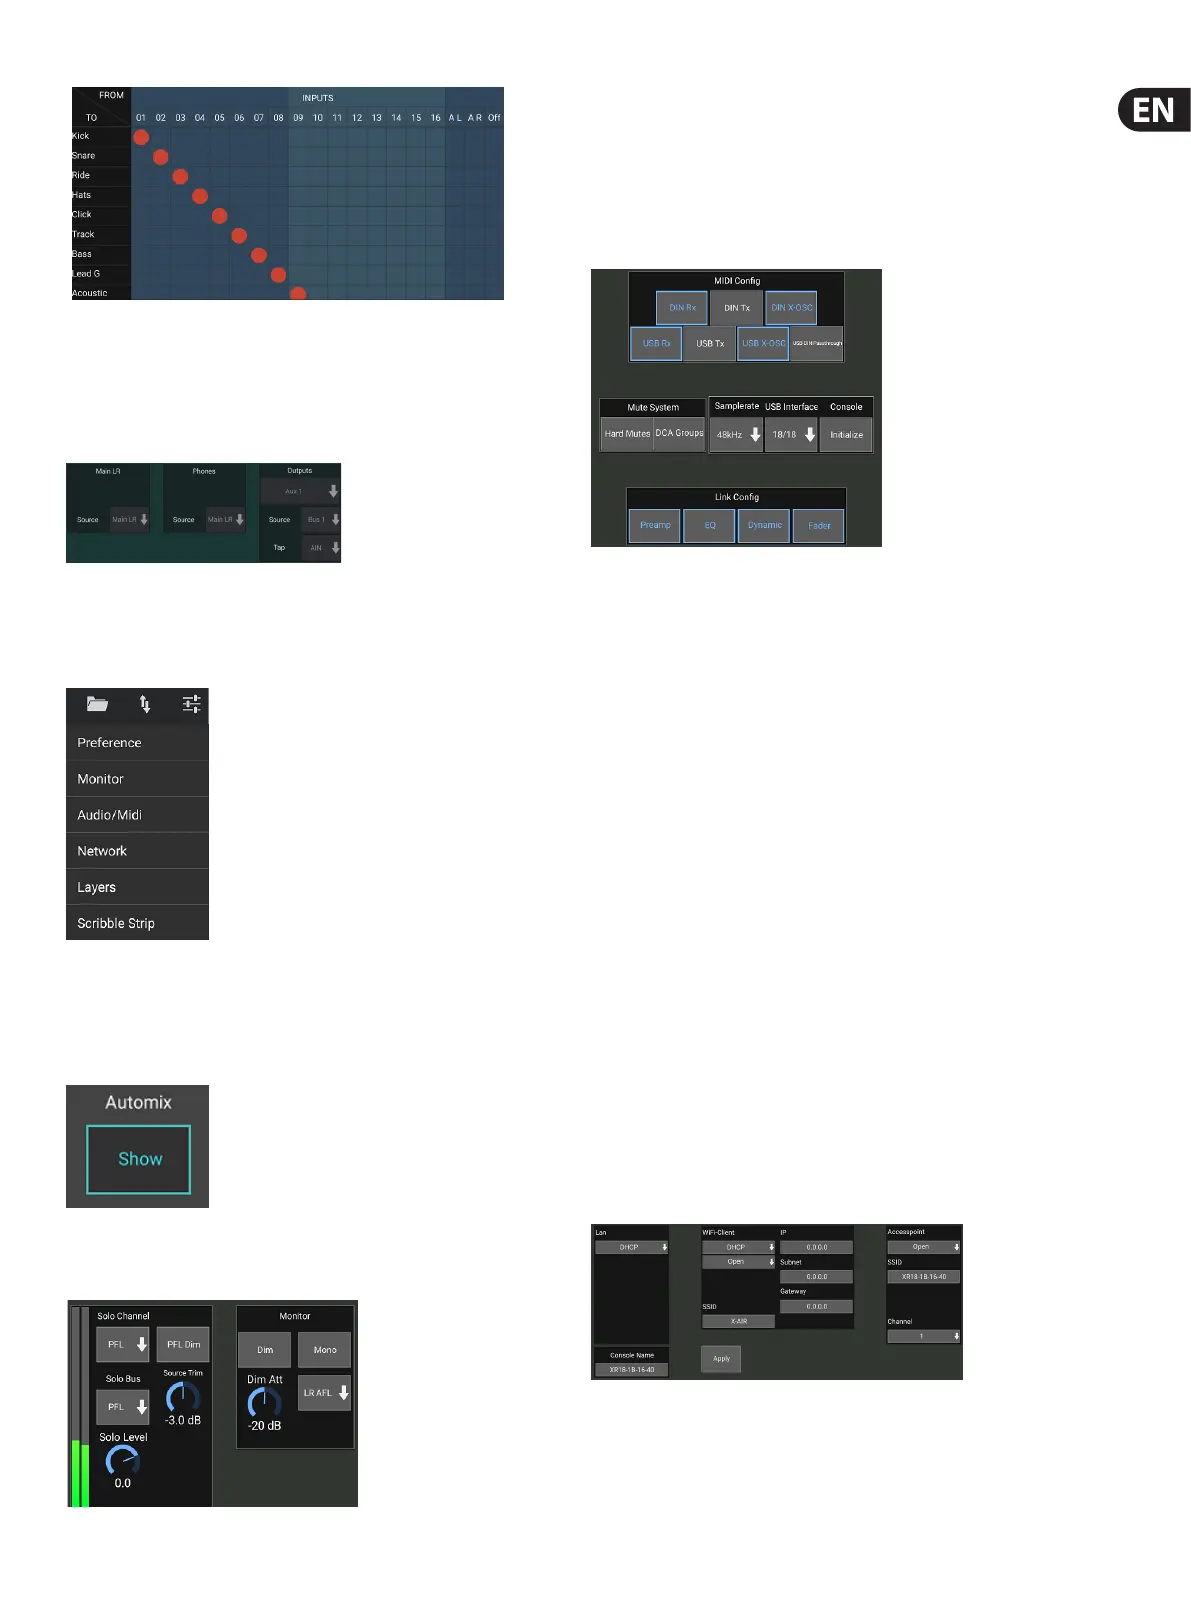
Tap inside an empty box in the grid to move the orange dots and reassign
the source for input channels, USB channels and P16 monitoring sources.
Modications to the Inputs/USB routing can be reset by pressing the revert
button on the far right. The USB sends and inputs can be selected from a menu in
the folder icon, or they can be moved manually.
The Routing – Outputs page allows the Main LR, Phones, Aux and P16 sources to
be reassigned.
6.14 Setup
The Setup menu is accessed via the top right corner of the Main View screen.
This allows access to several global settings, network congurations and
layoutfeatures.
Preferences
The Preferences screen allows the auto mix X and Y buttons to be viewed on the
Main View screen.
The Solo Channel and Solo Bus can operate in pre-fader or after-fader listen
mode. The solo level can be adjusted if necessary as well. A PFL dimmer can be
engaged and adjusted to cause a drop in volume whenever a pre-fader (PFL)
signal is soloed, in order to match typical post fader (AFL) levels. The solo bus can
operate in mono or stereo. The source and tap for monitoring can be selected
from a pull-down menu. This monitor signal will be heard when no channels
are soloed.
The Setup – Audio/MIDI page allows editing of MIDI receive (Rx) and transmit
(Tx) settings, as well as several global system parameters.
The transmit, receive and OSC settings can be independently activated for the
DIN connectors and USB MIDI. The console can also pass USB MIDI through the
MIDI OUT connector.
The console defaults to “soft mutes”, meaning that if a channel has been
specically muted, and is also a part of a mute group, when the mute group
is unmuted, the channel that was specically muted will also be unmuted.
Selecting Hard Mutes will cause a channel that has been muted with its
dedicated Mute button will remain muted even if a mute group to which it
belongs is unmuted. DCA Groups normally just control volume levels without
actually having audio routing through them. However, engaging DCA Groups in
the Mute System will enable channels to be muted via DCA group assignments.
The console can operate at 48 kHz or 44.1 kHz. Mute the main LR fader before
changing clock rates as pops can occur.
The MR18 has an 18x18 channel USB audio interface built-in, which is useful for
recording sessions. You may, however, choose to switch to 2x2 channel mode
for simple media player applications when you don’t want to mess around with
multiple USB audio streams in your host PC.
Click the Initialize button to reset all system parameters. All settings will be lost,
so make sure to save any scenes or shows to a PC hard drive rst.
When the Link option is selected in a channel's Cong page, the adjacent channel
is linked as a stereo pair. Aside from the fader settings being matched, the
preamp, dynamics, EQ and fader/mute/sends can also be aligned, depending
which items are activated at the bottom of the Audio/MIDI page.
This screen allows the conguration of your wireless network connection.
See the Network Connection chapter for details.