24 M AIR User Manual
The Setup – Layers page allows the order of channels and buses to be altered.
Bydefault, only 8 channels are visible on the Main View screen at one time,
butthis can be edited to allow, for example, all 16 input channels to be seen
at once. A new layer can also be created to contain a custom mix of inputs
and buses. Byincreasing the visible channels per layer to 9, the Main LR fader
could be added to all of the fader banks so it is always available for adjustment.
Custom layers can be saved and recalled later, and the layers can be restored to
their default settings. The Setup menu also allows quick access to the Scribble
Strips for changing channel names and colors.
The Scribble Strip page allows a custom name and color to be assigned for each
channel, bus, FX send/return, and DCA group.
7. M AIR Edit for PC
The M AIR applications for iOS, Android and Mac/Win/Linux allow all of the
physical controls and features normally found on analog mixers to be adjusted
digitally, and also allow eects and routing to be fully adjusted, all from a remote
location away from the input box. This results in a very compact, yet full-featured
mixing solution that can be operated while moving about the venue or studio.
This chapter will discuss the software's functionality on a laptop/desktop running
Windows, OS X* or Linux.
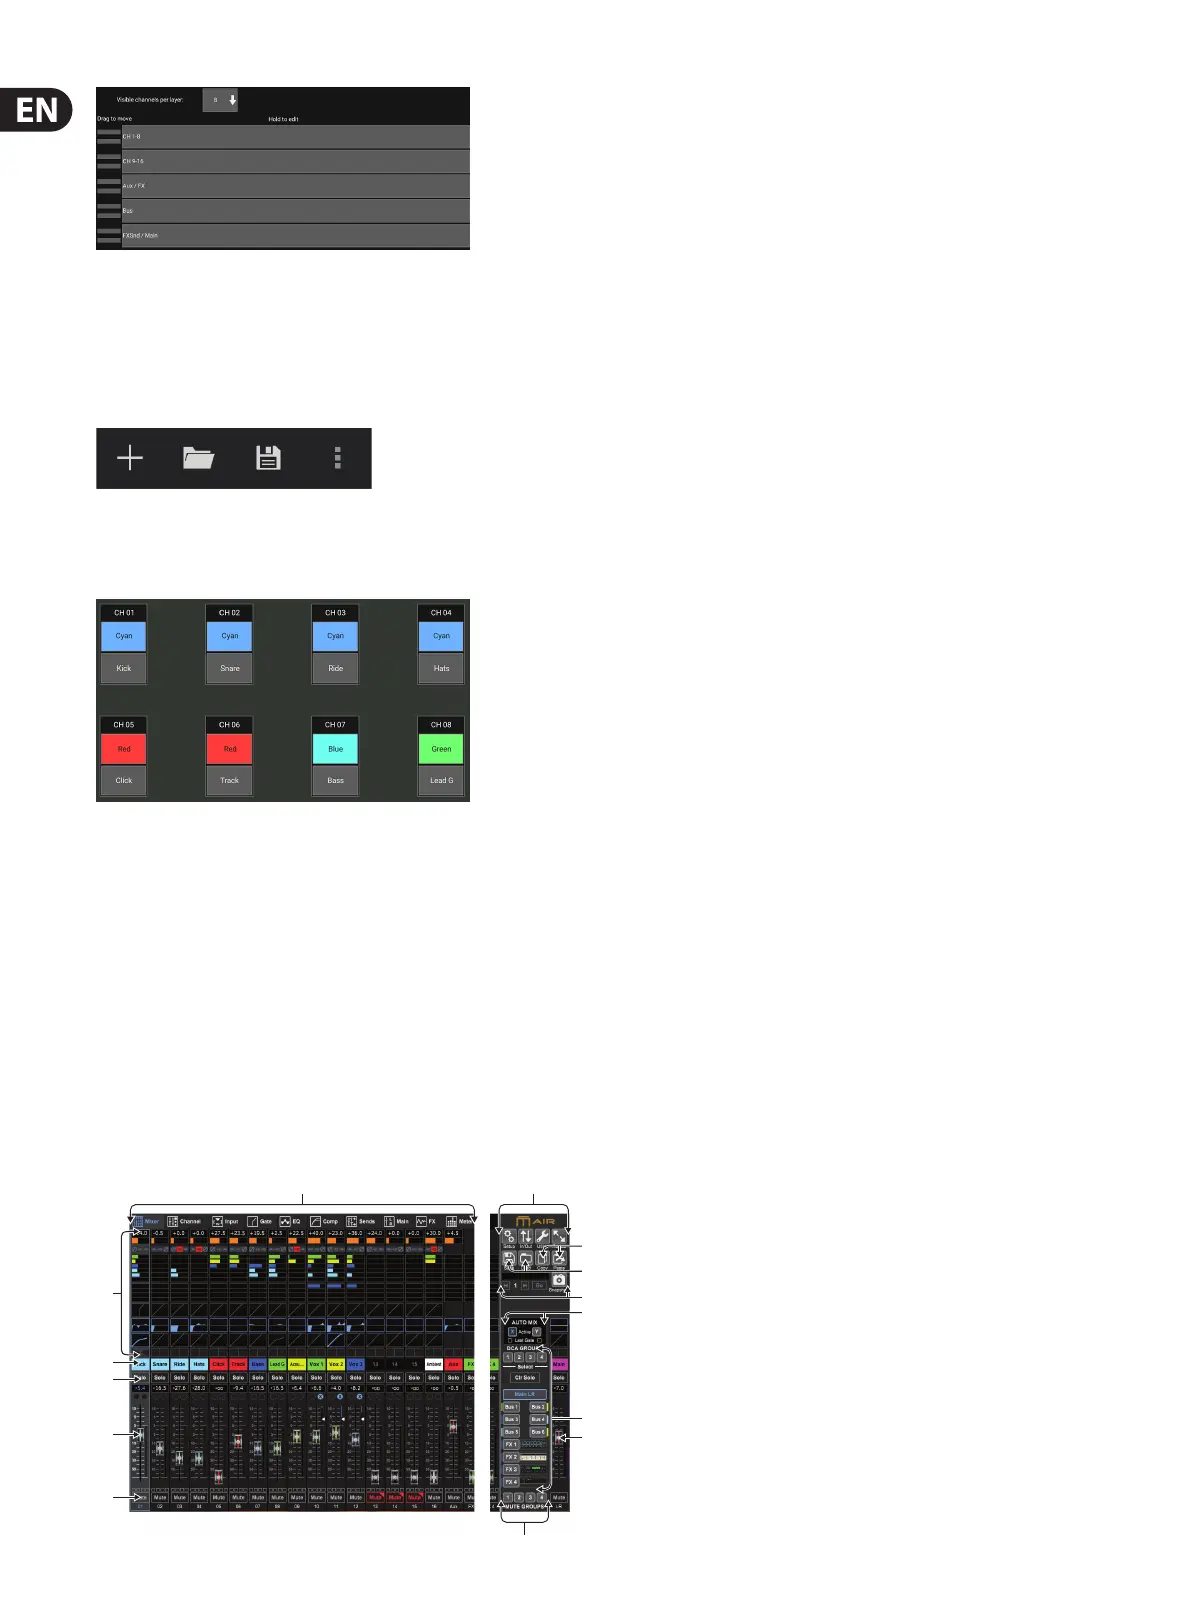
7.1 Main View and Mixer Tab
1. The Navigation Tabs allow quick access to various edit menus.
2. The Channel Strip area gives a quick reference to the status of phantom power,
aux send levels, pan, etc., The gain, aux levels, FX send levels and pan can be
adjusted by clicking and dragging left or right inside the respective section.
Click the Gate, EQ and Comp sections to jump to the edit pages for that channel.
Note – the following items are always visible regardless of which tab
is selected:
3. Left-click the channel number to select that channel. Right-click to change
the name and color of the channel.
4. Touch a channel’s Solo button to send the channel to the solo bus.
The button will light orange to indicate that the channel has been soloed.
5. The Channel Fader adjusts a channel’s level, or adjusts the aux/FX send level,
depending on which layer is selected on the right-hand side.
6. Click a channel’s Mute button to mute the channel. The button will light red
when muted.
7. Use the Save and Load icons to save and recall show scenes and saved
channel settings.
8. Access the Setup and Routing screens via the icons in the upper right corner.
The Utility feature provides access to additional oating windows that
provide constant access and monitoring for certain functions. See section
7.13 for details. The Resize button allows the window to automatically t
various screen resolutions up to 4k, as well as conform to a custom size.
9. Use the Copy and Paste buttons to transfer information between channels.
After clicking Paste, a window will open to allow a specic parameters
to be selected.
10. The Snapshot feature lets you save the current state of the mixer for later
recall. The specic parameters that should be recalled can be determined
at the time that a new snapshot is created, and can also be rened later
before the snapshot is actually loaded. Dedicated controls allow the saved
snapshots to be shued through and loaded directly from the main
mixer view. See section 7.12 for details.
11. Engage the Auto Mix X and Y buses here. See section 7.14 for details.
12. The Fader Bank buttons determine which layer is active in the faders.
When set to Main LR, the faders adjust the channel volume levels sent to
the main bus, and the main output is adjusted with the far-right fader.
When one of the bus or FX layers are selected, the faders adjust each
channel’s send level to that bus for monitoring or eects routing. The overall
bus level is adjusted with the far-right fader. To assign a channel to a DCA,
select the DCA group 1-4 and then click the small circle located above each
channel fader that you want to assign to that group. The group number will
be indicated in the circle.
13. The main level fader adjusts the output of the currently-selected bus.
14. The 4 Mute Group buttons engage the mute groups. Click one of the 4
small boxes below each channel fader to assign that channel to a particular
mute group.
7. 2 Channel Tab
The Channel tab allows quick access to the most common preamp parameters, as
well as basic control over the noise gate, compressor and bus sends. Most of the
adjustments on this tab can also be found in greater detail on other tabs.
(2)
(3)
(4)
(5)
(6)
(1)
(13)
(8)
(11)
(12)
(11)
(10)
(9)
(7)
*OS X is a trademark of Apple Inc.