OM-286504 Page 61
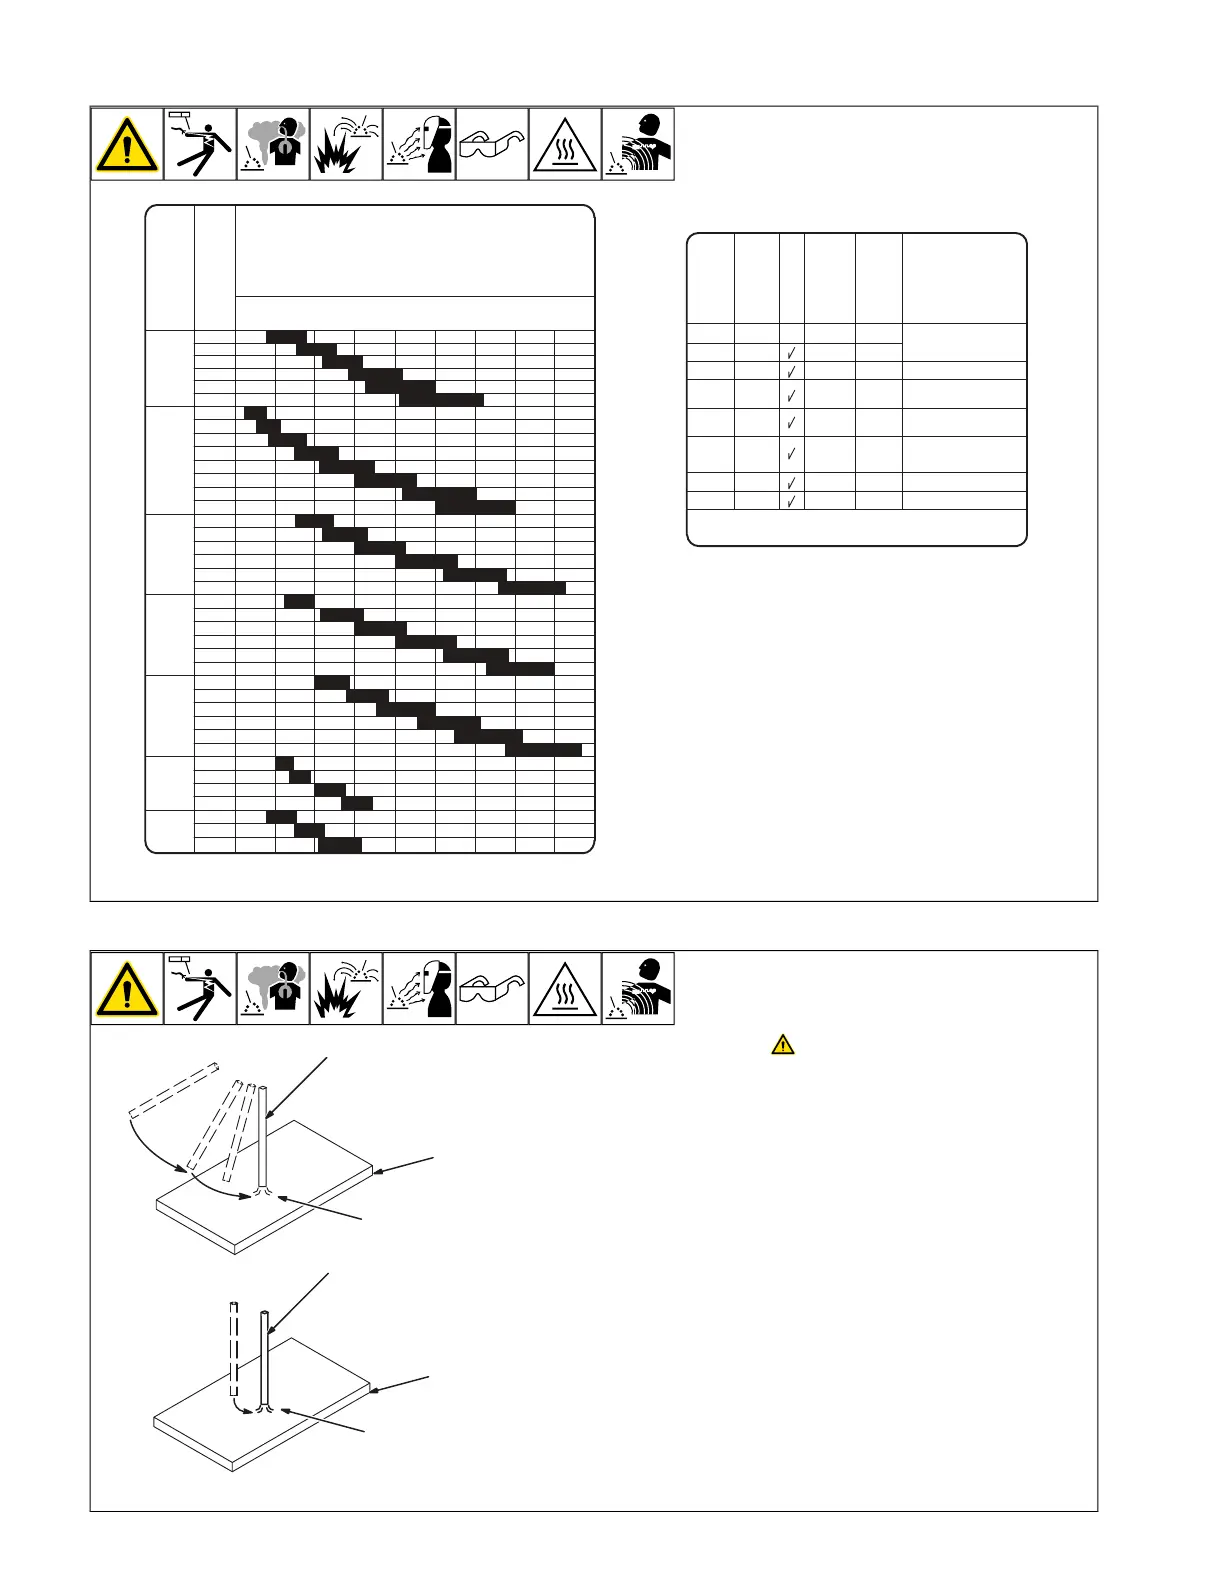
12-2. Electrode And Amperage Selection Chart
OM-
3/32
1/8
5/32
3/16
7/32
1/4
1/16
5/64
3/32
1/8
5/32
3/16
7/32
1/4
3/32
1/8
5/32
3/16
7/32
1/4
3/32
1/8
5/32
3/16
7/32
1/4
3/32
1/8
5/32
3/16
7/32
1/4
3/32
1/8
5/32
3/16
3/32
1/8
5/32
6010
&
6011
6013
7014
7018
7024
Ni-Cl
308L
50
100
150
200
250
300
350
400
450
ELECTRODE
DC*
AC
POSITION
PENETRATION
USAGE
MIN. PREP, ROUGH
HIGH SPATTER
GENERAL
SMOOTH, EASY,
FAST
LOW HYDROGEN,
STRONG
SMOOTH, EASY,
FASTER
CAST IRON
STAINLESS
DEEP
DEEP
LOW
MED
LOW
LOW
LOW
ALL
ALL
ALL
ALL
ALL
FLAT
HORIZ*
ALL
ALL
EP
EP
EP,EN
EP,EN
EP
EP,EN
EP
EP
6010
6011
6013
7014
7018
7024
NI-CL
308L
*EP = ELECTRODE POSITIVE (REVERSE POLARITY)
EN = ELECTRODE NEGATIVE (STRAIGHT POLARITY)
ELECTRODE
AMPERAGE
RANGE
DIAMETER
MED
12-3. Striking An Arc
Weld current starts when electrode
touches workpiece.
1 Electrode
2 Workpiece
3 Arc
Scratch Technique
Drag electrode across workpiece like striking
a match; lift electrode slightly after touching
work. If arc goes out, electrode was lifted too
high. If electrode sticks to workpiece, use a
quick twist to free it.
Tapping Technique
Bring electrode straight down to workpiece;
then lift slightly to start arc. If arc goes out,
electrode was lifted too high. If electrode
sticks to workpiece, use a quick twist to free
it.

 Loading...