OM-230693 Page 32
F
Complete Parts List is available at www.MillerWelds.com
SECTION 7 – MAINTENANCE AND TROUBLESHOOTING
7-1. Routine Maintenance
Disconnect power before maintaining.
F
Maintain more often during severe conditions.
ü = Check ◇ = Change m = Clean ¶ = Replace Reference
Every
3
Month-
s
¶ Unreadable Labels m Weld Terminals ü¶ Weld Cables
Every
6
Month-
s
Complete Parts List is available at www.MillerWelds.com
OM-278215 Page 33
1/2 in.
(13 mm)
SLUDGE
FUEL
m Inside Unit ü Apply Light Coat Of Oil
Or Grease To Drive Motor
Shaft
m Clean Drive Rolls
*To be done by factory authorized service agent.
7-2. Unit Overload
Thermistor RT1 in SCR1 protects the unit from damage due to overheating. If HL.P 002 is displayed on the meters, wait for unit to cool allowing
fan motor to run before trying to weld. If unit is cool and no weld output continues, contact Factory Authorized Service Agent.
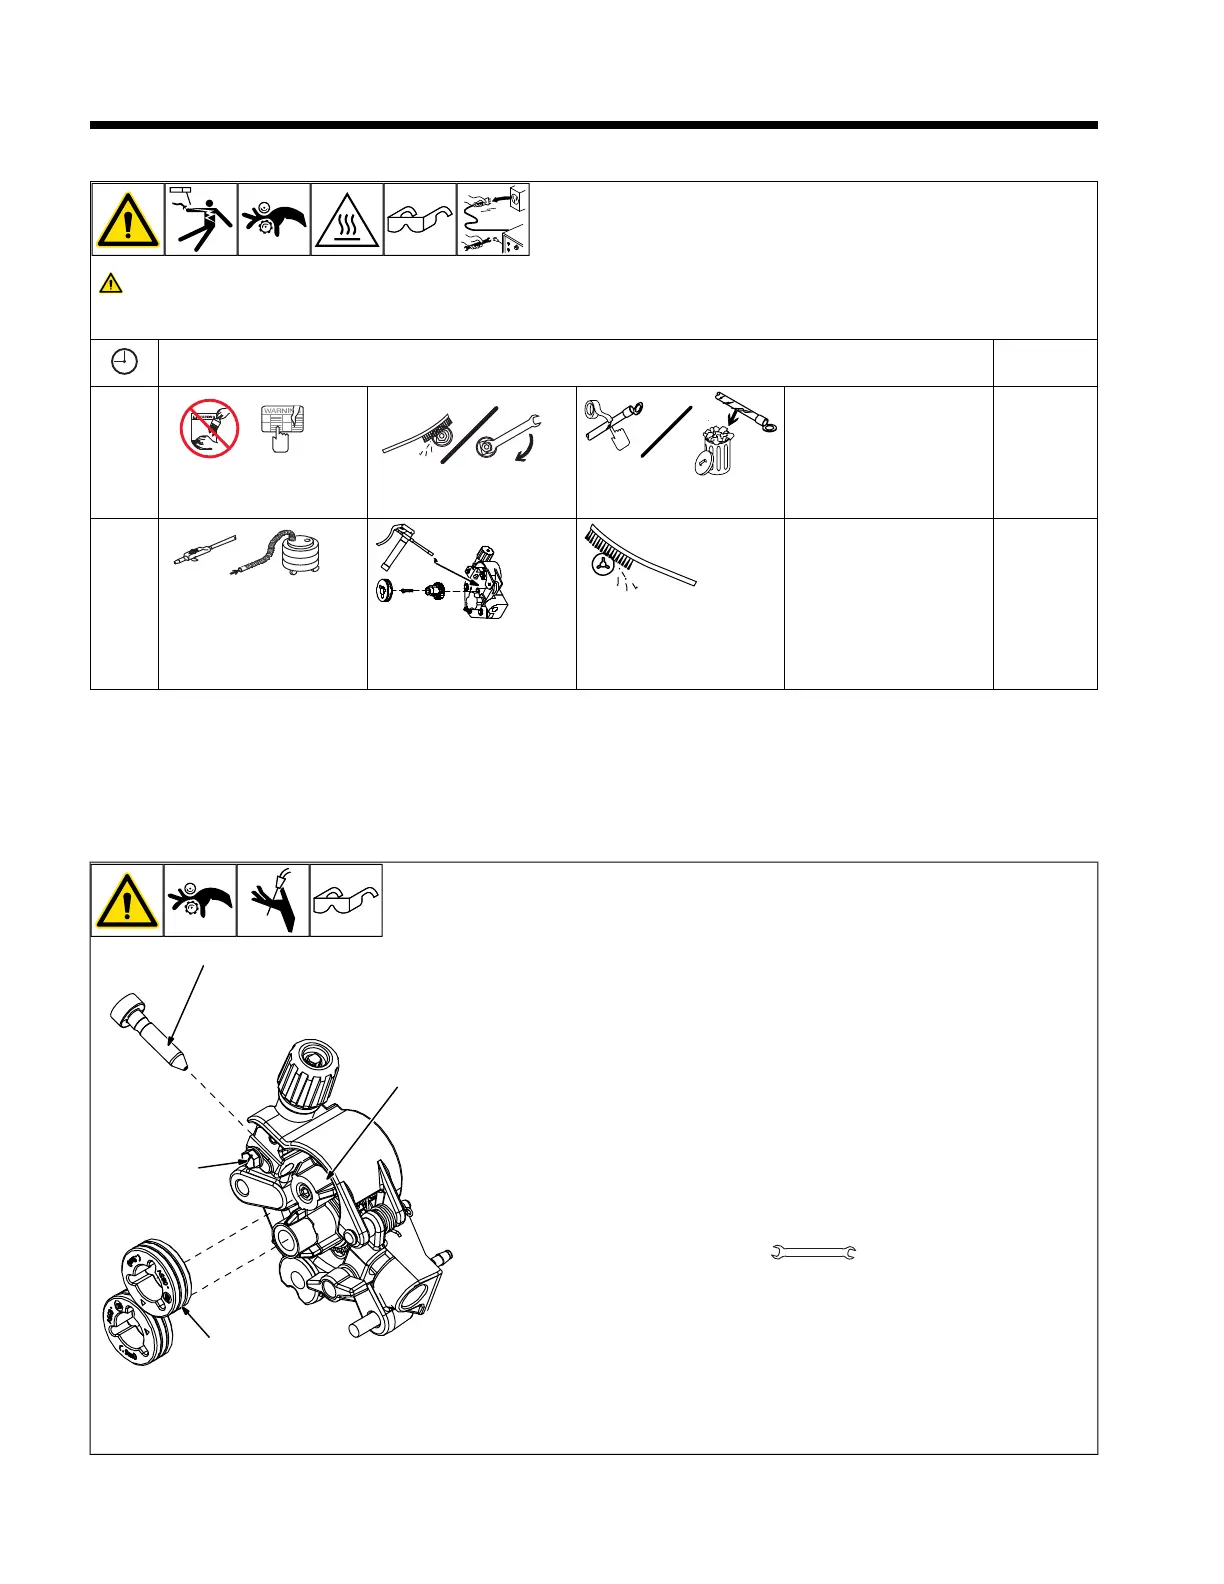
7-3. Changing Drive Roll and Wire Inlet Guide
1 Securing Screw
2 Inlet Wire Guide
Loosen screw. Slide tip as close to drive rolls
as possible without touching. Tighten screw.
3 Drive Roll
The drive roll consists of two different sized
grooves. The stamped markings on the end
surface of the drive roll refers to the groove
on the opposite side of the drive roll. The
groove closest to the motor shaft is the prop-
er groove to thread (see Section 5-15).
4 Drive Roll Securing Nut
Turn nut one click to secure drive roll.
OM-222 Page 1
allen_wrench
NGO’s
tools/
flathead philips head wrench
pliers
knife
heavy-duty workclamp light-duty workclamp wirecutter frontcutter
allen_set
needlenose
steelbrush nutdriver
chippinghammer
solderiron
stripcrimp
drill
torque wrench
socket wrench
hammer awl file
crimper
paintbrush
feelergauge flashlight ruler
toothbrush
greasegun
qtip (swab)
vicegrip
handream
punch
filterwrench
strapwrench
airgun
solvent pinextractor eprompuller pipewrench
torque screwdriver
crescent wrench
7/16 in.





 To Next Page