EasyManuals Logo

MIMAKI JV3-160SP Setup Guide

MIMAKI JV3-160SP
34 pages
To Next Page IconTo Next Page
To Previous Page IconTo Previous Page
Page #12 background imageLoading...
Page #12 background image
- 12 -
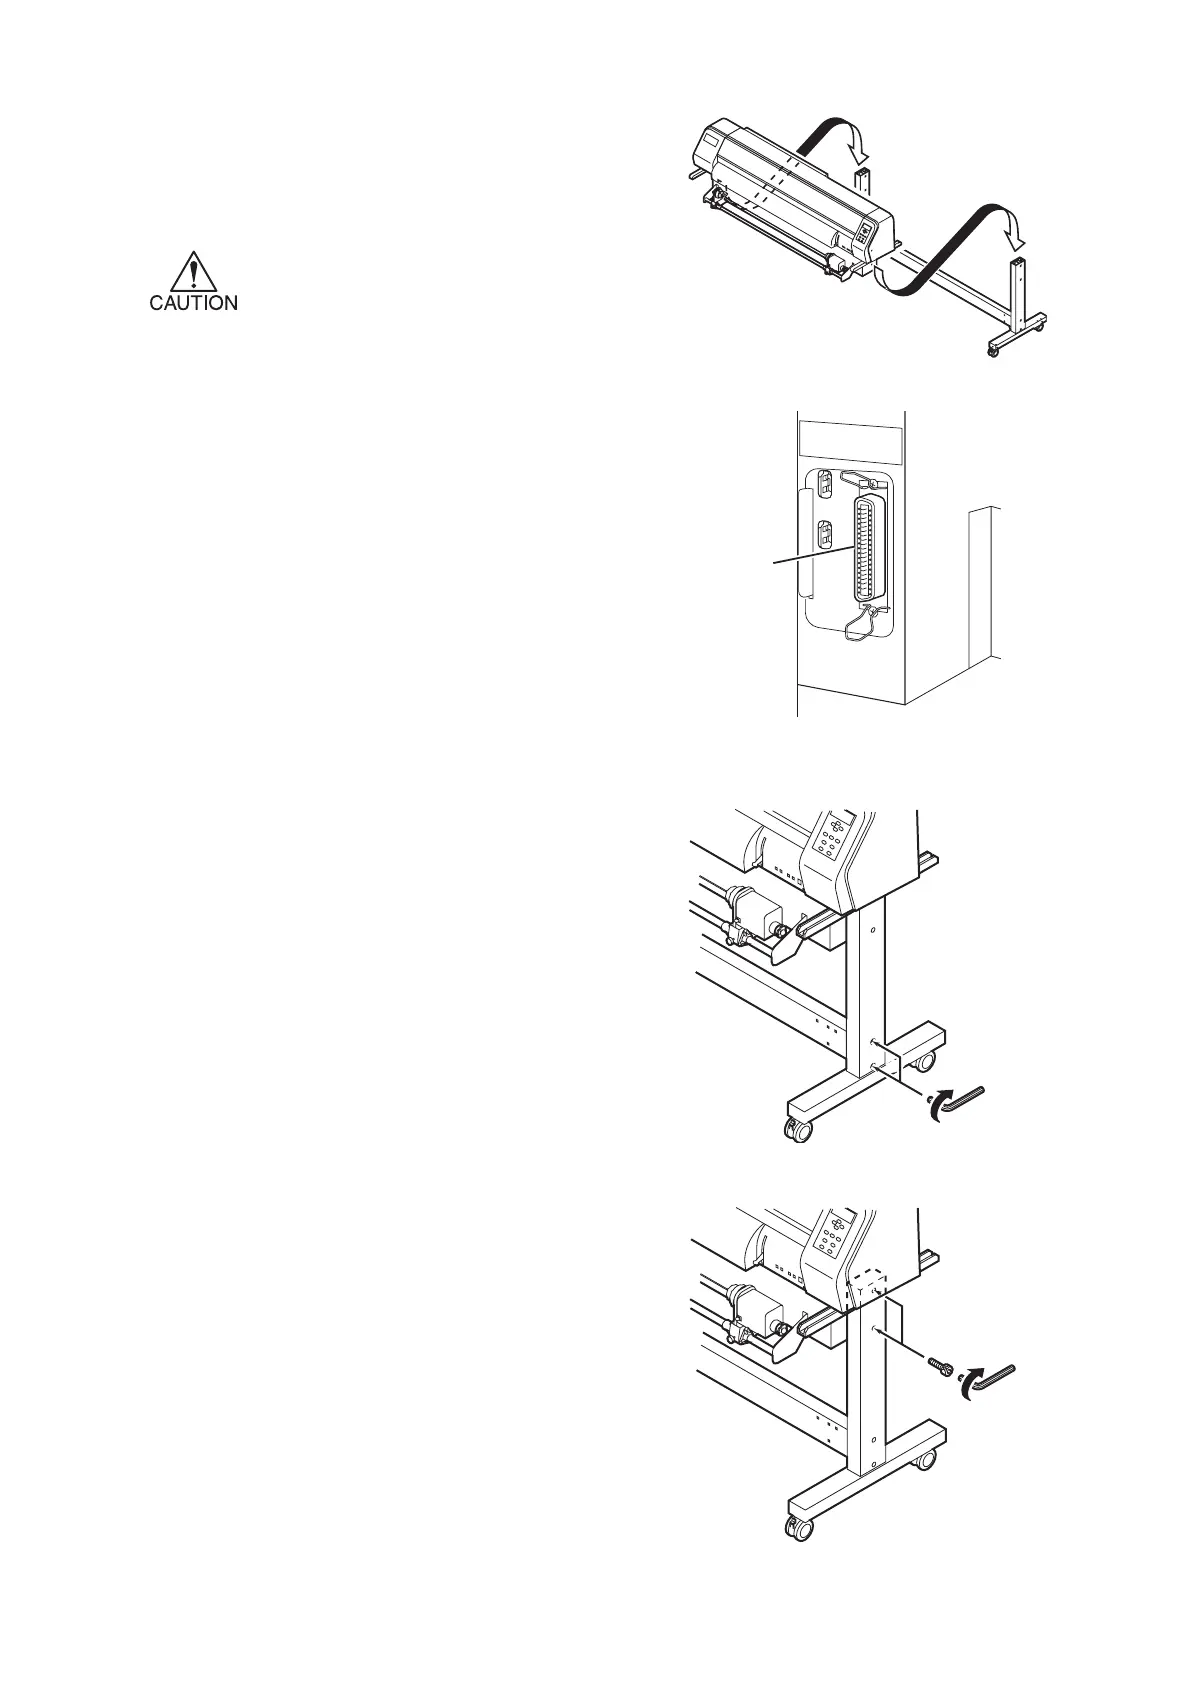
7. Put the front face of the leg first. If the rear face of
the leg is put first, the plotter cannot be attached
because of the interface connectors.
The plotter is very heavy. Be careful not to
drop it.
8. Fix the plotter and stay to the leg.
Fix the plotter to the leg using four screws.
Fasten the screws which fix the stay to the leg.
9. Attach the leg to the plotter temporarily with two
bolts.
IEEE 1284 interface
Temporality tighten
Temporality tighten

Other manuals for MIMAKI JV3-160SP

Questions and Answers:

Question and Answer IconNeed help?

Do you have a question about the MIMAKI JV3-160SP and is the answer not in the manual?

MIMAKI JV3-160SP Specifications

General IconGeneral
BrandMIMAKI
ModelJV3-160SP
CategoryPlotter
LanguageEnglish

Related product manuals