- 19 -
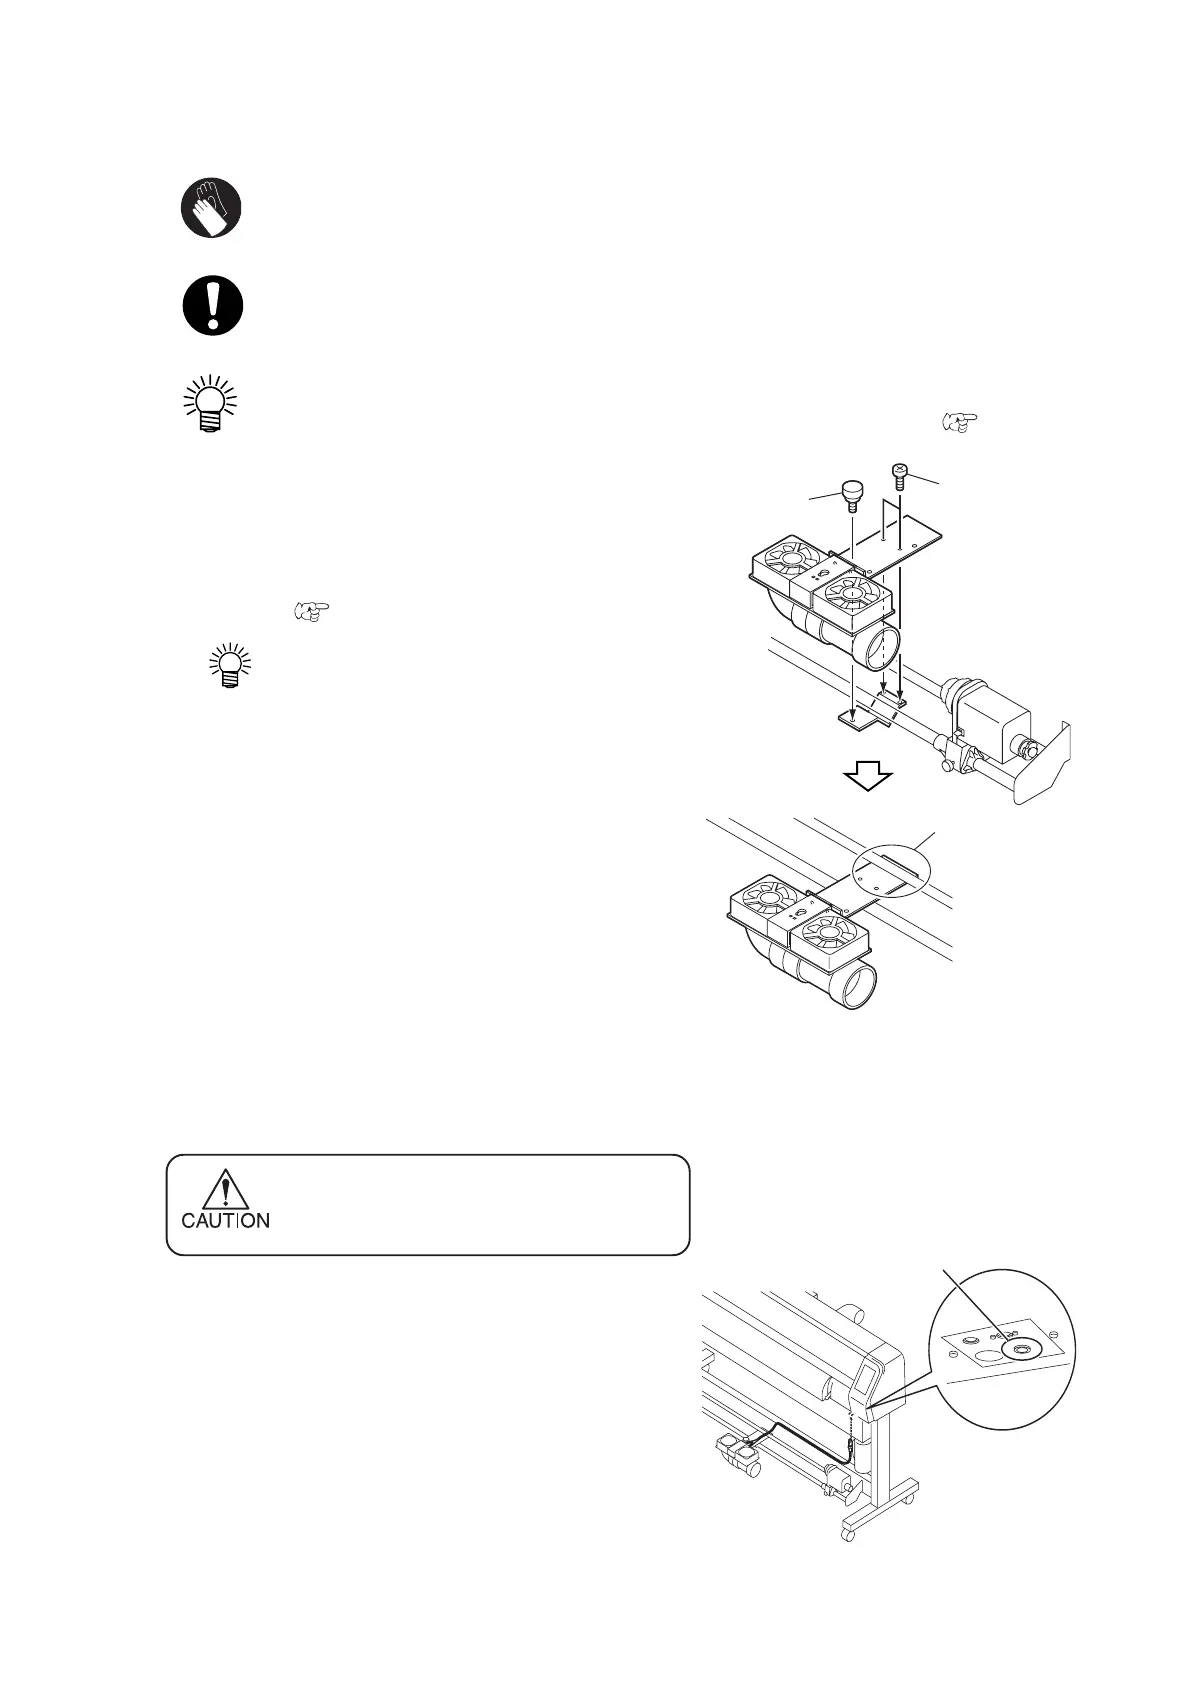
Assembling Front Exhaust Unit
•Wear protective gloves when assembling the front exhaust unit. If
you do not wear gloves, you may get hurt.
• Be sure to perform step 7) to pull out the pin which fixes the winding
of the roll screen.
• At shipping, the exhaust fan is set for exhaust to the right. For ex-
haust to the left, see “Leading the exhaust hose to the left.”
P.24
1. Fix the exhaust fan to the take-up device shaft using
one knob and two screws.
Attach the exhaust fan to fit the setup orientation (left/right) of the
duct hose.(
P.24)
Arrange the exhaust fan under the media to
be set.
2. Along the stay of the leg, plug the power cable of the
exhaust fan to the connector at the bottom of the
plotter.
• Do not plug the power cable to the
connector of the take-up device as this
may cause failure.
For exhaust fan
Put through under the test.
knob
screws
 Loading...